

How to Clean Install Windows 10
A clean install of Windows 10 will wipe out everything on the drive you select to install Windows 10 on giving you a completely new default installation of Windows 10.
See also: Reinstall Windows 10 | Microsoft Support
This tutorial will show you step by step on how to do a clean install of Windows 10 with UEFI or Legacy BIOS on your PC.
Windows 10 Specifications and System Requirements
See also: Minimum hardware requirements - Windows 10 hardware dev
- Processor: 1 GHz or faster compatible processor or System on a Chip (SoC)
- RAM: 1 GB for 32-bit or 2 GB for 64-bit
- Free hard disk space: 32 GB
- Graphics card: DirectX 9 or later with WDDM 1.0 driver
- Display: 800x600 screen resolution
- Internet: To activate Windows 10, and required to add Microsoft account
Feature-specific requirements for Windows 10
- BitLocker Drive Encryption (available with Windows 10 Pro or Windows 10 Enterprise only) requires a Trusted Platform Module (TPM) 1.2 or higher and Trusted Computing Group (TCG)-compliant BIOS or UEFI. BitLocker can be used on devices without TPM, but you will need to save a startup key on a removable device such as a USB flash drive. TPM 2.0 and InstantGo support is required when you want to automatically encrypt the local drive when joining a device to Azure Active Directory (AAD). Check with your PC manufacturer to confirm if your device supports the correct TPM version and InstantGo for the scenario you want to enable.
- BitLocker To Go requires a USB flash drive (available in Windows 10 Pro and Windows 10 Enterprise only).
- Client Hyper-V requires a 64-bit system with second level address translation (SLAT) capabilities and additional 2 GB of RAM (available in Windows 10 Pro and Windows 10 Enterprise only).
- Cortana is only currently available on Windows 10 for the United States, United Kingdom, China, France, Italy, Germany, Brazil, Mexico, Japan, Canada, Spain, Australia and India.
- Microsoft account is required for some features.
- Miracast requires a display adapter which supports Windows Display Driver Model (WDDM) 1.3, and a Wi-Fi adapter that supports Wi-Fi Direct.
- Movies & TV application is not available in all regions. For the most up-to-date list of regions, please go to the Movies & TV information page.
- Secure boot requires firmware that supports UEFI v2.3.1 Errata B and has the Microsoft Windows Certification Authority in the UEFI signature database.
- Skype is available only in select countries and regions. Calling to select countries and regions only. Excludes special, premium and non-geographic numbers. For details, visit the Office FAQ page.
- Snap: The number of applications that can be snapped will depend upon the minimum resolution for the application with a limit of two applications in Tablet mode and four applications in Desktop mode.
- Speech recognition will vary by device microphone. For a better speech experience, you will need a:
- High fidelity microphone array
- Hardware driver with microphone array geometry exposed
- Tablet mode is available on tablets and 2-in-1s with GPIO indicators or those that have a laptop and slate indicator will be able to be configured to enter "tablet mode" automatically.
- Touch: To use touch, you need a tablet or a monitor that supports multi-touch.
- Two-factor authentication requires the use of a PIN, Biometric (finger print reader or illuminated infrared camera), or a phone with Wi-Fi or Bluetooth capabilities.
- Windows Hello requires a camera configured for near infrared (IR) imaging or fingerprint reader for biometric authentication. Devices without biometric sensors can use Windows Hello with a PIN or a portable Microsoft compatible security key.
- Xbox application requires an Xbox Live account, which is not available in all regions. For the most up-to-date list of regions, please go to Xbox Live Countries and Regions website.
- Wi-Fi Direct Printing requires a Wi-Fi adapter that supports Wi-Fi Direct and a device that supports Wi-Fi Direct Printing.
The table at the Microsoft site below lists the most common upgrade and installation errors, and a few things you can try to fix the problems.
Get help with Windows 10 upgrade and installation errors - Windows Support
Before you get started installing Windows 10, be sure that you temporarily disable Secure Boot and Fast Boot in your UEFI firmware settings until finished. Some motherboards may not support booting from a USB flash drive while these settings are enabled.
Once installation has finished, you can enable Secure Boot and Fast Boot again if you like.
For a Windows 11 version of this tutorial, see:
Clean Install Windows 11
Here's How:
1 If you have not already, you will need to create a bootable Windows 10 installation USB that supports UEFI mode (recommended) or Legacy BIOS (CSM) for how you want to install Windows 10.
2 Temporarily disconnect all non OS hard drives until Windows installation has finished for the following reasons:
- To avoid you mistakenly deleting or formatting the wrong disk or drive.
- To prevent Windows Setup from installing the boot configuration files (bootloader) to a different connected hard drive instead of on the disk Windows will be installed on.
3 Boot to the UEFI firmware settings for your motherboard, and enable or disable UEFI or Legacy BIOS (CSM) mode for how you want to install Windows 10.
Usually it will be set to UEFI mode by default if supported. You may need to read your PC's or motherboard's manual for its specific instructions on how to change this setting.
4 If you are installing the Window 10 Home edition of version 20H2 and want to use a local account instead of a Microsoft account, then you will need to temporarily disconnect your computer from the Internet until installation has finished.
If you do not disconnect from the Internet before starting Windows Setup, you will only have the option to set up Windows 10 with a Microsoft account available.
5 Boot from the Windows 10 installation USB flash drive on your computer.
6 If you have installation media that is for both 32-bit and 64-bit created from the Media Creation Tool, then select Windows 10 Setup (64-bit) or Windows 10 Setup (32-bit) for what you want to install with, and press Enter. (see screenshot below)
7 Select your language, time and currency, and keyboard or input method preferences, and click/tap on Next. (see screenshot below)
8 Click/tap on the Install Now button to start the installation. (see screenshot below)
9 Enter the Windows 10 product key you want to activate Windows 10 with for the edition (ex: Home or Pro) you want installed, and click/tap on Next. (see screenshot below)
UPDATE 9/20/2023: Free Activation from Windows 7/8 key or upgrade to Windows 10/11 Ends
If you do not have a product key available right now, then you can click/tap on the I don't have a product key link to be able to manually activate Windows 10 later when you do have a product key.
If you wanted to select an edition of Windows 10 to install, then click/tap on the I don't have a product key link. You can manually activate Windows 10 later after the Windows 10 installation has finished.
If you want to activate with a digital license linked to your Microsoft account, then click/tap on the I don't have a product key link, and be sure to set up your Microsoft account at step 24 below.
You will not be asked to enter a product key if installing Windows 10 Enterprise. You will need to activate later after installation has finished.
If you took advantage of the free Windows 10 offer, then you can enter the Windows 7 or Windows 8 product key that you upgraded to Windows 10 from.
If this is an OEM PC that has a valid product key embedded in its UEFI firmware chip, then you will not be prompted to enter a product key. Windows 10 will automatically use the embedded product key if its valid for the edition being installed. If needed, you can change the product key after installation has finished.
10 If you have a Windows 10 multiple editions installation media and/or clicked on I don't have a product key in step 9 above, then you will need to select the edition you want to install, and click/tap on Next. (see screenshot below)
11 Check the I accept the license terms box, and click/tap on Next. (see screenshot below)
12 Click/tap on the Custom: Install Windows only (advanced) option. (see screenshot below)
13 Do step 14 (legacy BIOS) or step 15 (UEFI) below depending on if you are installing with or without UEFI.
BIOS/MBR-based hard drive partitions | Microsoft Hardware Dev Center
A) Select the hard drive or partition that you want to install Windows 10 on, and click/tap on the Drive Options (advanced) link.
If the hard drive or partition that you have selected is shown as unallocated, then you can just click/tap on the Next button and go directly to step 16 below instead since it is already empty.
(It is recommended to delete all partitions/volumes on the disk until the disk shows as one "Unallocated" space for best results.)
B) Select a hard drive or partition that you want to do a clean install of Windows 10 on, do one of the options in the blue TIP box below for how you want to install Windows to this drive or partition, click/tap on the Next button when finished, and go to step 16 below. (see screenshot below)
If your hard drive is not displayed and it's either a SATA drive or in a RAID setup, then you need to connect a USB key or DVD disc with the RAID or SATA drivers on it, click on Load Driver, select the folder on the USB key or DVD that contains the RAID or SATA drivers to install them. Afterwards, your RAID drives will be available to select from to install Windows on
.
Drive options (advanced)
(It is recommended to delete all partitions/volumes on the disk until the disk shows as one "Unallocated" space for best results.)
If you only have one partition for a Drive # (hard drive) listed that you wanted to install Windows on, then select the disk # and click on the Delete option if not grayed out to make it unallocated space.
If you have more than one partition for a Drive # (hard drive) listed and want to install Windows on only one of the partitions and keep the other partitions with that disk #, then only select the partition that you want to install Windows on the Format option.
If you have more than one partition for a Drive # (hard drive) listed and want to get rid of all of them to make that disk # one single partition drive again, then select a partition with that disk # and click on the Delete option for each partition with the same Drive # until there is only one "unallocated space" with that Drive # left as in the screenshot below.
To shrink an existing partition to create another partition to install Windows on instead, select the partition that you want to shrink and click on the Extend option. Type in how much in MB (1 GB = 1024 MB) that you want to shrink it by. Now select the new extended partition.
The 450 MB (UEFI-GPT) or 500 MB (Legacy BIOS-MBR) System Reserved partition is used for the Boot Manager code, BCD (Boot Configuration Database), System Recovery Options (Windows RE), and start up files for BitLocker (if turned on).
If you want to have (recommended) the 450 MB (UEFI-GPT) or 500 MB (Legacy BIOS-MBR) System Reserved partition in addition to the Windows C: partition on a HDD or SSD after installation, then you would need to make sure that all partitions on the drive have been deleted until it is only unallocated space. Next, select the unallocated drive to install Windows on. If there are no partitions on the disk, you will get the System Reserved partition.
If you do not want to have the 450 MB (UEFI-GPT) or 500 MB (Legacy BIOS-MBR) System Reserved partition and only the Windows C: partition on a HDD or SSD after installation, then select a formatted partition or drive to install Windows on. If there are any partitions on the disk, you won't get the System Reserved partition.
UEFI/GPT-based hard drive partitions | Microsoft Hardware Dev Center
Your motherboard must support UEFI 2.0 or later to be able to install 32-bit and 64-bit Windows 10 with UEFI.
A) Delete all partitions/volumes on the Drive # (ex: Drive 0) that you want to install Windows 10 with UEFI on until that Drive # shows as unallocated space. (see screenshot below)
B) When you are finished, click/tap on Next, and go to step 16 below. (see screenshot above)
If you receive a "Windows can't be installed on drive 0" warning, you will still be able to as long as you can click/tap on the Next button.
Windows Setup will automatically create the 4 partitions below on the drive, and install Windows 10 on the primary partition. The order these partitions are created in has changed in Windows 10 version 2004.
Partition 1 - System - The EFI System partition that contains the NTLDR, HAL, Boot.txt, and other files that are needed to boot the system, such as drivers.
Partition 2 - MSR - The Microsoft Reserved (MSR) partition that reserves space on each disk drive for subsequent use by operating system software.
Partition 3 - Primary - Where Windows is to be installed to.
Partition 4 - Recovery - In Windows 10 version 2004 and higher, the "Recovery Partition" partition will be created at the final stages of Windows Setup. In Windows 10 version 1909 and lower, the "Recovery Partition" partition will be created as partition 1 instead.
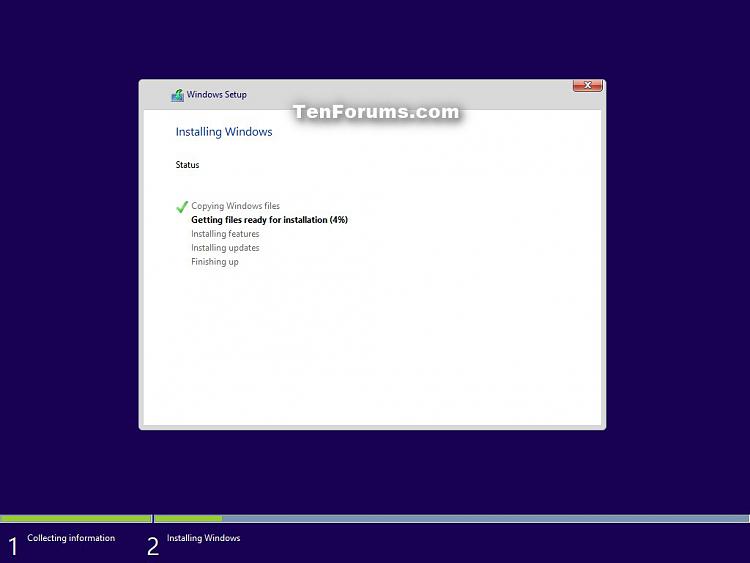
16 The installation of Windows 10 will now begin. (see screenshots below)
During the installation process, your screen may flash and computer will restart a few times.
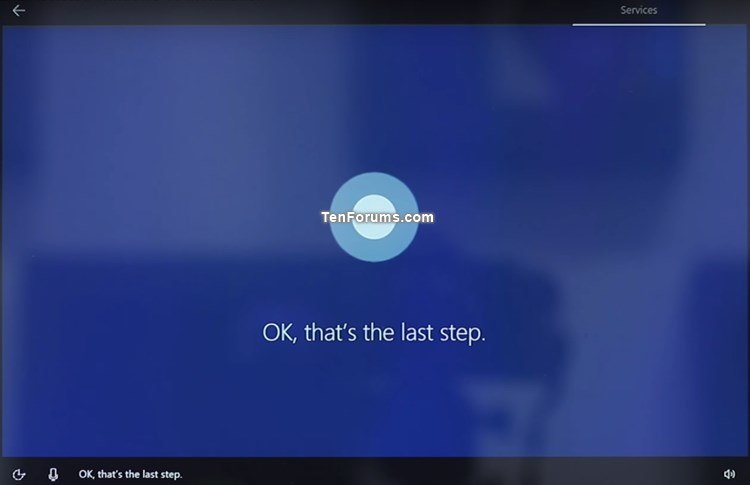
17 When installing Windows 10 has finished, you will now be greeted by Cortana (if supported) to assist in setting up Windows 10. (see screenshots below)
You can click/tap on the microphone icon at the bottom at anytime to toggle voice mode on and off as needed or wanted.
Starting with Windows 10 build 18309, based on feedback, if you clean install Pro, Enterprise, or Education editions of Windows 10, the Cortana voice-over will be disabled by default. Screen reader users can still choose to start Narrator at any time by pressing WIN + Ctrl + Enter.

18 Select your region (ex: "United States"), and click/tap on Yes. (see screenshot below)
If you would like to set up this PC to have an OOBE (Out-of-box Experience) so another user/owner can pick up at this point to finish setting up Windows on the PC with their own account and preferences the next time the PC it turned on, then:
1. Press the Shift + F10 keys when you see the screenshot below to open a command prompt.
2. TypeC:\Windows\System32\shutdown -s -t 0 -finto the command prompt, and press Enter to shut down Windows.
19 Select your keyboard layout (ex: "US"), and click/tap on Yes. (see screenshot below)
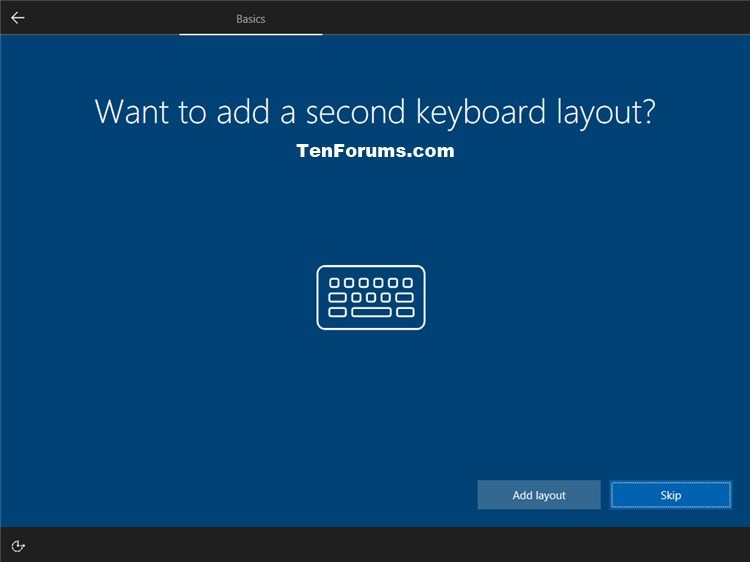
20 Select Add layout or Skip depending on if you want to add a second keyboard layout. (see screenshots below)
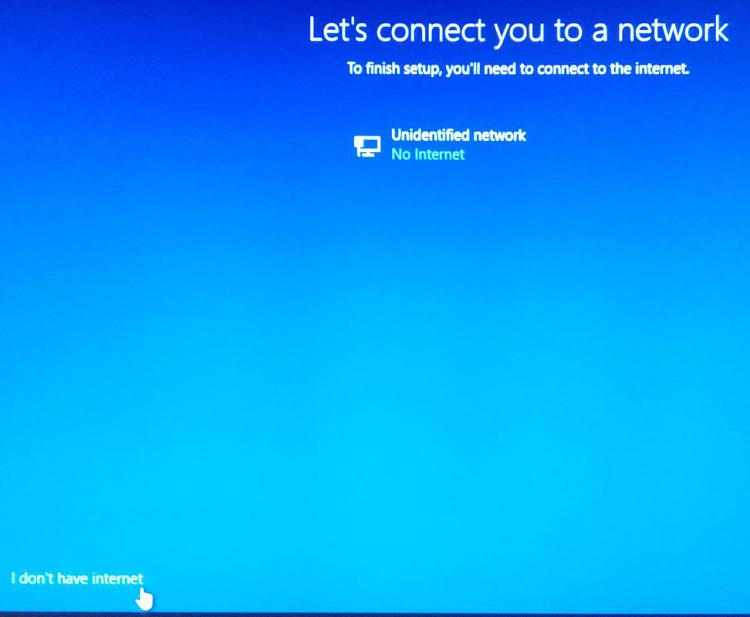
21 Windows Setup will now check for an Internet connection. If an Internet connection is not detected, it will prompt you to select an Ethernet network or setup and connect to your wireless network, and click/tap on Next. (see screenshots below)

If you currently do not have an Internet connection available, then you can click/tap on the I don't have internet or Skip for now link at the bottom left, click/tap on the Continue with limited setup link, and go to step 25C below to continue to set up a local account.
22 Select How would you like to set up (Pro) or Choose how you'll connect (Enterprise or Education), and click/tap on Next. (see screenshots below)
You will not see this if installing a Windows 10 Home edition.
For Windows 10 Pro:
Set up for an organization = Domain
Set up for personal use = Local home PC
For Windows 10 Education and Enterprise:
Join Azure Active Directory = Choose this option if your organization uses Office 365 or other business services from Microsoft. Your organization might collect info about you, install or remove apps, change settings or disable features, delete content, or reset your device. Talk to your support staff to learn more. This will let you setup Windows with a work or school account now.
Join a local Active Directory domain = This will let you setup Windows with a local account now. When setup is finished, you can join a domain, or switch to a Microsoft account. Go to step 25C below after selecting this option.

23 Do the step below depending on if your would like to set up Windows 10 to sign you in with a local account or Microsoft account. This account will be an administrator account.
If you currently do not have an Internet connection, then you will only be able to set up a local account during Windows Setup.
For more details about a Microsoft account, see: Microsoft account | Microsoft Docs:
A) Type in the email address, phone number, or Skype name you have registered for your Microsoft account, and click/tap on Next. (see screenshot below)
If you do not have a Microsoft account and would like to use one, then click/tap on the Create account link to create a new Microsoft account.
B) Enter the password for your Microsoft account, and click/tap on Next. (see screenshot below)
C) If you used the Microsoft Authenticator app to secure your Microsoft account, then approve this request when notified on your Android or iOS mobile device, and go to step 24F below. (see screenshot below)
D) If you have two-step verification turned on for your Microsoft account without using the Microsoft Authenticator app, then select how you would like to get your code, and click/tap on Next. (see screenshots below)
E) Enter the code you received from Microsoft, and click/tap on Next. (see screenshot below)
F) If your PC has a camera that supports Windows Hello, then you can click/tap on Set up to use your face to sign in to Windows 10. If you do not want to, then click/tap on Skip for now. (see screenshot below)
You will always be able to add a face later if you like in Windows 10.
G) Click/tap on Create PIN to add a PIN for your Microsoft account in Windows 10. (see screenshot below)
You will not be able to avoid creating a PIN, but you will always be able to add a PIN, change your PIN, or remove your PIN later if you like in Windows 10.
H) Enter a PIN you want to use, and click/tap on OK. (see screenshot below)
You will always be able to add a PIN, change your PIN, or remove your PIN later if you like in Windows 10.
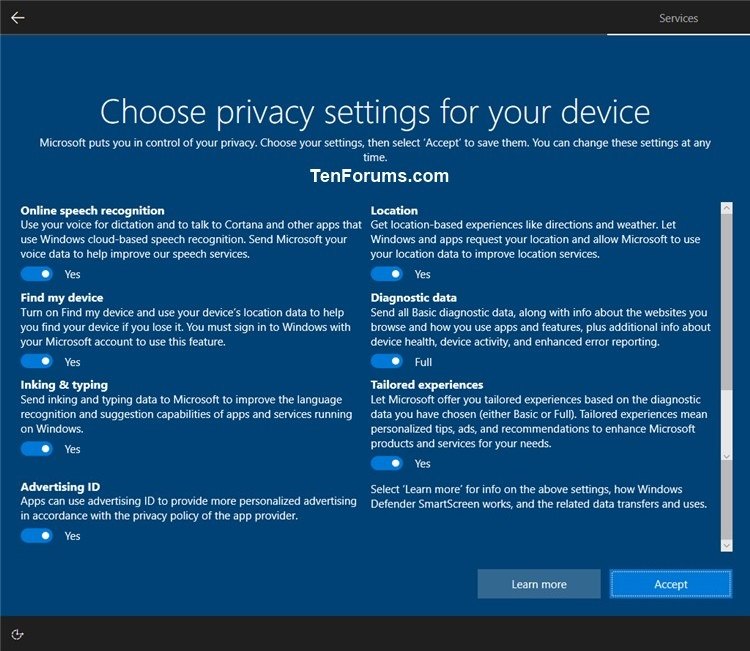
I) Turn on or off the privacy settings you want, and click/tap on Accept when finished. (see screenshots below)
The privacy screen settings are available starting with Windows 10 build 17115 and higher.
You will be able to change all of these privacy settings at anytime in Windows 10.
* How to Turn On or Off Online Speech Recognition in Windows 10
* How to Turn On or Off Location Service in Windows 10
* How to Turn On or Off Find My Device in Windows 10
* How to Change Diagnostic and Usage Data Settings in Windows 10
* How to Turn On or Off Improve Inking & Typing Recognition in Windows 10
* How to Turn On or Off Tailored experiences with diagnostic data in Windows 10
* How to Enable or Disable Let Apps use Advertising ID for Relevant Ads in Windows 10
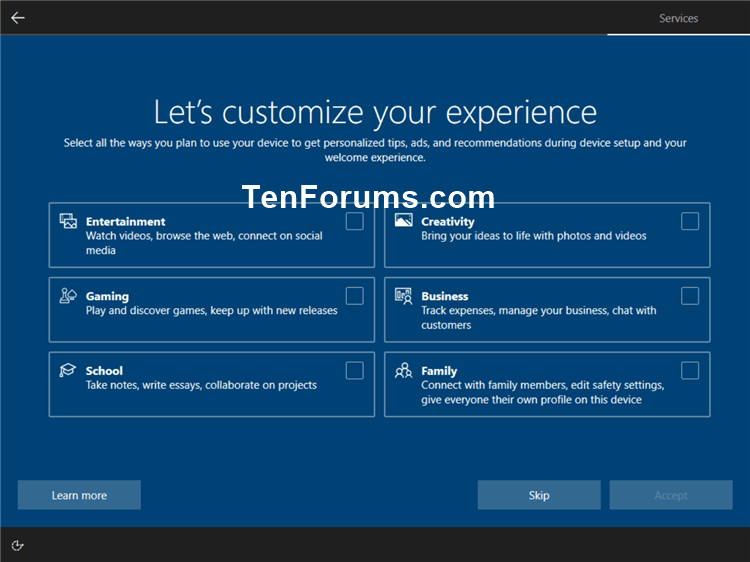
J) Either click/tap on Skip, or select (check) your device usage and click/tap on Accept. (see screenshot below)
You can always change your device usage settings at anytime.
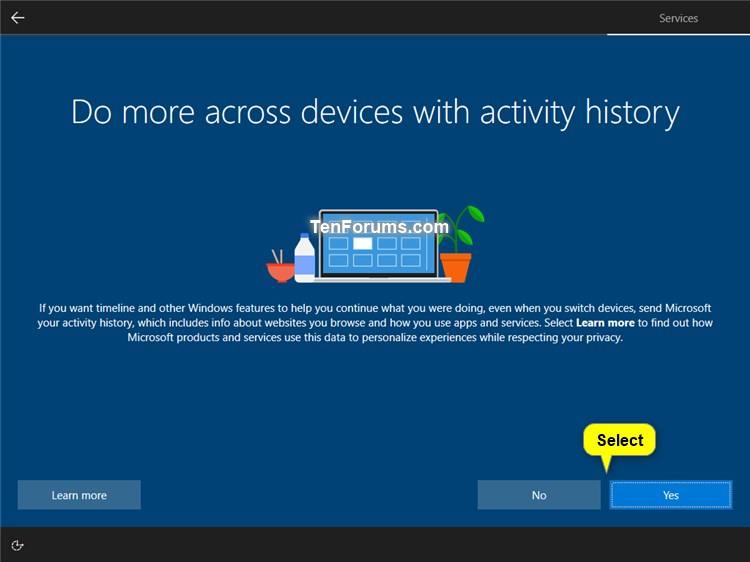
K) If prompted, click/tap on No or Yes depending on if you want to turn on Activity History for your account in Windows 10. (see screenshot below)
Activity History is only available starting with Windows 10 build 17040. You will be able to turn Activity History on or off at anytime in Windows 10.
L) If you wanted to link your iPhone or Android and this PC, then you could enter your phone number and click/tap on Send to have an app link sent to your phone to do so. Otherwise, just click/tap on Do it later or Next to skip this. (see screenshot below)
You will always be able to link or unlink your phone at anytime.
M) You will now be prompted if you would like to Back up your files with OneDrive in your Desktop, Documents, and Pictures folders. Click/tap on Next if yes, or click/tap on Only save file to this PC if no. (see screenshot below)
You will always be able to turn on or off back up your files with OneDrive in your Desktop, Documents, and Pictures folders at anytime in Windows 10.
N) If prompted, click/tap on the I have a product key link, No, thanks, or Try for free for Microsoft 365. (see screenshot below)
O) Click/tap on Not now (Decline) or Accept depending on if you want to use Cortana with your account in Windows 10. (see screenshot below)
You will be able to turn Cortana on or off at anytime in Windows 10.
P) Go to step 26 below.
For more details about a local account, see: Local account | Microsoft Docs:
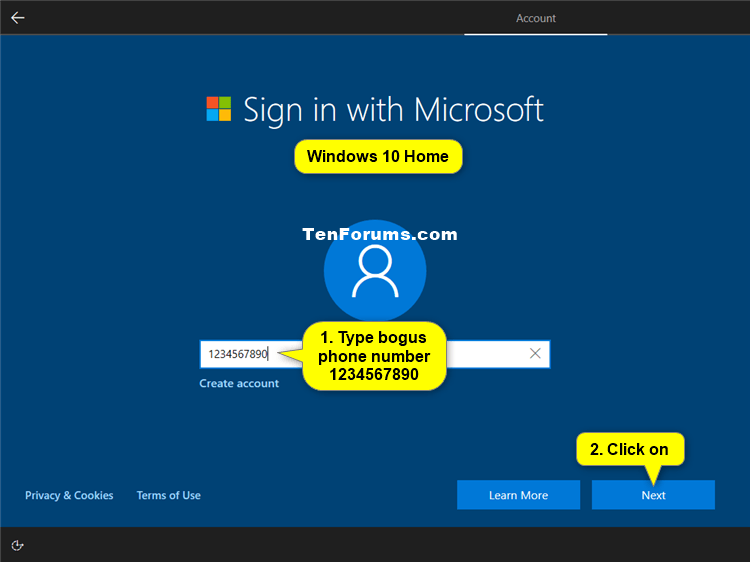
A) Perform one of the following actions depending on which Windows 10 edition you are installing: (see screenshots below)
- If Windows 10 Home (version 1909 and lower), type the bogus phone number 1234567890 into the phone/email address field, click/tap on Next, click/tap on the Offline account link at the bottom left of the Confirm your phone number screen. This will not work for Windows 10 version 20H2.
- If Windows 10 Pro or Windows 10 Home (version 2004), click/tap on the Offline account link at the bottom left.
- If Windows 10 Enterprise, click/tap on the Domain join instead link at the bottom left, and go to step 25C below.
If this does not work to allow you to set up a local account, then disconnect from the Internet and restart the clean install while disconnected from the Internet.

B) Click/tap on the Limited experience link at the bottom left. (see screenshot below)
C) Enter a user name you want for the local account, and click/tap on Next. (see screenshot below)
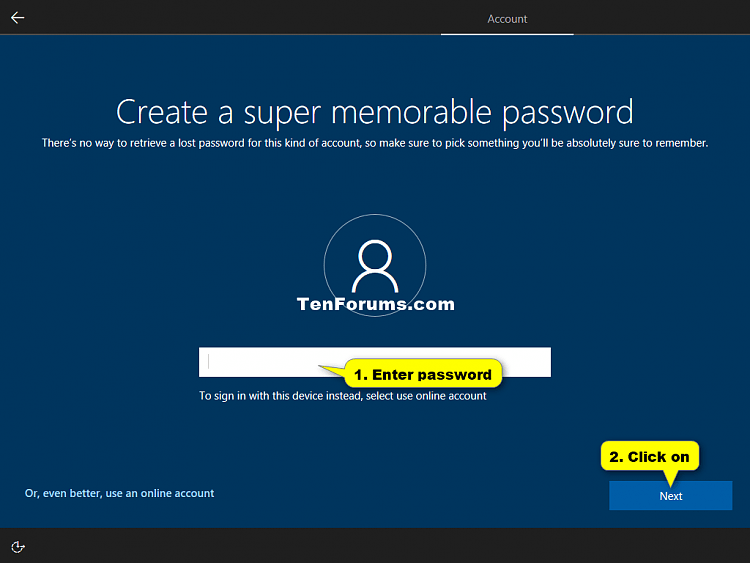
D) Enter a password you want for the local account, and click/tap on Next. (see screenshot below)
If you do not want this local account to have a password, then leave this field empty instead, click/tap on Next, and go to step 26 below.
E) Enter the password again to confirm, and click/tap on Next. (see screenshot below)
F) Select a security question (1 of 3) you want from the drop menu, type your answer, and press Enter. (see screenshot below)
Security questions for local accounts are only available starting with Windows 10 build 17063.
G) Select a security question (2 of 3) you want from the drop menu, type your answer, and press Enter. (see screenshot below)
Security questions for local accounts are only available starting with Windows 10 build 17063.
H) Select a security question (3 of 3) you want from the drop menu, type your answer, and press Enter. (see screenshot below)
Security questions for local accounts are only available starting with Windows 10 build 17063.
I) Turn on or off the privacy settings you want, and click/tap on Accept when finished. (see screenshots below)
The privacy screen settings are available starting with Windows 10 build 17115 and higher.
You will be able to change all of these privacy settings at anytime in Windows 10.
* How to Turn On or Off Online Speech Recognition in Windows 10
* How to Turn On or Off Location Service in Windows 10
* How to Turn On or Off Find My Device in Windows 10
* How to Change Diagnostic and Usage Data Settings in Windows 10
* How to Turn On or Off Improve Inking & Typing Recognition in Windows 10
* How to Turn On or Off Tailored experiences with diagnostic data in Windows 10
* How to Enable or Disable Let Apps use Advertising ID for Relevant Ads in Windows 10
J) Either click/tap on Skip, or select (check) your device usage and click/tap on Accept. (see screenshot below)
You can always change your device usage settings at anytime.
K) If prompted, click/tap on No or Yes depending on if you want to turn on Activity History for your account in Windows 10. (see screenshot below)
Activity History is only available starting with Windows 10 build 17040. You will be able to turn Activity History on or off at anytime in Windows 10.
L) Click/tap on Not now (Decline) or Accept depending on if you want to use Cortana with your account in Windows 10. (see screenshot below)
You will be able to turn Cortana on or off at anytime in Windows 10.
M) Go to step 26 below.
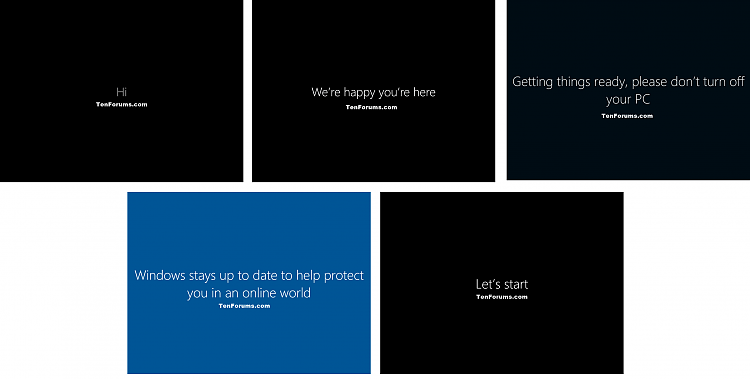
26 Windows Setup will now start getting things ready. (see screenshots below)
27 If prompted, click/tap on Yes (on) or No (off) for network discovery. (see screenshot below)
You will always be able to turn on or off network discovery at anytime in Windows 10.
28 When the clean install has finished, you will be on your desktop in Windows 10 greeted by the Windows Welcome Experience. (see screenshot below)
29 Make sure that you have the correct time zone, date, and time set.
30 Install any needed drivers for your devices.
That's it,
Shawn Brink
Related Tutorials
- How to Custom Install Windows 10
- How to Create a Bootable USB Flash Drive to Install Windows 10
- How to Dual Boot Windows 10 with Windows 7 or Windows 8
- How to Upgrade to Windows 10
- How to Directly Clean Install Windows 10 without having to Upgrade First
- How to Reinstall Windows 10 with this media
- How to 'Recover from a drive' to Reset Windows 10
- How to Download a Recovery Image for a Surface Device
- How to Refresh Windows 10
- How to Reset Windows 10
- How to Activate Windows 10
- How to Install Windows 10 as Virtual Machine in VirtualBox
- How to Install Windows 10 as Virtual Machine in VMware Player
- How to Do a Repair Install of Windows 10 with an In-place Upgrade
- How to Start Fresh with Clean up-to-date Installation of Windows 10
- How to Update to Latest Version of Windows 10 using Windows 10 Update Assistant
- How to Install Windows 10 S on a Windows 10 PC
- How to Clean Install Windows 10 without any External Installation Media
- List of Generic Product Keys to Install Windows 10 Editions
- How to clean install latest Fast Ring Insider build in supported way
- How to clean install latest Windows Insider Fast Ring build if traditional clean install fails
Clean Install Windows 10
-
New #1
Great Work Shawn!
-
-
New #3
Hi Shawn.
Will it work if I just copy the ISO content to windows 8.1 USB installation drive.?
Thanks
Kevin
-
New #4
Hello Kevin,
I'm afraid not. It still wouldn't be bootable just copying it. Using Rufus from step 2 would be a good easy option to create the USB with the ISO if you like.
-
-
New #6
Thanks Shawn. Creating USB bootable then install. Cheers!
-
New #7
Installed windows 10TP with MS account and didn't get 18 D step Select how to set up your PC. It just synced my settings from other pc that was using same account
-
New #8
First marked and confirmed answer on TechNet
Windows 10 Setup crashes on 36%
-
-
Clean Install Windows 10
How to Clean Install Windows 10Published by Shawn BrinkCategory: Installation & Upgrade
28 Sep 2023


 Quote
QuoteTutorial Categories

Related Discussions
