

How to Add or Remove This PC in Navigation Pane of File Explorer in Windows 10
This tutorial will show you how to add or remove This PC in the navigation pane of File Explorer for all users in Windows 10.
You must be signed in as an administrator to be able to add or remove This PC in the navigation pane.
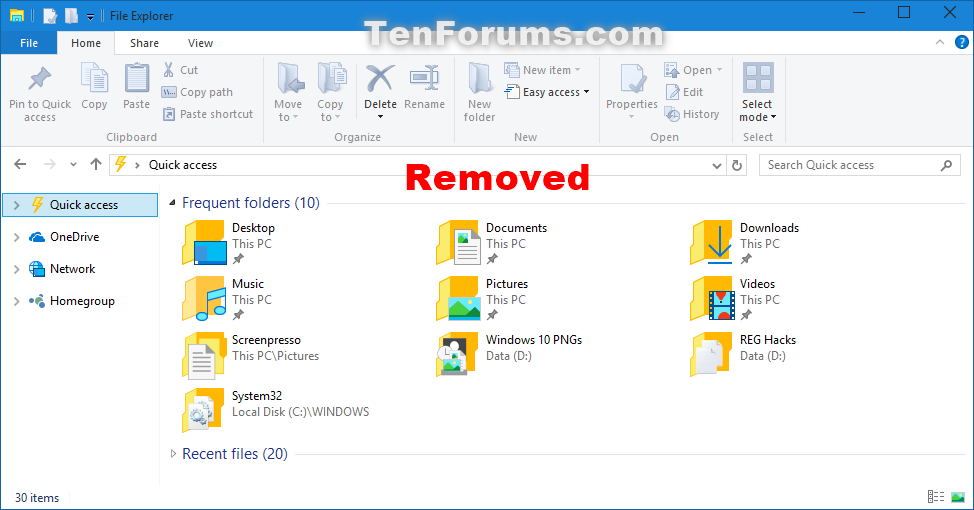
If you remove This PC from the navigation pane, it will also remove the default This PC desktop icon (if turned on). If you like, you can still create your own This PC shortcut to use instead though.
If you set File Explorer to open to This PC by default and remove This PC from the navigation pane, File Explorer will still open to This PC.
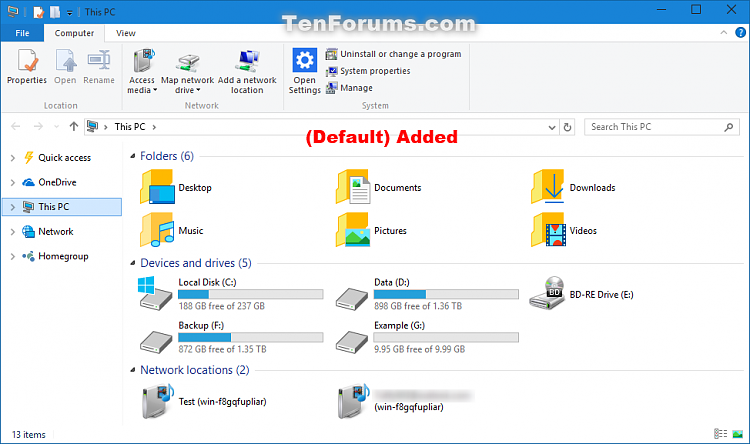
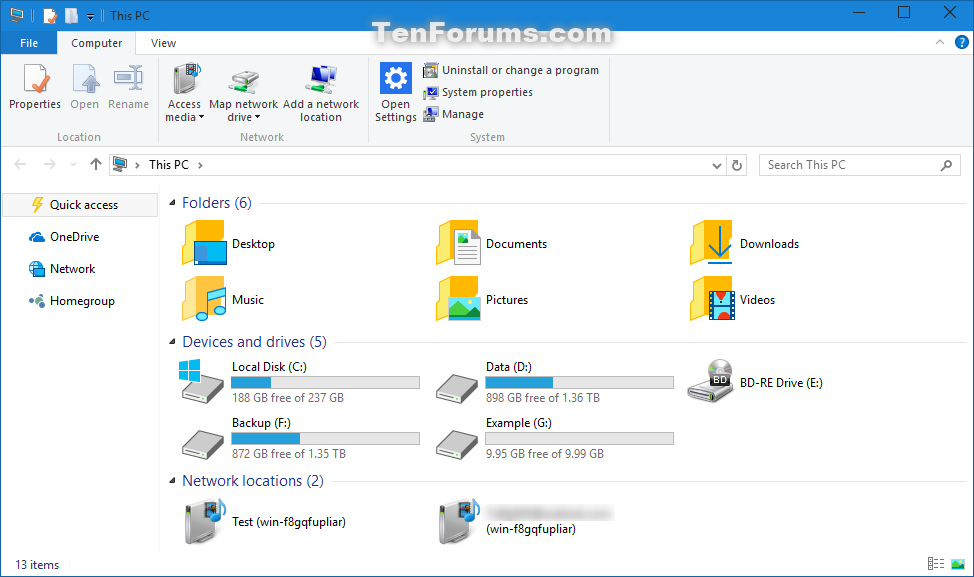
EXAMPLE: Add or Remove "This PC" in navigation pane
Here's How:
1 In the search box (Win+S) on your taskbar or Start menu, type regedit, and press Enter to open Registry Editor.
2 If prompted by UAC, click/tap on Yes.
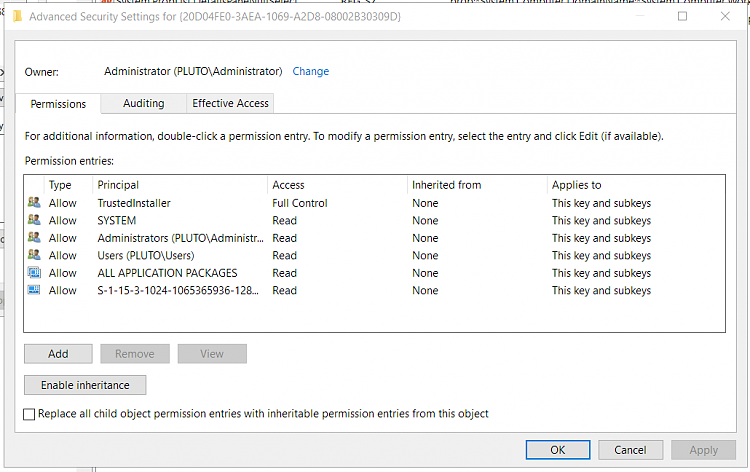
3 In Registry Editor, navigate to the location below. (see screenshot below)
HKEY_CLASSES_ROOT\CLSID\{20D04FE0-3AEA-1069-A2D8-08002B30309D}\ShellFolder
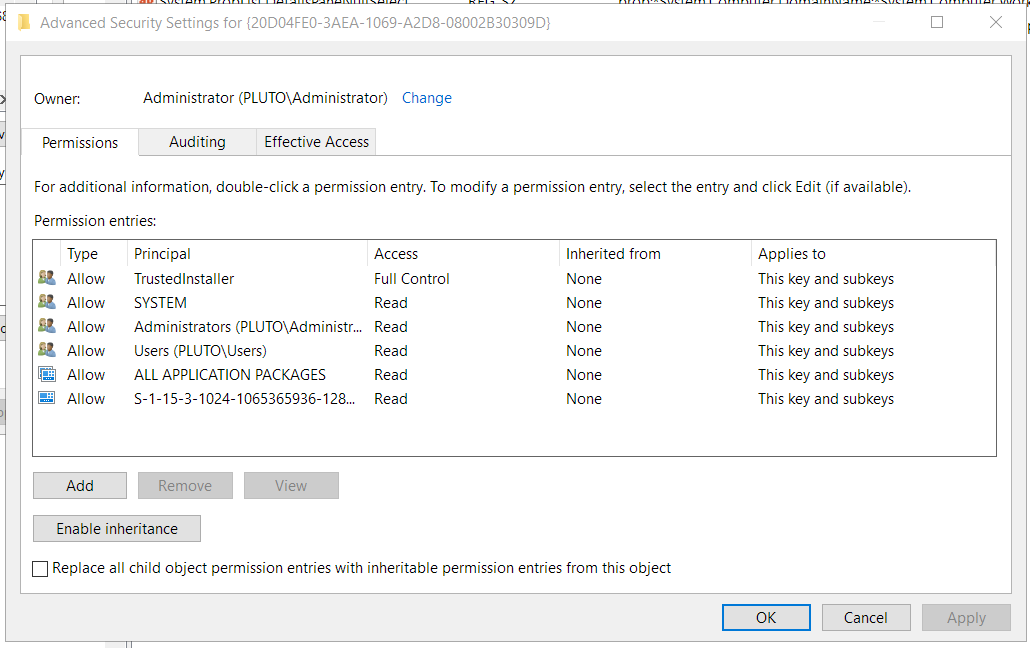
4 If you have not already, you will need to first change the owner of the ShellFolder registry key in the left pane to be the Administrators group. (see screenshot below step 3)
5 If you have not already, you will need to second set permissions of the ShellFolder registry key in the left pane to "Allow" the Administrators group "Full control". (see screenshot below step 3)
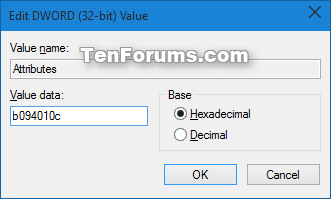
6 In the right pane of the ShellFolder key, double click/tap on the Attributes DWORD to modify it. (see screenshot below step 3)
If you do not have the Attributes DWORD, then right click on an empty space in the right pane of the ShellFolder key, click/tap on New, click/tap on DWORD (32-bit) Value, type Attributes for the name, and press Enter.
7 Do step 8 (remove) or step 9 (add) below for what you want.
This is the default setting/
A) In the right pane of ShellFolder, right click or press and hold on Attributes, click/tap on Delete, and click/tap on Yes to confirm. (see screenshot below step 3)
10 If you have a 64-bit Windows 10, then repeat steps 4 to 7 above for the registry location below.
This step is to add or remove This PC from the "Open" and "Save as" type dialogs in 64-bit Windows 10.
This step is not for 32-bit Windows 10.
HKEY_LOCAL_MACHINE\SOFTWARE\Wow6432Node\Classes\CLSID\{20D04FE0-3AEA-1069-A2D8-08002B30309D}\ShellFolder
11 When finished, close Registry Editor.
12 Either Sign out and sign in, or restart the computer to apply.
That's it,
Shawn
Related Tutorials
- How to Create a This PC Shortcut in Windows 10
- How to Open File Explorer to 'This PC' or 'Quick access' by Default in Windows 10
- How Add or Remove Folders from This PC in Windows 10
- How to Change Icons of Folders in This PC in Windows 10
- How to Change Default Icon for This PC in Windows 10
- How to Add or Remove Manage on This PC Context Menu in Windows 10
- How to Show or Hide Navigation Pane in File Explorer in Windows 10
- How to Turn On or Off Navigation Pane 'Show all folders' in Windows 10
- How to Add or Remove Drives in Navigation Pane of File Explorer in Windows 10
- How to Add or Remove Dropbox in Navigation Pane of File Explorer in Windows 10
- How to Add or Remove Favorites in Navigation Pane of File Explorer in Windows 10
- How to Add or Remove Google Drive in Navigation Pane of File Explorer in Windows 10
- How to Add or Remove Homegroup in Navigation Pane of File Explorer in Windows 10
- How to Add or Remove Libraries in Navigation Pane of File Explorer in Windows 10
- How to Add or Remove Network in Navigation Pane of File Explorer in Windows 10
- How to Add or Remove OneDrive from Navigation Pane in Windows 10
- How to Add or Remove Quick access in Navigation Pane of File Explorer in Windows 10
- How to Add or Remove User Folder in Navigation Pane of File Explorer in Windows 10
- How to Reset Navigation Pane Expanded State in Windows 10 File Explorer
Add or Remove This PC in Navigation Pane in Windows 10
-
New #1
Tried doing this with the latest updates to 1703 build 15063.502.
Changing the owner to Administrator was easily done but changing permissions of Administrator from read only to full couldn't be done.
I've attached a .png of the advanced permissions window.
Last edited by Brink; 08 Aug 2017 at 15:25. Reason: attached your uploaded image
-
New #2
Hello John, :)
Change the owner to the "Administrators" group instead, then see if you're able to change permissions.
-
New #3
That's what I did
-
New #4
Your screenshot indicates that you changed the owner to the built-in "Administrator" account instead of the "Administrators" group.
-
New #5
That did it! Thanks.
'till now I didn't know there was a difference.
Any idea why Microsoft keeps claiming that if you are an "Administrator" you have full control of everything on the computer when in fact you are just a user with very little control of anything?
...although on my installation there is no "Attributes" field (attached This PC 2.png).
Should I try and create an "Attributes" field?
Regards,
John
-
New #6
Never mind on the question of "Attributes", I went ahead and added it in (after reading you tutorial more carefully) and it worked - but not as I had expected.
I was trying to get the Navigation pane to look like a windows 7 pane, just the drives and network showing.
...but I'll continue to struggle with microsoft.
Thanks again,
John
-
New #7
Great news John. :)
Check the "Related Tutorials" links at the bottom of the tutorial for other add/remove items from the navigation pane tutorials that may help.
-
New #8
will do, thanks again
-
-
New #9
Hello, once i get to the "HKEY_CLASSES_ROOT\CLSID\{20D04FE0-3AEA-1069-A2D8-08002B30309D}\ShellFolder" area in the registry, the "attributes" folder is not visible.
What can be the cause of that?
Add or Remove This PC in Navigation Pane in Windows 10
How to Add or Remove This PC in Navigation Pane of File Explorer in Windows 10Published by Shawn BrinkCategory: Customization
22 Dec 2019


 Quote
QuoteTutorial Categories

Related Discussions
