

Information
The easiest way to install Windows 10 for dual or multi boot is to create a virtual hard disk and install Windows on it:
See this post in Ten Forums video thread for more detailed instructions. Be sure to read the note in video post:
Note
When creating VHD file to be used in native boot, always use MBR partitioning! To upgrade Windows on native boot VHD, it must be temporarily attached to a virtual machine. An MBR partitioned VHD is easy to attach to VM, it only needs Windows partition to be marked active, whereas a GPT partitioned VHD with only a single partition for Windows requires manually creating system partitions before it can be used on VM.
If you for any reason want to use a GPT partitioned VHD in native boot (can't think any valid reason!), it is better and recommended that you first create a Generation 2 VM in Hyper-V, installing Windows 10 on it. This takes care of the partitioning, doing it correctly. The VHD can then be used as native boot VHD, or on a VM.
If the on VHD installed Windows 10 edition is the same than Windows edition on host machine, Windows 10 on VHD will be automatically activated.
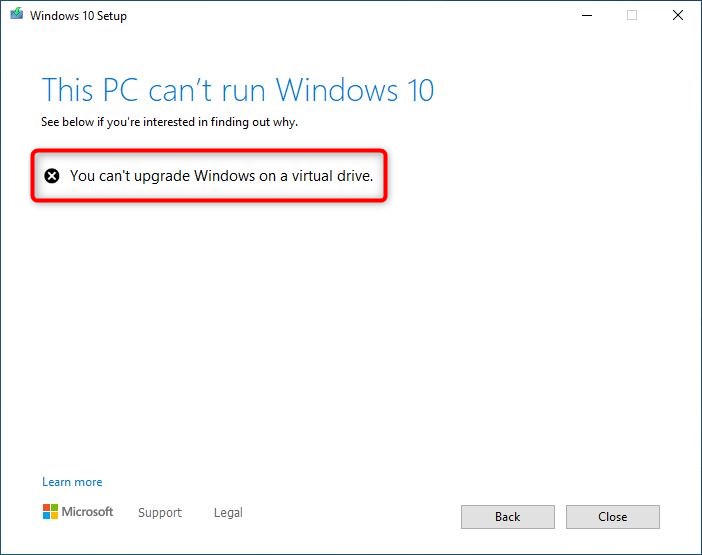
However, Windows cannot be upgraded when booted to VHD. This is somewhat illogical; booted to VHD, Windows acts as on any physical installation, for instance using real hardware devices, but system still sees the VHD as virtual disk. Trying to upgrade, user will get this message:
When the same VHD is used on a virtual machine instead of native boot, all hardware Windows sees is virtual, but the VM sees the VHD as a physical hard disk.
This tutorial will show how to use a virtual machine to upgrade Windows on a VHD.
The length of the tutorial does not mean the process is difficult and time consuming. Quite the contrary. Process is easy, straight forward and relatively fast (a minute or two, excluding time required to upgrade Windows). I just wanted to answer as many possible questions as possible in advance, making it easier for beginners to follow the tutorial.
Method One: Upgrade VHD using Hyper-V Method Two: Upgrade VHD using Macrium viBoot
Although these instructions are for Hyper-V, there's nothing preventing using VirtualBox or VMware instead.1.1) The process shown in video at the beginning of this tutorial creates a MBR partitioned virtual hard disk. There simply are no reasons to use GPT partitioning on a native boot VHD, but it is important to be sure about how VHD is partitioned.
1.2) Mount the VHD (right click it, select Mount).
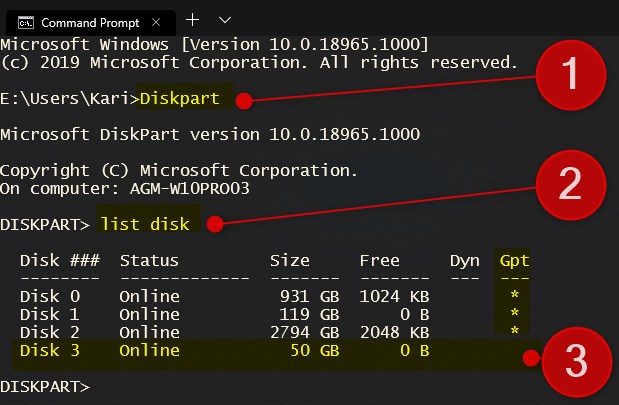
1.3) Open an elevated Command Prompt, enter commandDiskpart(#1 in screenshot) to start Windows Disk Partitioning Tool. Enter commandlist disk(#2) to list all disks.
1.4) Find your mounted VHD on list. If it shows an asterisk in column GPT, the disk is GPT formatted. Missing asterisk, as in this example case, tells that the disk is MBR formatted (#3):
1.5) Close Command Prompt, unmount the VHD (right click mounted VHD file in Explorer This PC, select Eject).
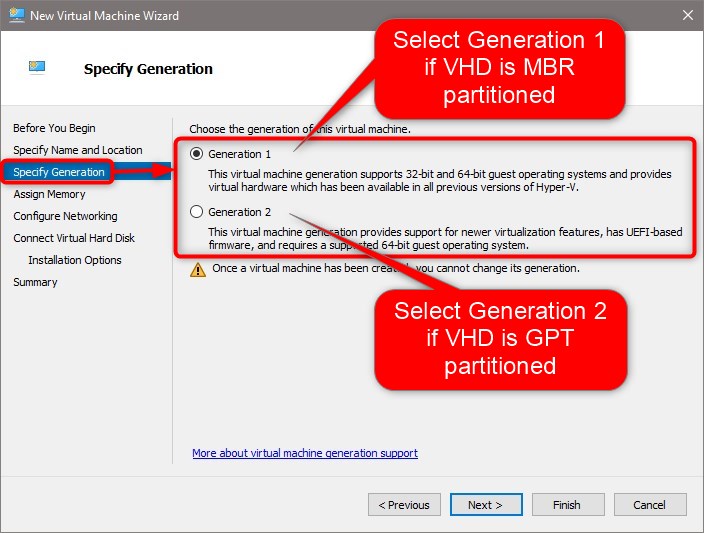
1.6) Create a new VM in Hyper-V (tutorial). In New Virtual Machine Wizard, in Specify Generation page, select Generation 1 if the VHD is MBR partitioned, Generation 2 if GPT partitioned:
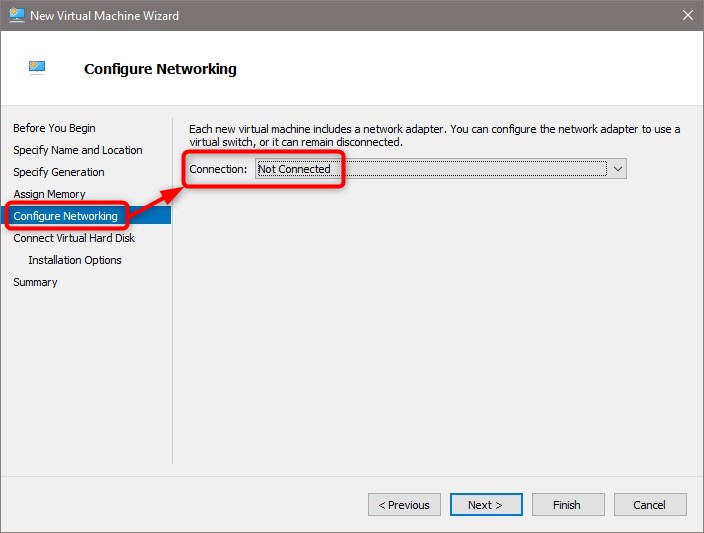
1.7) In Configure Networking page, select Not connected:
Because the VHD has been used in native boot, it contains drivers for devices on physical host machine. When VHD is used on a VM, the update / upgrade process would try to update these devices, but fail because they are not present on VM.
It is therefore better to not connect the VM to network for upgrade through Windows Update, but upgrade using ISO image instead.
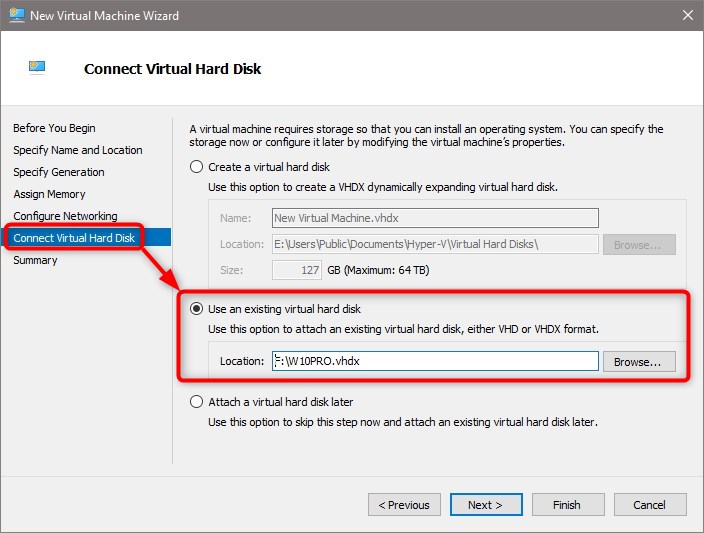
1.8) In Connect Virtual Hard Disk page, select Use an existing virtual hard disk, browse to and select your native boot VHD:
1.9) Get Windows 10 ISO image for the version and build you want to use for upgrade:
- General Availability ISO: Download Windows 10 ISO File
- Insider ISO: Windows Insider - Get Latest Fast Ring ISO image
1.10) Open Settings for the new VM (right click in Hyper-V Manager, select Settings)
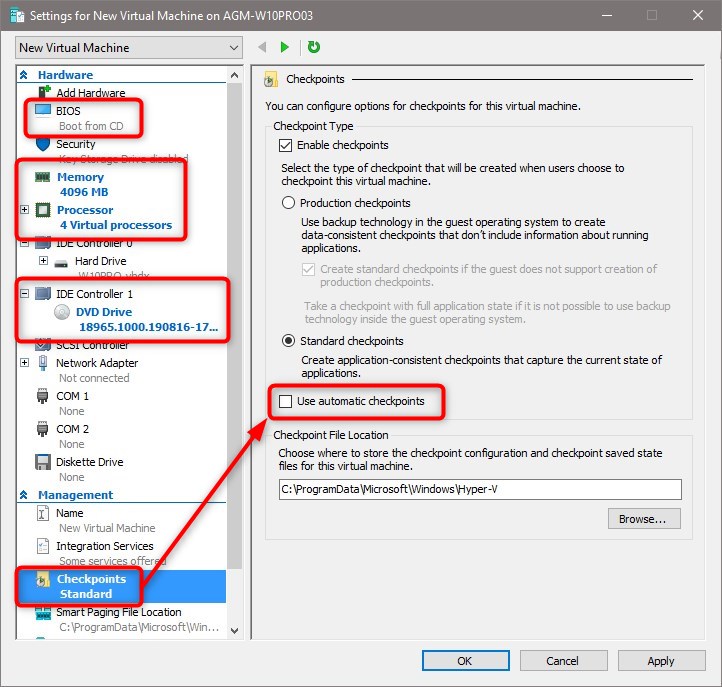
1.11) Make the VM boot from CD, add virtual RAM and virtual processors as you'd prefer, add Windows ISO image you will use for upgrade, and (really important!) disable automatic checkpoints:
1.12) Click OK to save settings, start the VM booting from ISO (virtual CD / DVD).
1.13) The virtual machine contains no boot records. To boot it to Windows, we need to add them. When booted from ISO, Windows Setup shows the region selection screen. Press SHIFT + F10 to open Command Prompt:
1.14) Enter commandDISKPART(#1 in next screenshot) to open Windows Disk Partitioning Tool. Enter commandlist vol(#2) to list all volumes (partitions); depending on how VHD was partitioned, booting to WinPE or Windows install media, Windows partition might be something else than usual C:
1.15) Find the volume number and partition letter for the Windows partition (#3).
1.16) MBR partitioned VHD only (not required on GPT VHD): Enter commandsel vol N(#4) where N is the volume number for VHD Windows partition, enter commandactive(#5).
1.17) Quit DISKPART with commandexit(#6). Enter following command to create boot records (#7), replacing all three instances of drive letter C with actual Windows partition letter for the Windows partition on VHD:
C:\Windows\System32\bcdboot C:\Windows /s C:
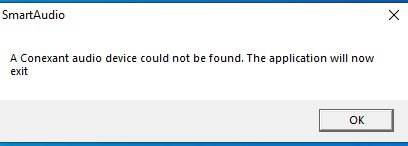
1.18) Close Command Prompt, close Windows Setup to restart the VM, boot normally to desktop. Because VM cannot find all installed physical devices, you might get a few device related error messages. Just ignore and close them:
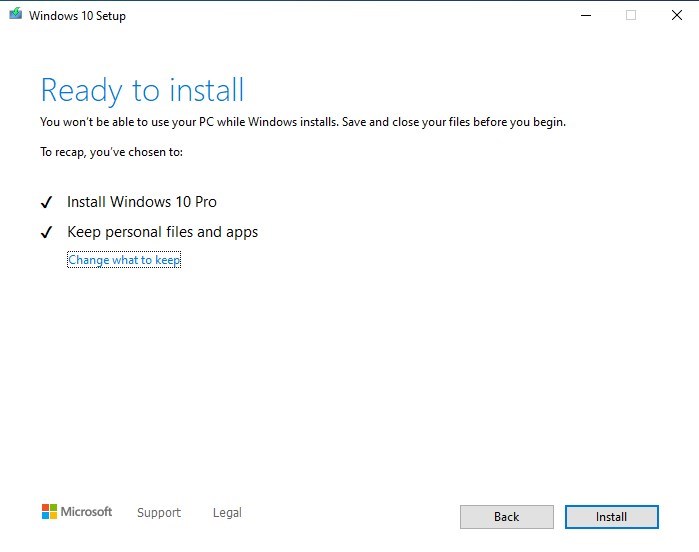
1.19) Run Windows Setup from ISO, and upgrade Windows:
1.20) When upgraded, shut down VM. You can now restart the host, and boot to your upgraded native boot VHD.
2.1) If you use Macrium Reflect for imaging, upgrading Windows on a native boot VHD is even easier than when using a Hyper-V VM.
2.2) Boot to your Windows VHD, create a Macrium system image of it. Notice that you should save the image on an external HDD, or other network share accessible from host!
2.3) Boot back to host.
2.4) Open the system image in viBoot (tutorial).
2.5) As told in step 1.7, do not connect viBoot VM to network. Assign RAM as preferred, let viBoot set virtual processors automatically:
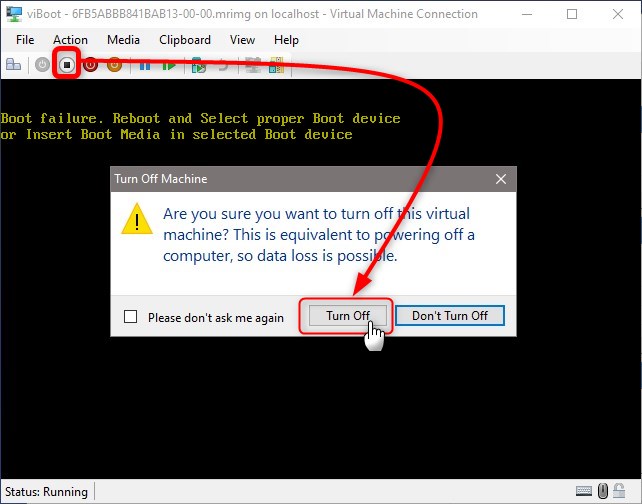
2.6) Macrium viBoot starts the VM automatically, but it fails to boot showing no boot device error. Click the Turn Off button and turn VM off:
2.7) Open VM settings, and do steps 1.10 through 1.18 in Method One. Macrium viBoot VM boots now without issues.
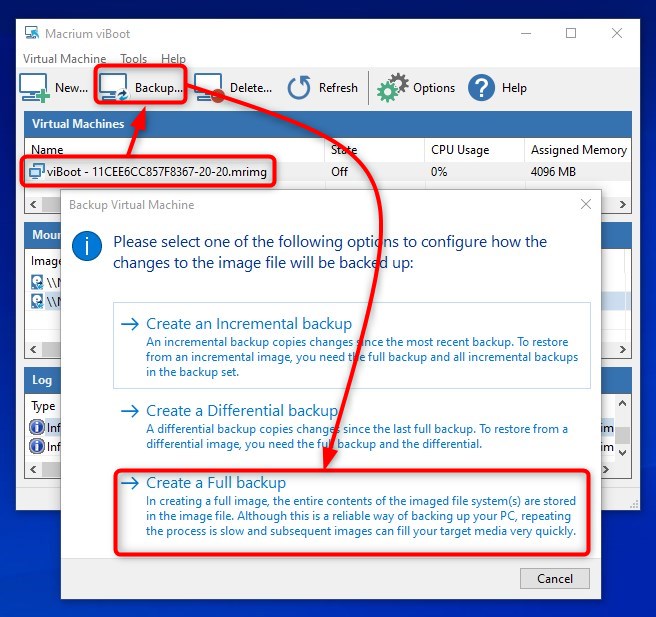
2.8) Upgrade as told in step 1.19. When upgraded, shut down viBoot VM, save the new Macrium Reflect image:
2.9) Boot to your VHD, restore the upgraded system image made in viBoot.
That's it. Although requiring some extra effort to upgrade Windows on VHD, native boot using VHD file is the easiest, most practical and convenient method to do dual / multi boot. When done, when dual boot is no longer required, just delete the VHD file and remove its boot entry. No partitioning required.
Kari
Native boot Virtual Hard Disk - How to upgrade Windows

Native boot Virtual Hard Disk - How to upgrade Windows
How to Upgrade Windows 10 Installed on a VHDPublished by Kari "Kalsarikänni" FinnCategory: Virtualization
25 Jun 2020


Tutorial Categories

Related Discussions
