

Information
I want to start with a very subjective, personal opinion: Macrium Reflect Free is the best available free imaging solution for Windows (download: Macrium Reflect Free).
That being said there are quite a many alternatives for those searching for a free, easy to use imaging solution to create regular backups of your Windows installation. I have tried most of them, been quite happy with some but never found anything that comes even close to Macrium Reflect Free. It is extremely easy to use even for newbies and does exactly what it is designed to do.
Macrium Reflect tutorial: Macrium Reflect - Backup Restore - Windows 10 Forums
When something happens, a system image allows you to restore Windows to state it had when the image was created. Windows 10 is quite robust and reliable, personally for instance I have had no need to restore a system image since I started playing around with first Windows 10 Technical Preview back in October 2014. However, a clever PC user never trusts that nothing happens. Creating a system image when all is well is like safety belt in a car; you don't use it because you know you will have an accident, you'll use it in case the unforeseen happens.
Macrium viBoot (Virtual Image Boot) allows you to use the system image of your physical computer as a Hyper-V virtual machine. It allows you to add files and even install software to your image, update and even upgrade it. After creating the image you might think that you would like to have Microsoft Office 2016 installed on the system image, although it was not installed when you created the image. Using any other imaging software you would need to install Office 2016 on your PC, then recreate the image, but with Macrium viBoot you can simply create a virtual machine of your image, install Office 2016 on that virtual machine, and then apply changes to the image.
Next time you restore the image Office 2016 is there, already installed, although it was not installed when the image was originally created.
Tip
Maybe the most practical use for viBoot virtual machine is to update and upgrade Windows in your Macrium system image.
In this tutorial I will take a Build 14316 image, create a vm of it, install some additional software and finally upgrade it to build 14352. This way although the image was created from build 14316, it will be 14352 when the image will be restored to a computer.
A quote from Macrium Software:
This tutorial will show you how to use Macrium viBoot. It was officially released on Friday 15th of July 2016 but as I have been using it for some time now when still a Technical Preview, I am able to help you with possible issues. Don't hesitate to post your questions in this thread. Notice that I have had no issues in using it, the user interface, menus and prompts are mostly self explanatory.Macrium viBoot is a new product that enables you to create and manage Microsoft Hyper-V virtual machines from one or more Macrium Reflect image backups. Macrium viBoot is available free to users of all editions, including Macrium Reflect v6 Free.
Because Macrium viBoot requires Hyper-V feature being enabled it cannot be used in Windows 10 Home edition; Hyper-V is included in Pro, Education and Enterprise editions only.
Note
Use links below to jump to any part of this tutorial, back button of your browser to return to this list.
Part One: SetupMacrium viBoot Part Two: Create a new virtual machine Part Three: Install software and Windows Updates to image Part Four: Apply changes to system image
Click or tap screenshots in this tutorial to pop them out, click / tap again to enlarge.
1.1) Macrium viBoot requires Hyper-V being enabled. See this tutorial for enabling and setting up Hyper-V virtualization: Hyper-V virtualization - Setup and Use in Windows 10 - Windows 10 Forums
1.2) Macrium viBoot is included in Macrium Reflect installer. No separate download is required. However, by default it will not be installed when Reflect is installed. Select viBoot when installing Macrium Reflect:

1.3) Launch Macrium viBoot. Notice that when run first time, viBoot needs to install a virtual SCSI adapter. Select Always trust software from Paramount Software, click Install:
2.1) The user interface is divided to four main parts, from top menus & controls, Virtual Machines pane showing currently set up virtual machines, Mounted Images showing currently mounted Macrium Reflect images, and Log pane.
2.2) Select New Virtual Machine:2.3) Click Next:
2.4) Click Add, browse to and select any Macrium Reflect image:
2.5) Selected Macrium image will be shown in viBoot manager. Click Next:
2.6) Name the vm as you wish (#1), assign RAM (#2), specify the number of virtual processors (#3, I recommend accepting default value), and select an external virtual switch from drop down list (#4). Click Finish:
2.7) viBoot will now create a virtual machine using the system image as virtual hard disk. This will only take a moment:
2.8) When done, the newly created vm will start automatically. Its status can be monitored both using Hyper-V Manager and Macrium viBoot Manager.
2.9) As with any image restored or imported to different hardware, in this case emulated Hyper-V hardware, Windows needs some time to make devices and drivers ready. Screenshot from a Swedish Windows 10 image on viBoot vm, you get the point::
2.10) In the future, as long as you want to keep this vm, you can run it from viBoot Manager or Hyper-V Manager. When not in use viBoot sits nicely in Notification area, requiring only a few megabytes RAM.
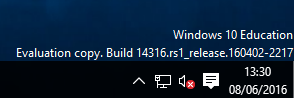
3.1) This example Macrium system image was created directly after a clean installation of Windows 10 Education Build 14316 and installation of some basic software.
Before using the image to restore this image to multiple computers, I want to install additional software to it and upgrade it to build 14352, the main reason I in first place used viBoot to make a vm from my image. In this way I don't have to install the same software every time the image will be restored to a computer, nor do I need to upgrade it.
I decided to install Office 2016 and PowerDirector 13 LE now to the viBoot virtual machine:
3.2) You can of course also add personal files and folders to the image. Simply copy the files and folders you want to add from host to virtual machine.
3.3) Even if you have no need to add any software or other content to your image, viBoot vm also allows you to regularly update the Windows in the image. In this example my system image was made from Windows 10 Education Build 14316, a few Insider builds ago:As the image in all other aspects is what I need and want to, it's easier and faster to upgrade the image than to install build 14352 (most current build when writing this) on a PC, customize it and install all software and finally create a new up to date image.
4.1) To apply changes to the image, shut down vm and right click it and select Backup in case you want to apply changes to image and keep it in viBoot available for later use, or click Delete if you want to discard changes and then remove / unmount the image. Do not delete the vm using Hyper-V Manager!
-- OR --
4.2) Select Create a Differential backup (in paid for version you also use Incremental backups, see this article to learn the difference) to apply the changes you made to image (small file, fast process). Select Create a Full backup if you want to create a new image (takes a bit longer, file size bigger). If you were just checking things and have nothing to save, select Discard changes. Click OK:
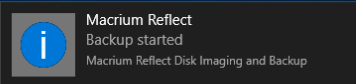
4.3) The image file will be created, you will get a notification:
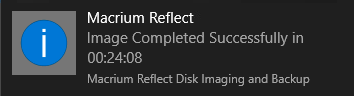
4.4) Installing some updates to my Windows 10 image it only took Macrium a minute and a half to make the differential image:You will get a few notifications on your desktop throughout the process. Below screenshots from creating a Full backup from one of my Windows 10 installs:
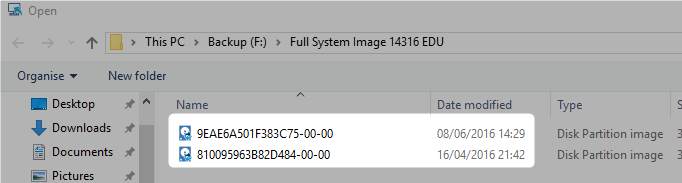
4.5) Macrium writes the new updated image to same folder where the original image is stored. If doing a full backup from viBoot vm, it's up to you if you want to keep both or delete the original one and keep just the updated image:The viBoot vm will work without issues as long as you do not delete it. When shut down the virtual machines will naturally not use any of your host resources.
You can create a viBoot / Hyper-V vm as soon as you have made a Macrium system image, then update it constantly, install software, add personal files and folders, and finally when you need the image to be restored to a computer, apply changes and restore it.
This way you can always have an up to date image with all Windows Updates and Upgrades.
4.6) All done! You can use the updated image to restore Windows to any machine. All additional software is there, in this case Office 2016 and PowerDirector, and Windows was upgraded from build 14316 in original system image to build 14352:
That's it! Happy computing :)
Kari
Macrium viBoot - Create Virtual Machine using Macrium Image
-
New #1
I'm looking forward to trying this out sometime, with my Base image(the one I made after a clean install, after I installed any OEM drivers I needed, such as Black Silk keyboard for my Fn keys and a few programs I knew I always will use).
-
-
New #3
Macrium viBoot allows you to take that system image, upgrade it to latest build (14361 was released just two hours ago!), apply the changes and save the image.
No more need to upgrade or clean install and reinstall all software, then create a new image. Also very practical way to add your personal data to the Macrium image.
You are welcome. This is an interesting concept.
-
New #4
Judging by their tweet, it looks that Macrium approves this tutorial :)
Tweet
— Twitter API (@user) View on TwitterLast edited by Kari; 10 Jun 2016 at 05:48. Reason: Short post, many typos :)
-
-
New #6
That's awesome Kari
Now all we need is one of the members on viBoot's dev team here, and more people using it, so they can catch any bugs, or tell us the work arounds, and reactivate development on it.
And for those that help, a free lifetime license , when it's finished, and becomes pay-to-play
-
-
-
-
Macrium viBoot - Create Virtual Machine using Macrium Image
How to Create Hyper-V Virtual Machine using Macrium Reflect System ImagePublished by Kari "Kalsarikänni" FinnCategory: Virtualization
03 Nov 2019


 Quote
QuoteTutorial Categories

Related Discussions
