

Information
Microsoft's cooperation with Canonical just took a giant leap. Will Cooke from Canonical announced new Hyper-V Quick Create Gallery virtual hard disk with pe-installed Ubuntu 18.04 LTS. Using Quick Create, users can set up an Ubuntu Generation 2 virtual machine in just a minute or two.
Will Cooke on Ubuntu Blog on September 17th, 2018:
Today were very pleased to announce that an optimised Ubuntu Desktop image is available from the Hyper-V gallery. This will give an optimum experience when running Ubuntu Desktop as a guest on a Windows 10 Pro desktop host. From the Ubuntu Report data we know that a lot of people are using Ubuntu as a virtual machine, and so we want to make that experience as seamless as possible.
The Quick Create Gallery Ubuntu VM uses XRDP upstream to add support for Hyper-V Enhanced Session Mode. Everything is pre-installed, the new Ubuntu VM will allow enhanced mode on first boot.
This tutorial will show how you can set up a Generation 2 Ubuntu VM in a few easy steps.
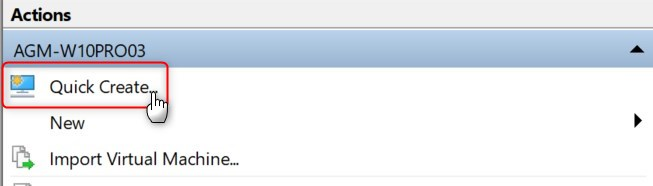
1.1) In Hyper-V Manager, select Quick Create on Actions pane:
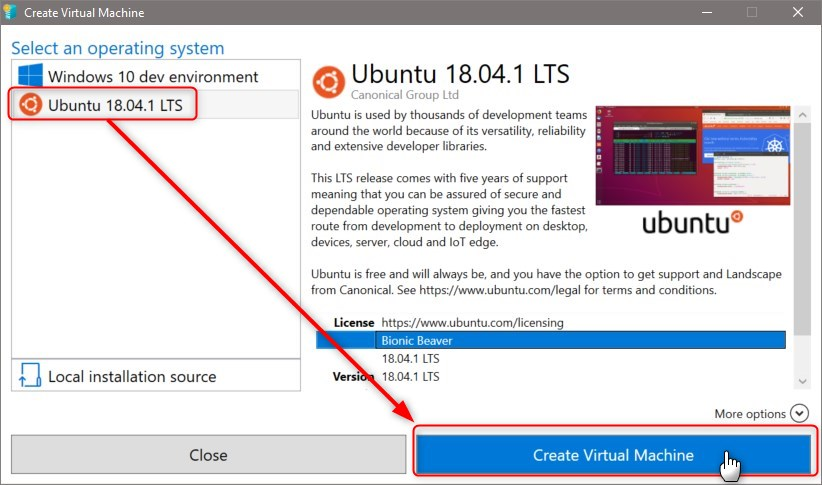
1.2) Select Ubuntu , click Create virtual machine:
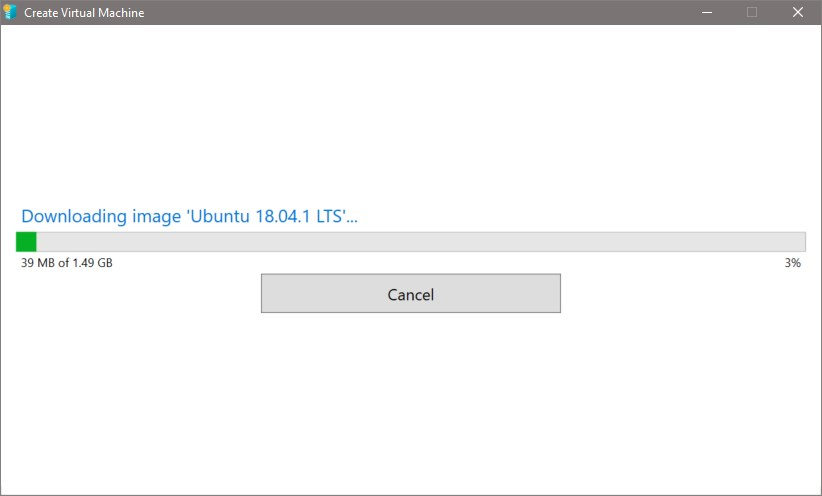
1.3) Pre-made virtual hard disk will be downloaded (1.5 GB):
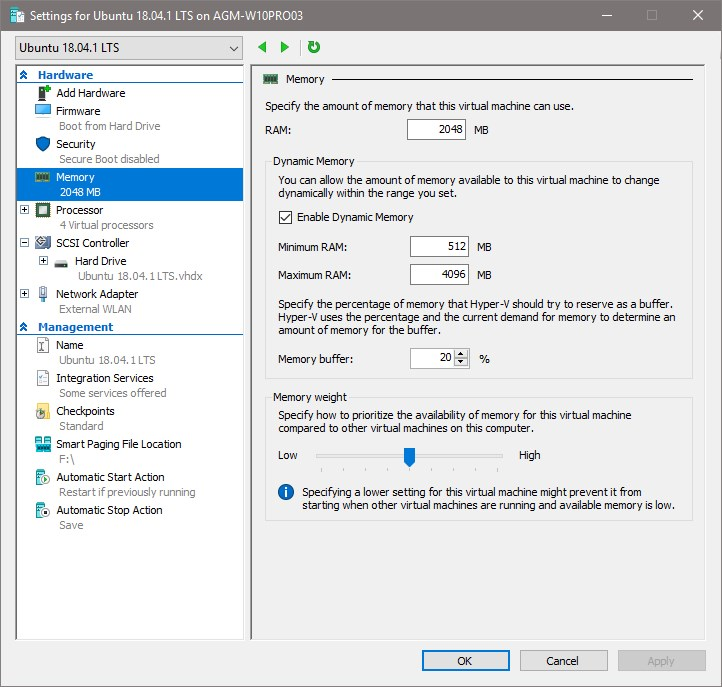
1.4) After the download, the file integrity will be verified and virtual machine created. It will be created using dynamic memory, with 2 GB RAM to start with. Hyper-V sets number of virtual processors automatically, based on what your host hardware allows. Click Edit settings to change settings, or click Connect:
1.5) Accepting default settings, you might be surprised how much of host RAM virtual machine's dynamic memory will consume after a few minutes use. In my case, I had to reduce the max RAM allowed to 4 GB after noticing that when browsing Ten Forums on Ubuntu VM, it suddenly used over 8 GB RAM when nothing else than browser with a few tabs was running.
Before setting lower max RAM, the VM was constantly using close to 8 GB. When left idle, it settled to 7,662 MB, over 7.5 GB, and remained there constantly as long as VM was idle:
(Click screenshot to pop out, click again to enlarge.)
2.1) Start the virtual machine.
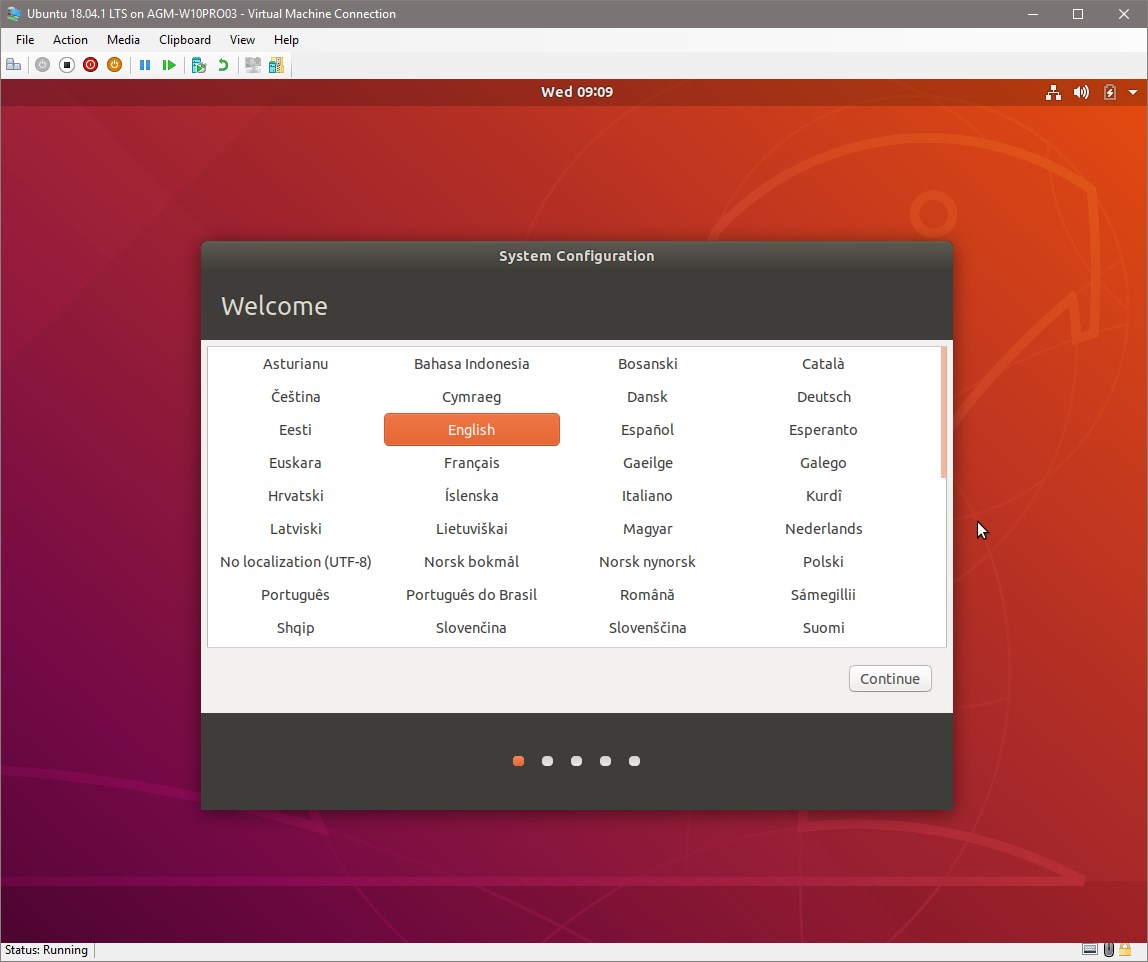
2.2) Select OS language, keyboard layout and time zone:
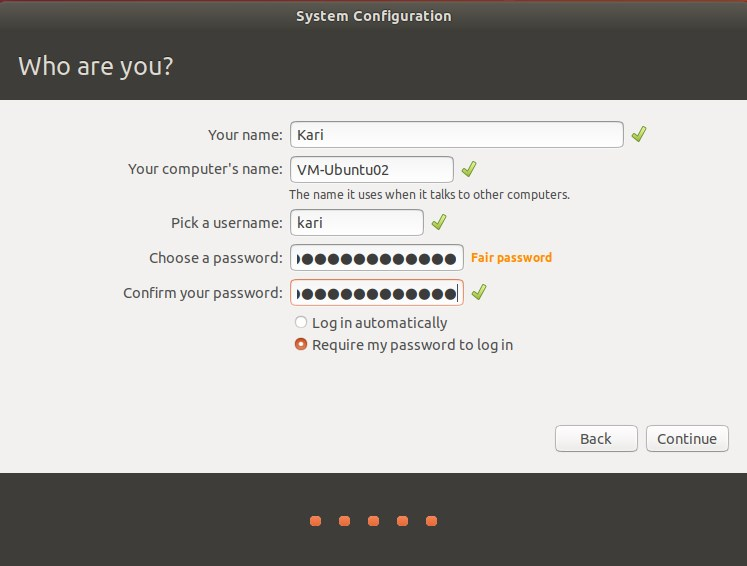
2.3) Set up your user account:
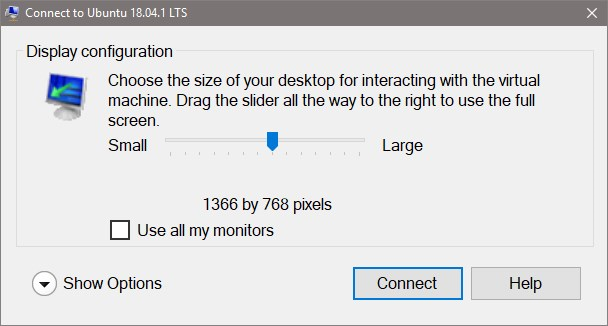
2.4) Setup will take a minute or two. When done, Enhanced Session Mode prompt will be shown. Click Connect:
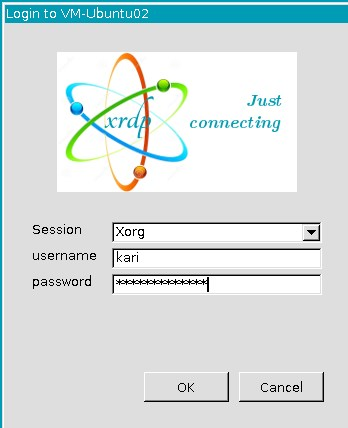
2.5) Sign in:
2.6) That's it! I was on Ubuntu desktop about three minutes after starting the VM first time, using enhanced mode:
Happy computing, geeks!
Kari
Related Tutorials
- How to Enable or Disable Windows Subsystem for Linux (Bash on Ubuntu) in Windows 10
- How to Quick Create a New Hyper-V Virtual Machine
- How to create a virtual machine repository for Hyper-V Quick Create
- How to Create and Use Hyper-V Checkpoints in Windows 10
- How to Create VHD of Windows 10 Installation and Use in Hyper-V
- How to Install Windows 10 as Virtual Machine in VirtualBox
- How to Add or Remove a Physical Hard Disk to Hyper-V Virtual Machine
- How to See if Hyper-V Virtual Machine is Generation 1 or Generation 2
- How to Create a Hyper-V Manager shortcut in Windows 10
- How to Import Hyper-V Virtual Machines in Windows 10
- How to Export Hyper-V Virtual Machines in Windows 10
- How to Change Default Folder to Store Hyper-V Virtual Machines
- How to Change Default Folder to Store Hyper-V Virtual Hard Disks
- How to Turn On or Off Hyper-V Enhanced Session Mode in Windows 10
- How to Enable or Disable BSOD Crash on Ctrl+Scroll Lock in Hyper-V Virtual Machine
- How to Change Display Scaling Zoom Level of Hyper-V Virtual Machine in Windows 10
Hyper-V Quick Create - Setup Ubuntu Linux virtual machine
-
New #1


I get this in enhanced mode (only)
strange, strange.. I must investigate
or may be you have the solution
-
New #2
If it is using that much RAM, something is wrong. This is basically the same development that I posted a guide a while back on how to install ubuntu 18.04 on enhanced mode and it happily ran inside 4GB (even inside 2GB). There must be some kind of memory leak.
-
New #3
I get that every now and then, too, and found out it is my own fault.
Windows usernames are not case sensitive. I can use KAri, kari, kARI and so on instead of Kari. However, Linux usernames are case sensitive and by default all lowercase.
When I get that error, it's always because I am so used to write my username as Kari in Windows that I wrote it with uppercase first letter. I just edit the username I entered, replacing the uppercase first letter K with lower case k.
Might not be your case, but after seeing that error some 20 times and having fixed it every time with this simple way, replacing one letter in username, I thought it's worth to tell.
Also, check the password. That error usually means authentication error.
Kari
-
-
New #5
thanks kari
entering a different (non existing) user name give a different error

-
-
New #7
I have not tested it yet, but there was a bug affecting things if you had printers ticked in the Hyper-V enhance menu popup menus.
Hi @Kari, I remember getting memory problems with ububtu a while back if I set memory to dynamic. I always uncheck dynamic memory.
Maybe that is causing you a problem?
-
-
-
Hyper-V Quick Create - Setup Ubuntu Linux virtual machine
How to use Hyper-V Quick Create and pre-installed Ubuntu virtual hard disk to setup Ubuntu Linux virtual machinePublished by Kari "Kalsarikänni" FinnCategory: Virtualization
19 Sep 2018


 Quote
Quote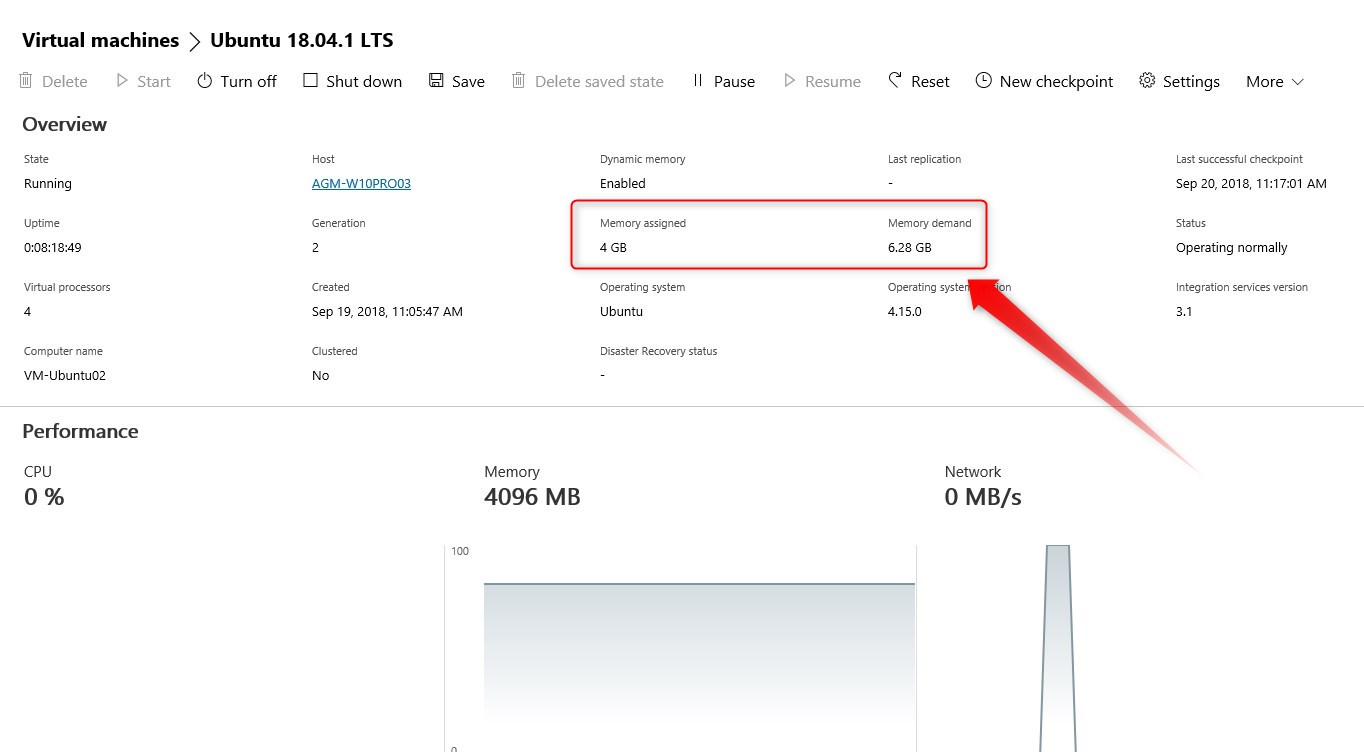
Tutorial Categories

Related Discussions
