

How to Enable or Disable NTFS File Encryption in Windows
The Encrypting File System (EFS) is the built-in encryption tool in Windows used to encrypt files and folders on NTFS drives to protect them from unwanted access. EFS enables transparent encryption and decryption of files for your user account by using advanced, standard cryptographic algorithms. Any individual or app that doesn't possess the appropriate file encryption key cannot open any encrypted files and folders. Encryption is the strongest protection that Windows provides to help you keep your individual files and folders secure.
This tutorial will show you how to enable or disable NTFS file encryption for all users in Windows 7, Windows 8, Windows 10, and Windows 11.
You must be signed in as an administrator to enable or disable NTFS file encryption.
If you disable NTFS file encryption, any currently encrypted files will still remain encrypted.
Contents
- Option One: Enable or Disable NTFS File Encryption in Local Group Policy Editor
- Option Two: Enable or Disable NTFS File Encryption using a REG file
EXAMPLE: NTFS file encryption disabled
The Local Group Policy Editor is only available in the Windows 7/8/10 Pro, Windows 7/8/10 Enterprise, and Windows 10 Education editions.
All editions can use Option Two below.
1 Open the Local Group Policy Editor.
2 Navigate to the location below In the left pane of the Local Group Policy Editor. (see screenshot below)
Computer Configuration\Administrative Templates\System\Filesystem\NTFS
3 In the right pane of NTFS in the Local Group Policy Editor, double click/tap on the Do not allow encryption on all NTFS volumes policy to edit it. (see screenshot above)
4 Do step 5 (enable) or step 6 (disable) below for what you would like to do.
A) Select (dot) Not Configured or Disabled, click/tap on OK, and go to step 7 below. (see screenshot below)
Not Configured is the default setting.
7 When finished, close the Local Group Policy Editor.
8 Restart the computer to apply.
The downloadable .reg files below will add and modify the DWORD value in the registry key below.
HKEY_LOCAL_MACHINE\SYSTEM\CurrentControlSet\Policies
NtfsDisableEncryption DWORD
(delete) = Enable
1 = Disable
1 Do step 2 (enable) or step 3 (disable) below for what you would like to do.
This is the default setting.
A) Click/tap on the Download button below to download the file below, and go to step 4 below.
Enable_NTFS_file_encryption.reg
Download
A) Click/tap on the Download button below to download the file below, and go to step 4 below.
Disable_NTFS_file_encryption.reg
Download
4 Save the .reg file to your desktop.
5 Double click/tap on the downloaded .reg file to merge it.
6 When prompted, click/tap on Run, Yes (UAC), Yes, and OK to approve the merge.
7 Restart the computer to apply.
8 You can now delete the downloaded .reg file if you like.
That's it,
Shawn Brink
Related Tutorials
- How to Encrypt Files and Folders with Encrypting File System (EFS) in Windows 10
- How to Decrypt Files and Folders Encrypted with EFS in Windows 10
- How to Find and List All Your EFS Encrypted Files in Windows 10
- How to Change or Remove Lock Icon on Encrypted Files and Folders in Windows 10
- Turn On or Off Show Encrypted or Compressed NTFS files in Color in Windows 10
- How to Enable or Disable Automatically Encrypt Files Moved to EFS Encrypted Folders in Windows
Enable or Disable NTFS File Encryption in Windows
-
New #1
Thank you so much, very useful feature. was looking for this long time. Every time i used to download something got encrypted, and could not play on my other PC/Laptop without decryption beforehead.
-
-
New #3
Hi . I have Windows 10 Home and these solutions do not work for me.
That option to encrypt a file or folder is grayed out .
How do I encrypt a sensitive text file with all my passwords on it ?
Thank you.
-
New #4
Hello John,
I'm afraid that Encrypting File System (EFS) is only availble in the Windows 10 Pro, Enterprise, and Education editions.
 Encrypt Files and Folders with EFS in Windows 10 | Windows 10 Tutorials
Luckily, there are plenty of free 3rd party file encryption programs out there to choose from.
-
New #5
-
New #6
If you would like something simple, the free program "7-Zip" includes a password protected folder encryption option. You could keep your .txt file in this encrypted folder.
https://www.7-zip.org/
-
New #7
Hi BRINK, I've been getting this popup on my W10 Pro system over the last couple of days but have no encryption in operation as far as I know, other than KeePass and such that I've used for ages. Clicking on the popup just makes it disappear. I now see that there is a new item in the System Tray with three courses of actionbut I'm none the wiser!
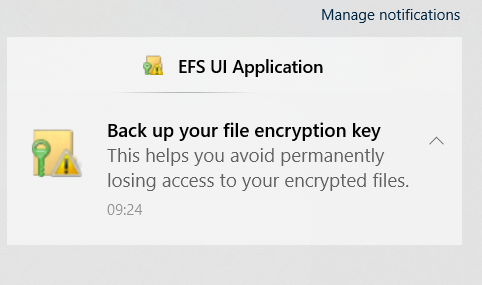
I'm nervous that any action I take may present problems. Could you please advise me on the right course of action? Thanks as always for your advice.
IainLast edited by Pacman23; 06 Aug 2020 at 03:32. Reason: Additional Info
-
New #8
Hi there.
Encryption on Home computers IMO is just an unnecessary and pointless exercise. Any sensitive documents would be stored on a secure server if it was commercially sensitive or if you work for an organisation such as CIA, Mossad etc.
I can see 100% no reason whatsoever for encrypting anything at all on a home computer --perhaps other Forum members reading this thread can enlighten me as to why.
If your workplace allows you to store sensitive documents / information locally on a PC or external device then I'd suggest they need to have a look at their own I.T practices -- this stuff should always be on secure servers whether you are working from home, use a work laptop or your own computer.
Cheers
jimbo
-
-
New #9
Yes, I think I understand that - I've no intention of encrypting anything on my pc (apart from passwords). My question was just how I should handle the message, as I don't, to my knowledge, have an encryption key that needs backing up but MS appears to think I do!
Iain

Enable or Disable NTFS File Encryption in Windows
How to Enable or Disable NTFS File Encryption in WindowsPublished by Shawn BrinkCategory: Security System
19 Aug 2023


 Quote
QuoteTutorial Categories

Related Discussions
