

How to Create a New Pool and Storage Space in Windows 10
Storage Spaces helps protect your data from drive failures and extend storage over time as you add drives to your PC. You can use Storage Spaces to group two or more drives together in a storage pool and then use capacity from that pool to create virtual drives called storage spaces. These storage spaces typically store two copies of your data so if one of your drives fails, you still have an intact copy of your data. If you run low on capacity, just add more drives to the storage pool.
You can create a simple, mirror (two-way or three-way), or parity storage space:
- Simple spaces are designed for increased performance, but don't protect your files from drive failure. They're best for temporary data (such as video rendering files), image editor scratch files, and intermediary compiler object files. Simple spaces require at least two drives to be useful.
- Mirror spaces are designed for increased performance and protect your files from drive failure by keeping multiple copies. Two-way mirror spaces make two copies of your files and can tolerate one drive failure, while three-way mirror spaces can tolerate two drive failures. Mirror spaces are good for storing a broad range of data, from a general-purpose file share to a VHD library. When a mirror space is formatted with the Resilient File System (ReFS), Windows will automatically maintain your data integrity, which makes your files even more resilient to drive failure. Two-way mirror spaces require at least two drives, and three-way mirror spaces require at least five drives.
- Parity spaces are designed for storage efficiency and protect your files from drive failure by keeping multiple copies. Parity spaces are best for archival data and streaming media, like music and videos. This storage layout requires at least three drives to protect you from a single drive failure and at least seven drives to protect you from two drive failures.
See also:
This tutorial will show you how to use Storage Spaces to create a new pool and storage space in Windows 10.
You must be signed in as an administrator to create a new pool and storage space.
Issue with some Storage Spaces configurations after updating to Windows 10, version 2004 and Windows Server, version 2004 | Microsoft Support
Workaround and recovery steps for issue with some Parity Storage Spaces after updating to Windows 10, version 2004 and Windows Server, version 2004 | Microsoft Support
Contents
- Option One: Create a New Pool and Storage Space in Settings
- Option Two: Create a New Pool and Storage Space in Control Panel
This option is only available starting with Windows 10 build 21296.
1 Add or connect the drives that you want to group together with Storage Spaces.
These drives can be internal or external hard drives, or solid state drives. You can use a variety of types of drives with Storage Spaces, including USB, SATA, and SAS drives.
The number of required drives will depend on if you want to create a simple, mirror (two-way or three-way), or parity storage space. See info at the top of this tutorial for how many drives will be required.
2 Open Settings, click/tap on the System icon.
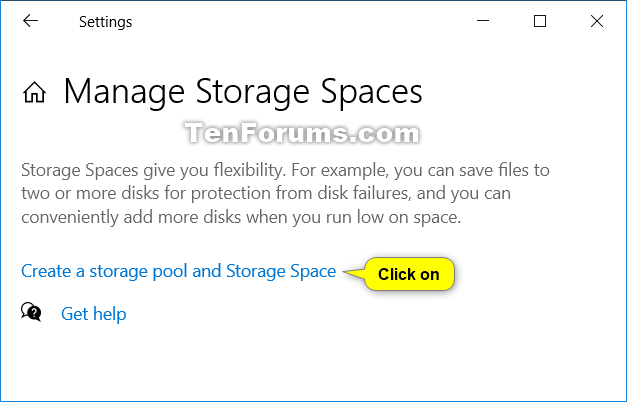
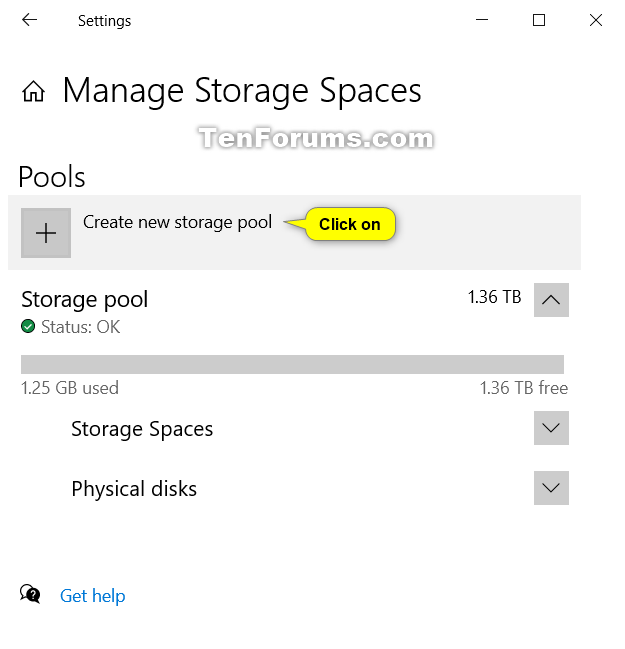
3 Click/tap on Storage on the left side, and click/tap on the Manage Storage Spaces link on the right side. (see screenshot below)
4 Depending on if you already have a storage pool or not, click/tap on either the Create a storage pool and Storage Space link OR Create new storage pool button. (see screenshot below)
5 Perform the following actions to create a new storage pool: (see screenshot below)
A) Type a name you want to use for this storage pool.
B) Select (check) the available disk(s) you want to add to this storage pool.
C) Click/tap on Create when ready.
6 Perform the following actions to create a Storage Space for the storage pool: (see screenshot below)
A) Type a name you want to use for this Storage Space.
B) Select and enter a maximum pool usage size (ex: "1.36 TB") you want to use from the available Pool capacity.
C) Select a Simple, Two-way mirror, Three-way mirror, Parity, or Dual parity resiliency type you want to use for this storage space.
D) Click/tap on Create when ready.
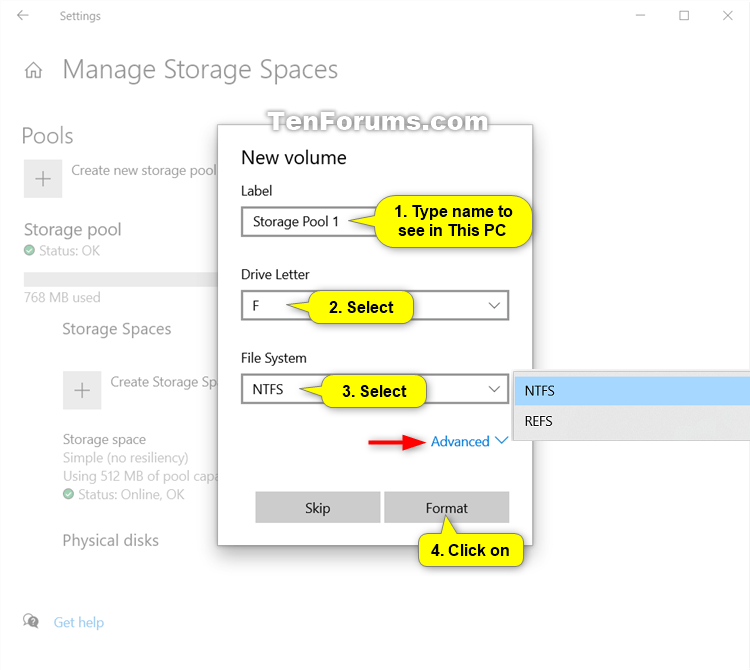
7 Perform the following actions to create a volume for the storage pool: (see screenshots below)
A) Type a name you want to use for this volume.
This name is what you will see in This PC.
B) Select an available drive letter (ex: "F") you want assigned to this volume.
C) Select a file system (ex: "NTFS") you want for this storage space.
The ReFS file system will only be available to select if enabled.
You can click/tap on the Advanced link for more options if wanted.
D) Click/tap on Format when ready.
8 You can now close Settings if you like.
9 This storage space (virtual drive) will now show up as a drive (ex: "F") in This PC for users to use like any other drive on the PC. (see screenshot below)
1 Add or connect the disk(s) that you want to create a new pool and storage space with.
These disk drives can be internal or external hard drives, or solid state drives. You can use a variety of types of drives with Storage Spaces, including USB, SATA, and SAS drives.
The number of required drives will depend on if you want to create a simple, mirror (two-way or three-way), or parity storage space. See info at the top of this tutorial for how many drives will be required.
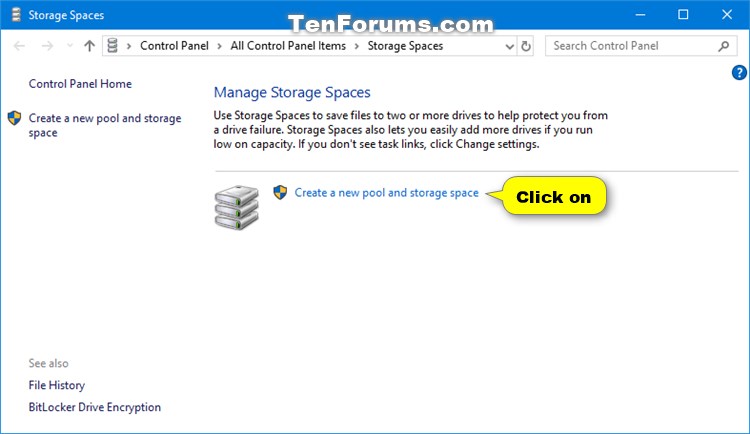
2 Open the Control Panel (icons view), and click/tap on the Storage Spaces icon. (see screenshot below)
3 Click/tap on the Create a new pool and storage space link. (see screenshots below)
4 Click/tap on Yes if prompted by UAC.
5 Select (check) the available disk(s) you want to add to the new storage space to create a storage pool, and then select Create pool. (see screenshot below)
Windows will permanently delete all partitions and files on selected formatted drives (disks).
Be sure to back up anything you do not want to lose to another disk first.
6 Enter a name (ex: "Storage space") you want for this storage space. (see screenshot below step 10)
7 Select a drive letter (ex: "E") you want for this storage space. (see screenshot below step 10)
8 Select a file system you want for this storage space. (see screenshot below step 10)
REFS will only be available if previously enabled.
Enable or Disable ReFS File System in Windows 8.1 and Windows 10 - Windows 10 Hardware Drivers Tutorials
9 Select a Simple, Two-way mirror, Three-way mirror, or Parity resiliency type you want for this storage space. (see screenshot below step 10)
10 Enter the maximum size you want this storage space can reach, and click/tap on Create storage space. (see screenshot below)
11 The new storage pool and storage space will now be created. (see screenshot below)
The physical drives are the disks you selected in step 5 above.
12 This storage space (virtual drive) will now show up as a drive (ex: "E") in This PC for users to use like any other drive on the PC. (see screenshot below)
That's it,
Shawn
Related Tutorials
- How to Create Storage Spaces Shortcut in Windows 10
- How to Add Drives to Storage Pool for Storage Spaces in Windows 10
- How to Rename Physical Drive in Storage Pool for Storage Spaces in Windows 10
- How to Create a Storage Space for Storage Pool in Windows 10
- How to Change Storage Space in Storage Pool in Windows 10
- How to Delete a Storage Space from Storage Pool in Windows 10
- How to Remove Drive from Storage Pool for Storage Spaces in Windows 10
- How to Rename Storage Pool for Storage Spaces in Windows 10
- How to Optimize Drive Usage in Storage Pool for Storage Spaces in Windows 10
- How to Upgrade Storage Pool for Storage Spaces in Windows 10
- How to Delete a Storage Pool for Storage Spaces in Windows 10
Create a New Pool and Storage Space in Windows 10
-
New #1
Hi Shawn, an interesting challenge might be a tutorial on transferring a storage pool from one PC to another - and indeed whether it's actually possible. Example thread:
Reconnect Storage Spaces Drives to New Install Win 10 Pro - Windows 10 Forums
What do you think? A quick search on the internet shows nothing that's very clear.
-
-
New #3
Again, another great tutorial. I'd like to pass along a few related bits n pieces as I just recently got into Storage Spaces which I'm using in lieu of my motherboard's hardware RAID.
There is a very nice 'side' benefit to Storage Spaces not readily apparent. The one I stumbled upon is that if you have created/saved a Windows System Image [Control Panel; Backup & Restore (Windows 7)] on the Storage Space 'Drive' and you ever need to perform a system recovery using the image file, it is very easy to access the image folder/files while using a System Repair Disk. Don't think it would be that easy [or even possible?] with a hardware RAID.
Did some experimenting with 'what if' there was a computer failure and/or single drive failure while using a Two-way Mirror. I physically removed one of the 2.5" SSD's used in the Mirror from my Windows 10 desktop and attached to my Windows 10 laptop by using a USB adapter cable for SATA drives. The drive was automatically detected as a USB device and I was able to open the drive and access all the files from Windows. The drive did NOT appear in Disk Management and you could not 'Eject' the drive using Windows either. Couple of other 'notes'...
1] The drive did appear in Device manager, but with no Volume Information
2] After navigating to Control Panel; Storage Spaces it showed my desktop Storage Pool configuration and detailed the two physical drives used in the desktop to build the Mirror. It noted one was 'missing' from the pool.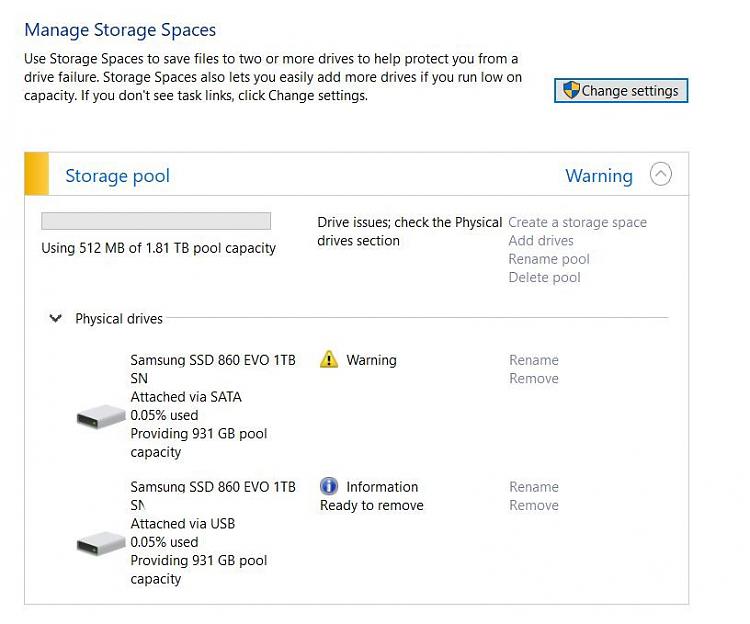
In doing all of this I was mainly interested in the what/how I would be able to quickly access my data from a 'broken' desktop system. VERY easy!
-
-
-
New #6
Hi Shawn, seems few here use Storage Spaces ... what's hard to find is anything clear about how to recover from a single drive failure in configurations which should withstand that.
I found
Repairing Storage Spaces After a Drive Failure | Murray's Blog
when considering this thread:
Storage Pool Failure:Change Settings not enabling Physical drive optio
A challenge might be a tutorial dealing with the procedure to recover from it, plus a suggestion on detecting drive degradation (as I mention in that thread- the easy bit).
-
New #7
Hello mate,
Yeah, I don't think many use Storage Spaces considering the size of drives these days. I never trust any software way of combining disks like this.
It may be a bit since I don't use Storage Spaces and have to get back up to speed, but I'll see if I may be able to come up with something.
Create a New Pool and Storage Space in Windows 10
How to Create a New Pool and Storage Space in Windows 10Published by Shawn BrinkCategory: Hardware & Drivers
23 Jan 2021


 Quote
Quote
Tutorial Categories

Related Discussions
