

How to Update to Latest Version of Windows 10 using Windows 10 Update Assistant
If you have an older version of Windows 10 installed, you can use the Windows 10 Update Assistant to directly update to the latest version of Windows 10 instead of slowly updating via Windows Update.
You can check which version of Windows 10 your device is currently running to see whether you have the latest version or not.
For how, see: How to Find Windows 10 Version Number
See also: Windows 10 release information - current branch version, build history
If you have the latest version number of Windows 10 currently installed, then the Windows 10 Update Assistant will only show you Thank you for updating to the latest version of Windows 10.
If you don't have the latest version number of Windows 10 currently installed, then the Windows 10 Update Assistant will show you Update to the latest version of Windows 10 with the option to Update Now.
This tutorial will show you step by step on how to directly update to the latest version of Windows 10 using the Windows 10 Update Assistant.
You must be signed in as an administrator to run the Windows 10 Update Assistant.
You can now upgrade to Windows 10 version 22H2 with the Windows 10 Update Assistant.
Here's How:
1 If you have not already, you will need to disable or uninstall any 3rd party AV or security program you have installed first to prevent it from interfering with the upgrade to Windows 10. You can enable or reinstall it after Windows 10 has finished upgrading.
2 While signed in to Windows 10 with an administrator account, go to the Microsoft Software Download site, and click/tap on the Update now button to download the Windows 10 Update Assistant. (see screenshot below)
3 Save the Windows10Upgrade9252.exe (or latest version) file to your desktop, and run it.
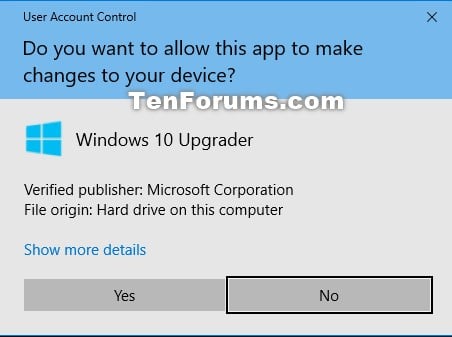
4 Click/tap on Yes if prompted by UAC. (see screenshot below)
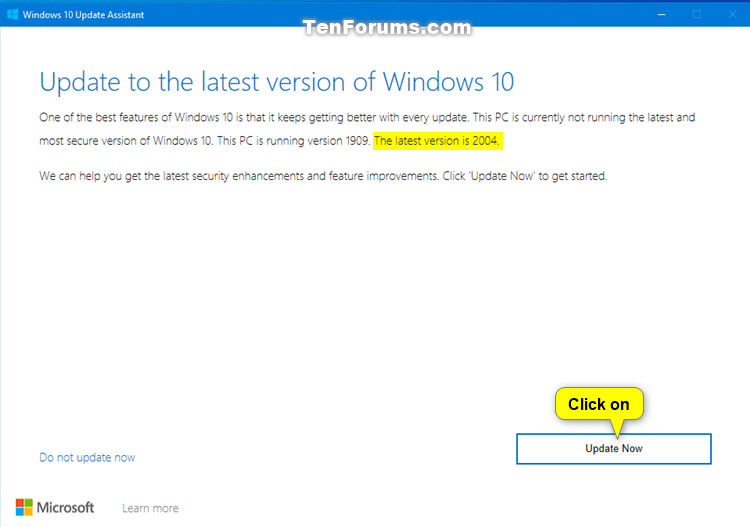
5 If there is a newer version (ex: 2004) of Windows 10 available than the version you are currently running, click/tap on the Update Now button. (see screenshot below)
If you already have the latest version number of Windows 10 currently installed, then the Windows 10 Update Assistant will only show you Thank you for updating to the latest version of Windows 10.
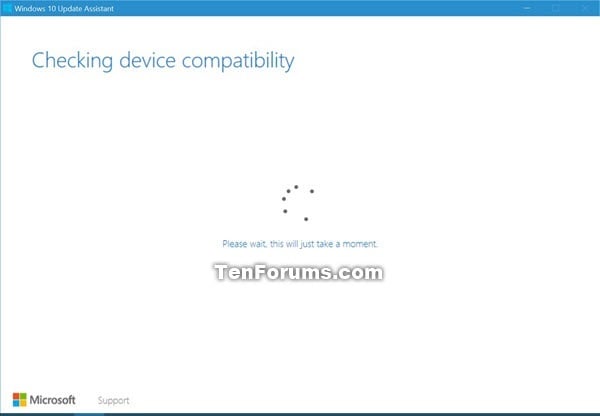
6 Windows 10 Update Assistant will now check your device compatibility. (see screenshot below)
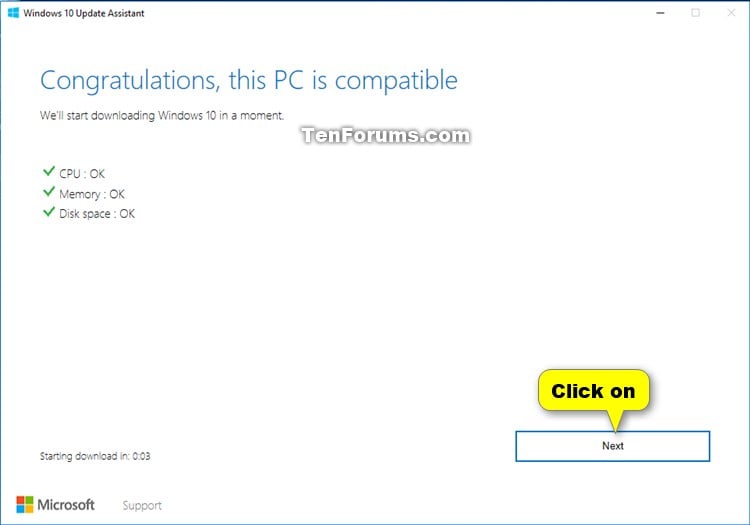
7 If your PC is compatible, click/tap on Next to continue. (see screenshot below)
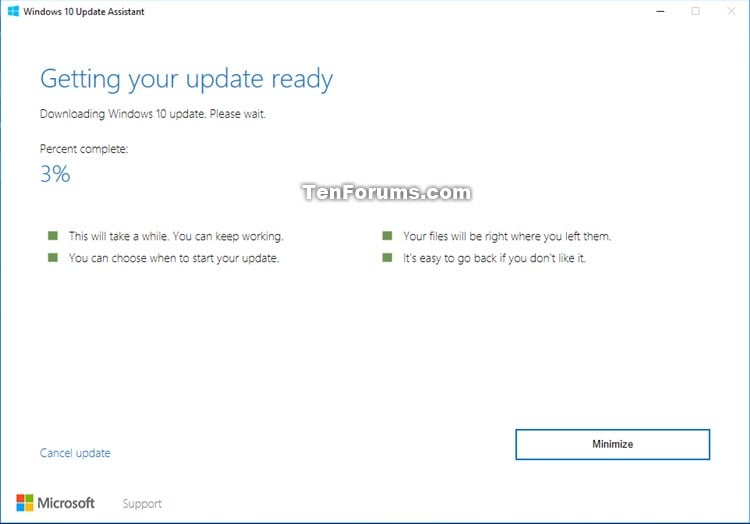
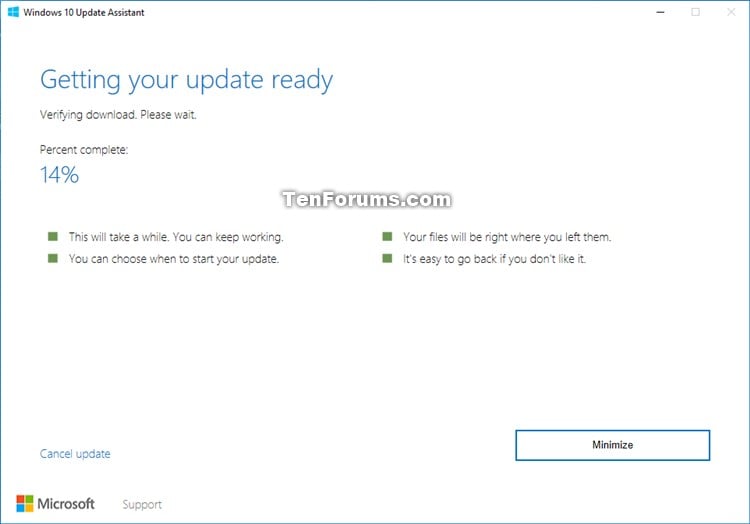
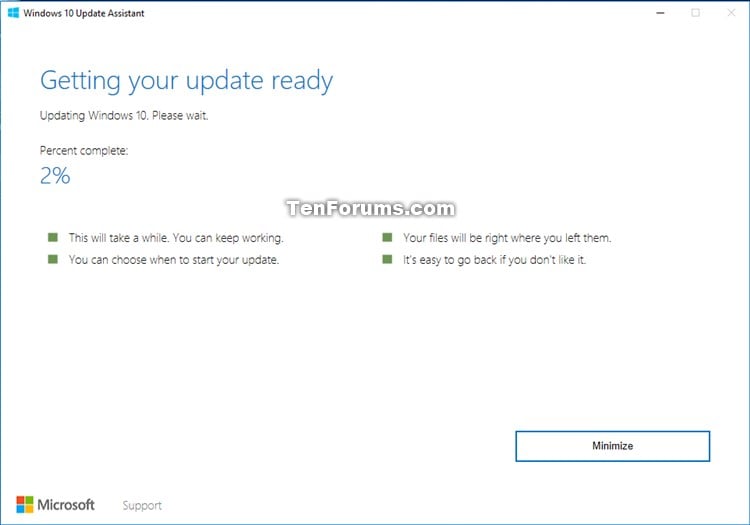
8 Windows 10 Update Assistant will now start downloading, verifying, and updating to the latest version of Windows 10. (see screenshots below)
This will take a while to finish.
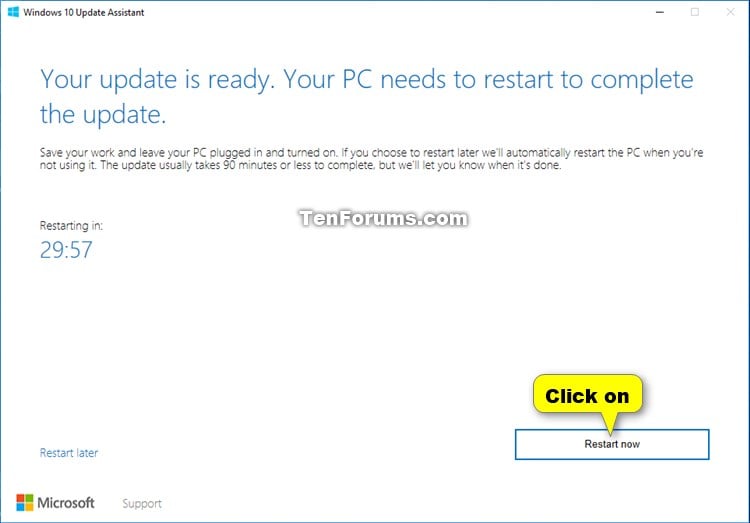
9 When your update is ready, click/tap on the Restart now button to complete the update. (see screenshot below)
Be sure to save and close all other open windows first. Your computer will automatically restart in 30 minutes. You can click/tap on the Restart later link to continue later if needed.
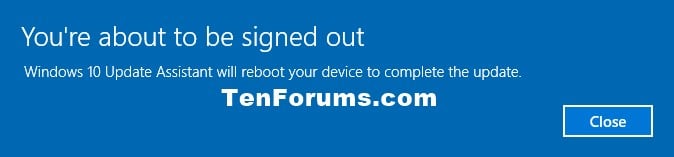
10 You will now see the message below letting you know that your PC is about to reboot. (see screenshot below)
11 You PC will now restart to complete the update. (see screenshots below)
This will take a while to finish, and your PC will restart a few times.
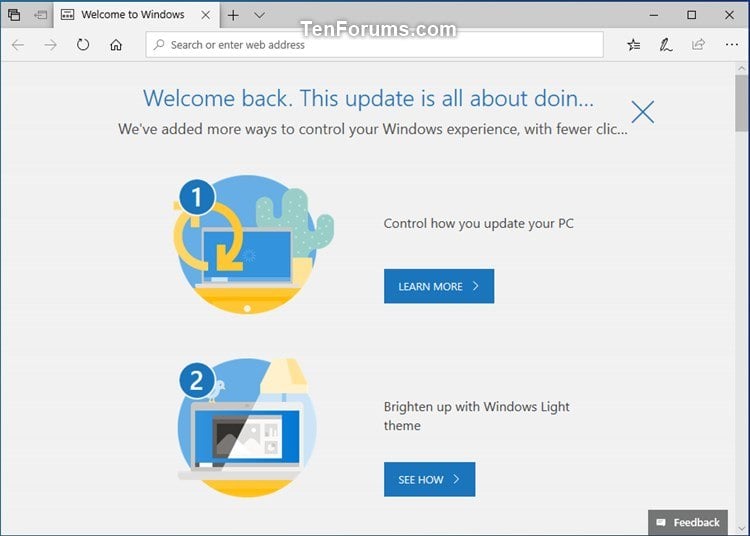
12 After the update has finished, you can sign in to your account. (see screenshots below)

13 You will see the Windows welcome experience in Microsoft Edge that you can explore or close. (see screenshot below)
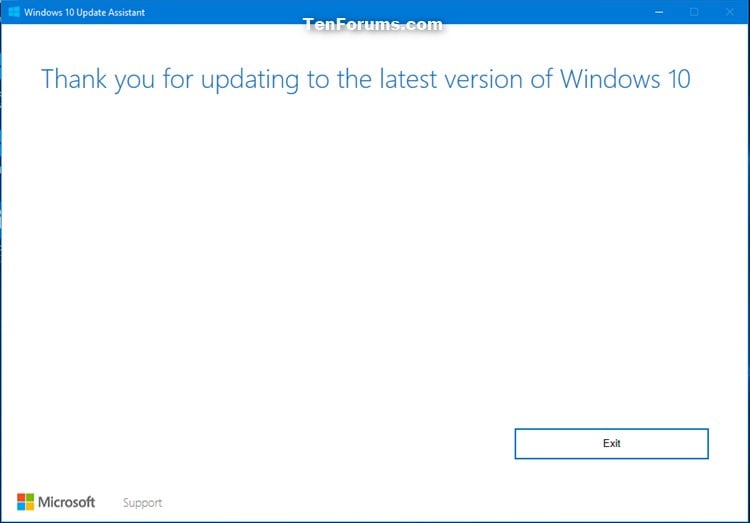
14 Click/tap on Exit in the Windows 10 Update Assistant. (see screenshot below)
When you install the Windows 10 Upgrade Assistant, it will create a C:\Windows10Upgrade folder. If you like, you can uninstall Windows 10 Upgrade Assistant to remove this folder.
How to Delete Windows10Upgrade Folder in Windows 10
That's it,
Shawn
Related Tutorials
- How to Delete Windows10Upgrade Folder in Windows 10
- How to Check for and Install Windows Updates in Windows 10
- How to Clean Install Windows 10
- How to Upgrade to Windows 10
- How to Download a Windows 10 ISO File
- How to Find Windows 10 Version Number
Update to Latest Version of Windows 10 using Update Assistant
-
New #1
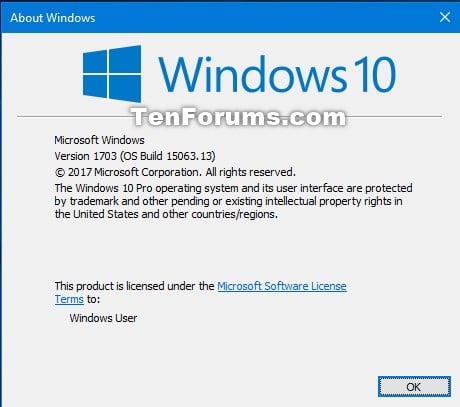
Windows 10 Creators Update version 1703 build 15063.13 now available via Windows 10 Update Assistant.
-
New #2
Total time is under 1 hour and you may lose several items from the desktop. I lost the Icon for Solitaire but everything else was properly located. Also the Search box is now a Magnifying glass.
-
New #3
how big download size is this update?
can we guarantee sharing of update without other local pc on my lan, so we don't need to download same update for each pc?
-
New #4
-
New #5
Is this the proper iso name?
-Windows10_InsiderPreview_Client_x64_en-us_15063.iso
What about if you use the upgrade assistant?
How big is it to download the update?
Is there a way to block the internet access for other pcs, so it is forced to use the downloaded update from one pc?
===
I downloaded this
Windows10_InsiderPreview_Client_x64_en-us_15063.iso
and created a bootable usb and ran it within windows 10, and it seems to want to do a new installation rather than an update.
Is this normal?Last edited by madmax2; 16 Apr 2017 at 21:31.
-
New #6
You can use that one, yes. It is the same as the Media Creation Tool creates, build 15063 is the final build.
About the same download size, maybe 100-200 MB less.What about if you use the upgrade assistant?
How big is it to download the update?
Not that I know ofIs there a way to block the internet access for other pcs, so it is forced to use the downloaded update from one pc?
===
Yes. As long as you run setup.exe from within the existing Windows. One of the first questions you will get is what you want to keep, and the default answer is to keep everything.I downloaded this
Windows10_InsiderPreview_Client_x64_en-us_15063.iso
and created a bootable usb and ran it within windows 10, and it seems to want to do a new installation rather than an update.
Is this normal?
-
New #7
-
-
-
New #9
I am tempted to do the update to Creators update Via "Update now" using installer Windows10Upgrade9252.exe. My new Windows 10 came with Version 1607, is running great. I got it 2 Saturdays ago. About 4 days after I started using it, I got the screen from MS about privacy settings, the screen also said that the upgrade would come later. I think this PC was build in February 2017.
I don't know if I should wait or get it over with. It makes me a little restless thinking that if I get the update Via Windows updates, it can come at a time when I cant baby sit it. According to this list from Dell my W10 is ready for Creators update.
http://www.dell.com/support/article/ni/es/nibsdt1/SLN297954/computers-tested-for-upgrade-to-windows-10-creators-update?lang=EN
Can that link be trusted? My speed is about 7MB. I reckon at that speed downloading the 4.4 GB file from Microsoft could take about an hour and 15 minutes. I have never downloaded anything larger than about 1.3GB. I live in a country where electricity can break at any time, and lose internet connection. If it happens while the file is being downloaded, can I cancel the download with no harm done to the PC?
Another question. If the download is done successfully and the process gets to the "Verifying download" screen, by that time, does it matter if I lose electricity and/or internet connection? In other words, can I lose electricity/internet after I get to the the Verifying screen and the upgrade process would continue without problem. I like to know this since I don't see a Cancel button after the "Updating Windows 10. Please wait" screen. Also, my W10 Home is in Spanish. I guess that doesn't matter. :)
Bo
Update to Latest Version of Windows 10 using Update Assistant
How to Update to Latest Version of Windows 10 using Windows 10 Update AssistantPublished by Shawn BrinkCategory: Installation & Upgrade
18 Oct 2022


 Quote
QuoteTutorial Categories

Related Discussions
