Brink,
Updated 17th May 2022
This post has been written to assist people who can only boot from Fat32. Fat32 can only cope with files up to 4GB.
The latest versions of Windows ISOs downloaded using
Download Windows 10 ISO File [Option 5 - TechBench] -TenForumsTutorials
contain install.wim files that are bigger than 4GB and which cannot therefore be copied onto a Fat32 USB.
[My problem computer, that boots from Fat32 only, is a Chuwi tablet-with-keyboard. My newest proper computers are both happy to boot from exFat / NTFS but the least capable computer becomes the limiting factor in this situation.]
Dell provides procedures for coping with this situation
Windows 10 ISO contains WIM file that is big for FAT32 file system - Dell
When the install.wim file is bigger than 4GB so you cannot copy ISO contents onto a Fat32 drive using normal methods, Dell suggest1 Extracting a single-Edition version of install.wim, or
2 Splitting Install.wim into Fat32-sized chunks.
Their first method no longer produces an install.wim less than 4GB but their second method does.
I have built on Dell's second procedure to take it from a downloaded ISO file through to completion, a finished InstallUSB.
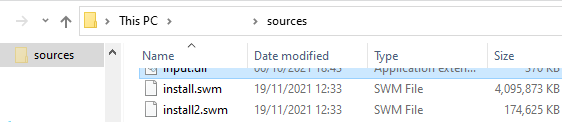
1 Extract the ISO's install.wim into .swm filesIn File explorer, mount the ISO by double-clicking on it, read its drive letter then use this command to extract .swm files from its install.wim file
- Use your mounted ISO's drive letter in place of my K:
- Use a convenient folder path on your computer in place of my D:\ISO
Code:
dism /Split-Image /ImageFile:"K:\sources\install.wim" /SWMFile:"D:\ISO\install.swm" /FileSize:4000
2 Make the USB2.1 Format the InstallUSB as Fat32.
- Formatting is not required if you are just using this procedure to update an existing InstallUSB with a later ISO.
- If formatting is required, I just format the USB with Fat32 in File explorer.
- A more comprehensive formatting procedure is described in
Steps 1-13 of Option 4 of this tutorial.
2.2 Mount the ISO in File explorer by double-clicking on it.
- I run File explorer twice so I can have the mounted ISO in its right-hand window and the InstallUSB in its left. I find it easier to avoid mistakes this way.
2.3 Drag the ISO contents from the mounted ISO to the InstallUSB - skip the file when it reports an error trying to copy the too-big original install.wim.
2.4 Drag the .swm files you made in step 1 to the Sources folder on the InstallUSB.
2.5 Optionally, if you intend to use the InstallUSB for storing other files as well, you can hide all its installation contents to guard against accidentally deleting any of them. They still work even when they are hidden.
- Select bootmgr in its root folder, right-click, Properties, Hidden, OK. {bootmgr likes to be treated on its own}
- Select everything else in its root folder including the subfolders, right-click, Properties, Hidden, OK. {when challenged, choose Apply changes to the selected items only}
3 Test the USB by booting from it in each computer in turn.
Denis


 Quote
Quote