

How to Install or Uninstall Miracast Connect Wireless Display Feature to Project to this PC in Windows 10
Miracast is a wireless technology your PC, laptop, or tablet can use to project your screen to wireless TVs, projectors, and streaming media players that also support Miracast. You can use this to share what youre doing on your PC, present a slide show, or even play your favorite game on a larger screen.
The Wireless Display optional feature adds the Connect app in Windows 10 allowing other devices on the same wireless network to use Connect to wireless display to wirelessly project to your computer with Miracast supported hardware.
The Projecting to this PC feature uses the Connect app to allow you to wirelessly project your Windows Phone, another PC, or Android devices to the screen of this PC, and use its keyboard, mouse, and other devices too.
See also: Get Wireless Display app for Xbox One in Microsoft Store
Starting with Windows 10 version 2004, the Connect app for wireless projection using Miracast is no longer installed by default, but is available as an optional feature.
This tutorial will show you how to install or uninstall the Wireless Display optional feature in Windows 10 for projecting to this PC by devices with Miracast Connect app.
You must be signed in as an administrator to install or uninstall the Wireless Display optional feature.
Your PC can only be projected to from devices on the same wireless private and domain networks, but not on public networks.
Contents
- Option One: Install or Uninstall Connect Wireless Display Feature in Settings
- Option Two: Install or Uninstall Connect Wireless Display Feature in Command Prompt
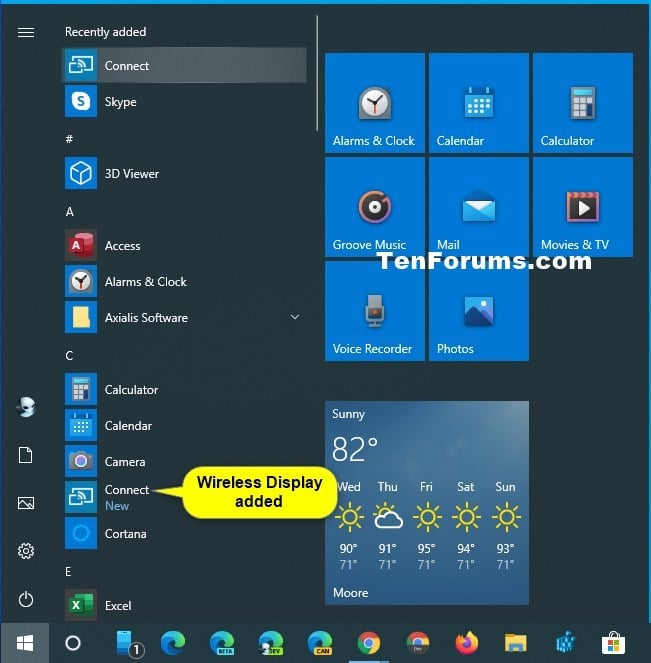
EXAMPLE: Connect app when Wireless Display optional feature is installed

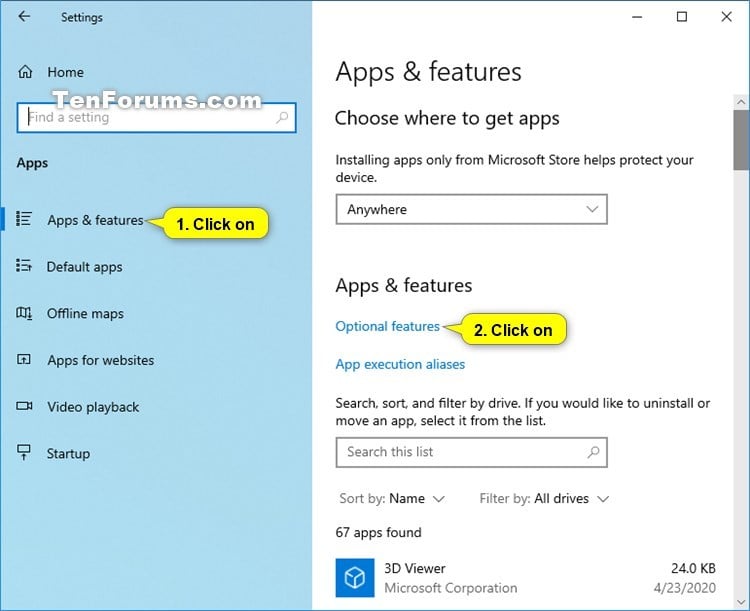
1 Open Settings, and click/tap on the Apps icon.
2 Click/tap on Apps & features on the left side, and click/tap on the Optional features link on the right side. (see screenshot below)
3 Do step 4 (install) or step 5 (uninstall) below for what you want to do.
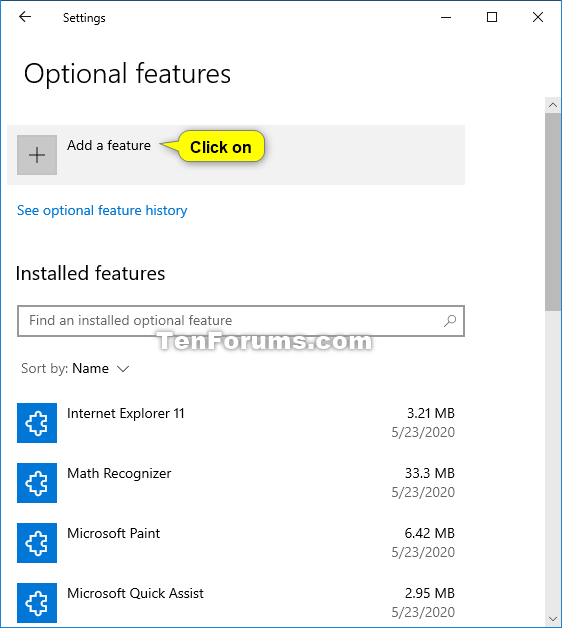
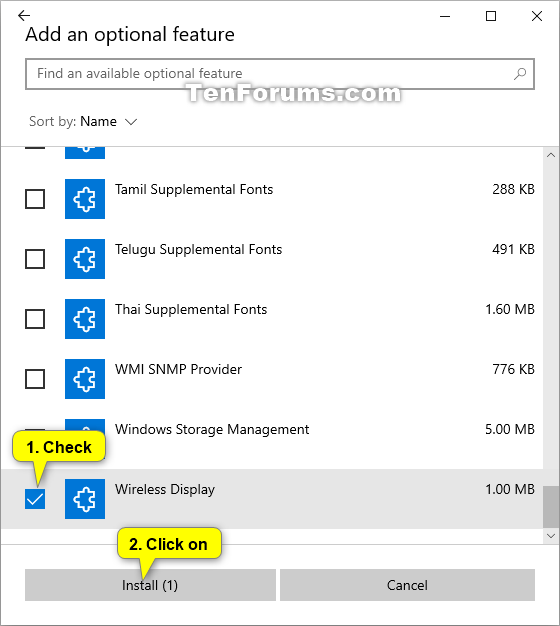
A) Click/tap on Add a feature. (see screenshot below)
B) Check Wireless Display, click/tap on Install, and go to step 6. (see screenshot below)
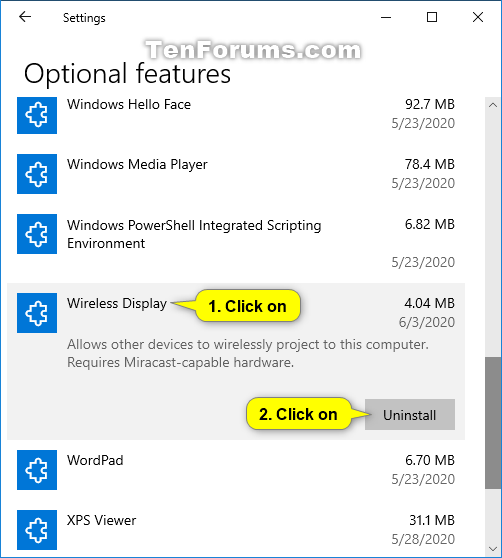
A) Scroll down, click/tap on Wireless Display, click/tap on Uninstall, and go to step 6. (see screenshot below)
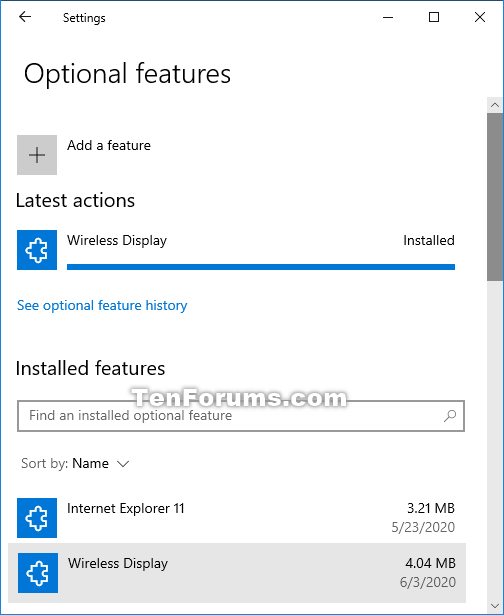
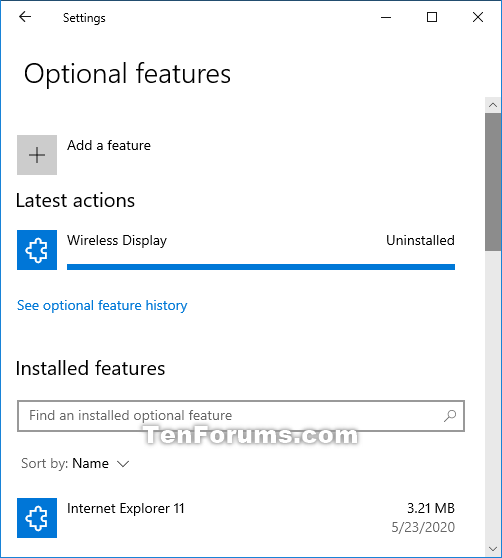
6 When the Wireless Display feature has been installed or uninstalled, you can close Settings if you like. (see screenshots below)

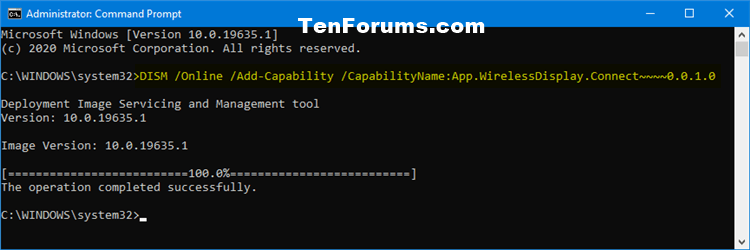
1 Open an elevated command prompt.
2 Copy and paste the command you want to use into the elevated command prompt, and press Enter. (see screenshots below)
(Install)
DISM /Online /Add-Capability /CapabilityName:App.WirelessDisplay.Connect~~~~0.0.1.0
OR
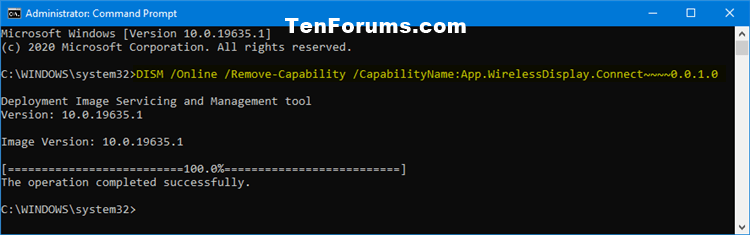
(Uninstall)
DISM /Online /Remove-Capability /CapabilityName:App.WirelessDisplay.Connect~~~~0.0.1.0
3 When the operation completed successfully, you can close the elevated command prompt if you like.
That's it,
Shawn
Related Tutorials
- How to Enable or Disable Projecting to this PC in Windows 10
- How to Turn On or Off Projecting to this PC in Windows 10
- How to Manage Optional Features in Windows 10
- How to Check if Windows 10 PC Supports Miracast
- How to Change when to Ask to Project to this PC in Windows 10
- How to Turn On or Off Projecting to this PC Only when Plugged In in Windows 10
- How to Turn On or Off Require PIN for Pairing when Projecting to this PC in Windows 10
- How to Connect to a Wireless Display with Miracast in Windows 10
- How to Project Android Phone to Screen on Windows 10 PC
- How to Project to this PC from Windows 10 Mobile Phone
- How to Create a Connect Wireless Display and Audio Devices shortcut in Windows 10
Install or Uninstall Connect Wireless Display Feature in Windows 10
-
New #1
I have never tried projecting to another display before. It does not work for me.
I have looked at these tutorials
Enable or Disable Projecting to this PC - TenForumsTutorials
Turn On or Off Projecting to this PC - TenForumsTutorials
Install or Uninstall Connect Wireless Display Feature - TenForumsTutorials
but even after trying what I think they say I do not believe that I really understand what I am supposed to do.
0 Preps - I checked that both computers are talking to each other on my home [WiFi] network - Dell Inspiron 7779, HP Pavilion TP01-0026na.
1 I have set up Settings, System, Projecting to this PC on both computers [Available everywhere] because I want to try both directions eventually.
2 I have checked that I have the app Connect installed on both computers & have run it. But the other computer does not appear in the big blue dialog shown in the example above, each computer just shows itself.
3 I have also looked for the 'Wireless display' app but it is nowhere to be found. I think it might be an older name for the Connect app.
4 If I run System, Display, Connect to a wireless display then the other computer's display appears in Notifications for me to click on but it then takes a minute or so "Connecting to your device" before then telling me it cannot do so.
- The little black connection overlay stays at the top of the screen but clicking on Reconnect does nothing.
- I get the same behaviour whichever computer I try from.
- I have tried this with the Connect app open and also without running it but there is no change in the behaviour.
What am I missing?
DenisLast edited by Try3; 19 Jul 2020 at 04:20.
-
New #2
Hello Denis @Try3,
It really comes down to if the wireless display you want to project to supports Miracast or not.
The Wireless Display feature adds the Connect app. There will not be a Wireless Display app.
It sounds like you doing the same in the tutorial to connect to the wireless display, but it wouldn't hurt to double check.
Connect to Wireless Display with Miracast in Windows 10
-
New #3
Shawn,
Thanks for replying.
I've checked that other tutorial and, using dxdiag, that both support Miracast.
I was hoping that I had simply misunderstood something but it does seem to be a technical problem instead.
I've ordered some extra bits & bobs that will let me use physical connections [so the laptop can use the desktop's monitor directly instead]. I'll put the wireless display issue into the very large pile of things to be resolved in the fullness of time.
All the best,
Denis
-
New #4
I've always found it to be pretty finicky as well. A direct cable connection is always best if able.
-
New #5
The Connect app for wireless projection using Miracast is no longer installed by default, but is available as an optional feature.
Features removed and deprecated in Windows 10 version 2004
-
New #6
None of the above works. I'm using an Asus T200 which supports Miracast which I'm planning to use as a second screen.
-
-
New #8
Hello. Mine says it is 10586. Does this mean it is impossible to get? What are the alternatives?
-
-
New #9
Oh my. You are on an old build of version 1511.
The method in this tutorial is only available in version 2004 and higher.
If you would like to directly update to the latest version and build of Windows 10, you could use the Windows 10 Update Assistant as per the tutorial below to do so. Afterwards, you'll be able to install the Connect app.
Update to Latest Version of Windows 10 using Update Assistant

Install or Uninstall Connect Wireless Display Feature in Windows 10
How to Install or Uninstall Miracast Connect Wireless Display Feature to Project to this PC in Windows 10Published by Shawn BrinkCategory: Apps & Features
31 Aug 2020


 Quote
QuoteTutorial Categories

Related Discussions
