

How to Add or Remove NVIDIA Control Panel Notification Tray Icon on Taskbar in Windows
If your Windows device has NIVIDIA graphics and NVIDIA display drivers installed, you will have the NVIDIA Control Panel available.
By default, the NVIDIA Control Panel notification tray icon will show on the taskbar.
The NVIDIA Control Panel is NVIDIA's hardware control application that unlocks the features of NVIDIA drivers. The NVIDIA Control Panel was designed by NVIDIA's dedicated user interface team to revolutionize software ease-of-use and ensure that set-up and configuration of your NVIDIA hardware has never been easier.
The NVIDIA Control Panel contains settings and adjustments for NVIDIA GPUs and MCPs. In similar fashion, the NVIDIA Control Panel now applies the same depth of control to the rest of the core components within the system. Without ever leaving Windows or entering the BIOS users can optimize and adjust nearly every system component to minimize noise, increase stability, and maximize performance.
This tutorial will show you how to add or remove the NVIDIA Control Panel notification tray icon on the taskbar for your account in Windows 7, Windows 8, and Windows 10.
Contents
- Option One: Add or Remove NVIDIA Control Panel Notification Tray Icon in NVIDIA Control Panel
- Option Two: Remove NVIDIA Control Panel Notification Tray Icon from Notification Tray Icon
- Option Three: Add or Remove NVIDIA Control Panel Notification Tray Icon using a REG file
EXAMPLE: NVIDIA Control Panel notification tray icon on taskbar
1 Perform one of the following actions below to open the NVIDIA Control Panel: (see screenshot below)
A) Run (Win+R) the C:\Program Files\NVIDIA Corporation\Control Panel Client\nvcplui.exe file.
OR
B) Right click or press and hold on the Desktop, and click/tap on NVIDIA Control Panel.
2 In the NVIDIA Control Panel, click/tap on Desktop on the menu bar, and click/tap on Show Notification Tray Icon to check (add - default) or uncheck (remove) it. (see screenshot below)
You can also press the Alt + K keys and press the I (i) key to toggle Show Notification Tray Icon as checked (add - default) or unchecked (remove).
3 You can now close the NVIDIA Control Panel if you like.
1 Right click or press and hold on the NVIDIA Control Panel notification tray icon on the taskbar, and click/tap on Exit. (see screenshot below)
The downloadable .reg files below will modify the DWORD value in the registry key below.
HKEY_CURRENT_USER\SOFTWARE\NVIDIA Corporation\NvTray
StartOnLogin DWORD
0 = Remove
1 = Add
1 Do step 2 (add) or step 3 (remove) below for what you would like to do.
This is the default setting.
A) Click/tap on the Download button below to download the file below, and go to step 4 below.
Add_NVIDIA_Control_Panel_notification_icon_for_current_user.reg
Download
A) Click/tap on the Download button below to download the file below, and go to step 4 below.
Remove_NVIDIA_Control_Panel_notification_icon_for_current_user.reg
Download
4 Save the .reg file to your desktop.
5 Double click/tap on the downloaded .reg file to merge it.
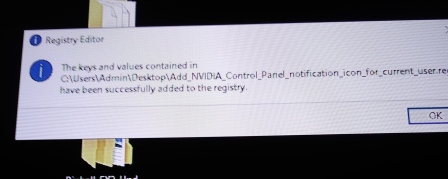
6 When prompted, click/tap on Run, Yes (UAC), Yes, and OK to approve the merge.
7 Sign out and sign in, or restart the PC to apply.
8 You could now delete the downloaded .reg file if you like.
That's it,
Shawn
Related Tutorials
- How to Hide or Show Notification Area Icons on Taskbar in Windows 10
- How to Add or Remove Notification Area on Taskbar in Windows 10
- How to Determine Currently Installed NVIDIA Graphics Display Driver Version in Windows
- How to Add or Remove NVIDIA GPU Activity Notification Area Icon on Taskbar in Windows
- How to Add or Remove NVIDIA Control Panel Desktop Context Menu in Windows
Add or Remove NVIDIA Control Panel Notification Tray Icon in Windows
-
-
-
New #3

- - - Updated - - -
The toolbar icon is left over from when I DID have NVIDIA Control Panel.
-
New #4
You could see if resetting the taskbar notification area icons may help remove it if a corrupted cache may be at fault.
Reset Notification Area Icons in Windows 10
-
New #5
Thank you, I downloaded that .bat from your link, installed it on my pinball cabinet, ran it, asked me if I wanted to reboot as it's supposed, which I choose Y and it reboots and icon is still there and the Microsoft store popup still pops up.
- - - Updated - - -
This is on a Virtual Pinball Cabinet BTW, that has the capability to go online, but I am loathe to do so, there is no ANTIVirus or ANTIMalware, just pinball software and associated programs. All things this cabinet needs to run I shovel over to it via USB sticks.
-
New #6
Is NVIDIA still listed in Settings to turn off like in option 3 below?
Hide or Show Notification Area Icons on Taskbar in Windows 10
-
-
New #8
Well, other than turning off show all icons and making sure NVIDIA is turned off, you could try:
- Reinstall the NVIDIA Control Panel app.
- Set to remove the icon as per option 1 or 2 in the tutorial.
- Uninstall the NVIDIA Control Panel app if the icon has been removed.
-
-
New #9
That's the whole thing, NVIDIA no longer supplies this, yeah I know boggles the mind, only way is to get it from Microsoft store. That's what my intent was, to get the NVIDIA control panel back to working, but it appears that NVIDIA has been strong armed by Microsoft and after one of the recent W10 updates NVIDIA control panel has been removed, and no where can I find it other than I suppose going to Microsoft store.
Add or Remove NVIDIA Control Panel Notification Tray Icon in Windows
How to Add or Remove NVIDIA Control Panel Notification Tray Icon on Taskbar in WindowsPublished by Shawn BrinkCategory: Hardware & Drivers
14 Jun 2020

 Quote
Quote
Tutorial Categories

Related Discussions
