

How to Add and Remove Folders in Photos app in Windows 10
The Photos app is included in Windows 10 by default. You can use the Photos app to view and edit your photos and videos, make movies, and create albums. You can use video remix to instantly create a video from photos and videos you select. Use the video editor for fine-tuned adjustments change filters, text, camera motion, music, and more. You can even add 3D effects like butterflies, lasers, or explosions that magically appear in your video.
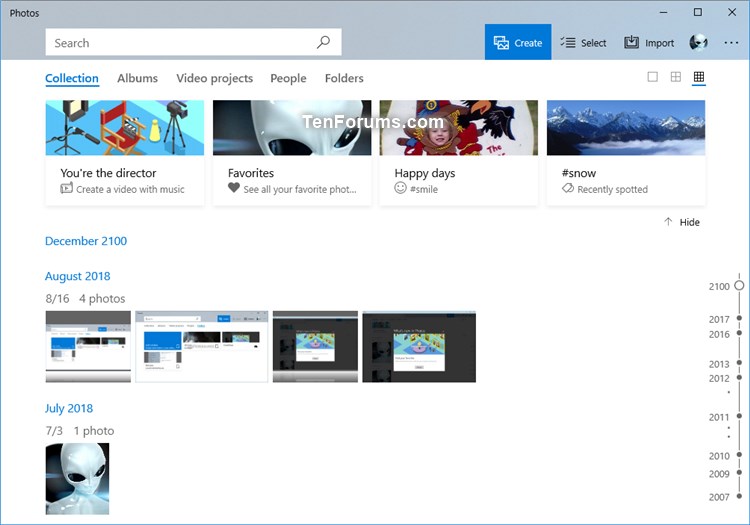
The Photos app in Windows 10 gathers photos from your PC, phone, and other devices, and puts them in one collection place, where you can more easily find what youre looking for.
The Photos app displays your collection of images from folders you add located on your PC, an external drive, or a network drive connected to your PC. Subfolders of the folders you add will be included, too.
The Photos app automatically displays the photos and videos in the Pictures folder on your PC and OneDrive by default.
See also:
This tutorial will show you how to add and remove folders in your collection in the Photos app for your account in Windows 10.
Contents
- Option One: Add Folders in Photos app from Photos app Settings
- Option Two: Add Folders in Photos app from Photos app Folders
- Option Three: Remove Folders in Photos app from Photos app Settings
EXAMPLE: Folder collection in Photos app
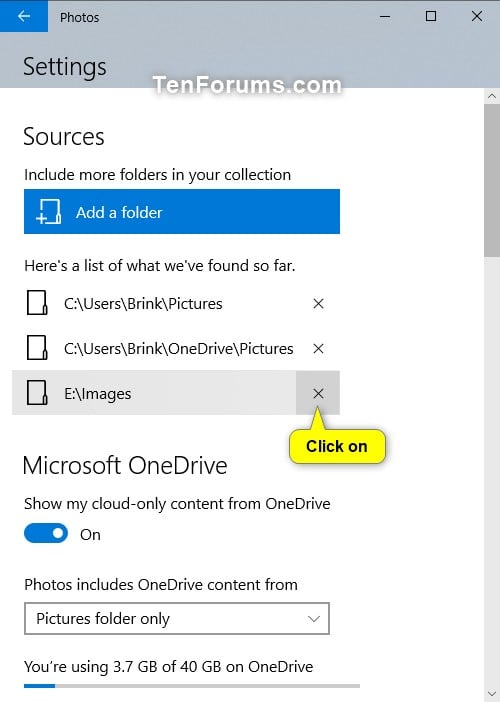
1 Open the Photos app.
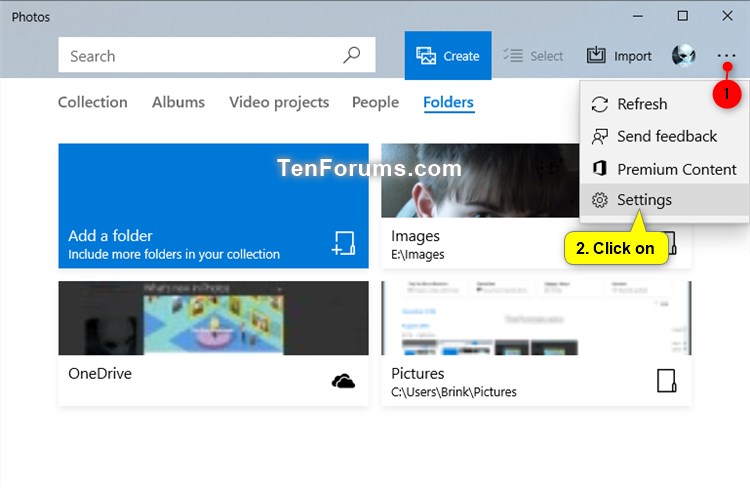
2 Click/tap on the See more (3 dots) button, and click/tap on Settings. (see screenshot below)
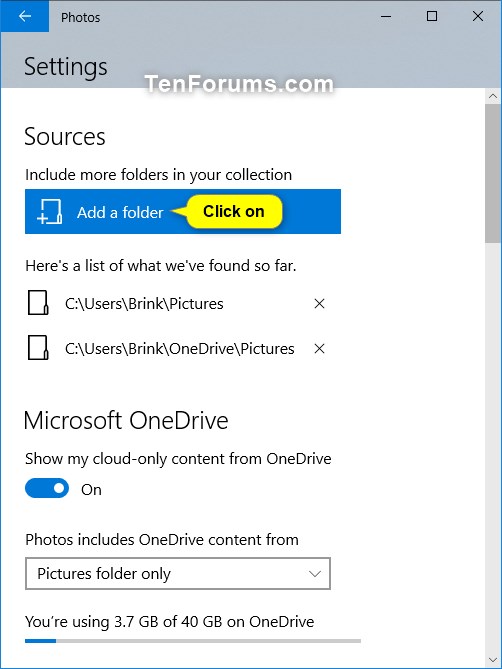
3 Click/tap on the Add a folder under Sources. (see screenshot below)
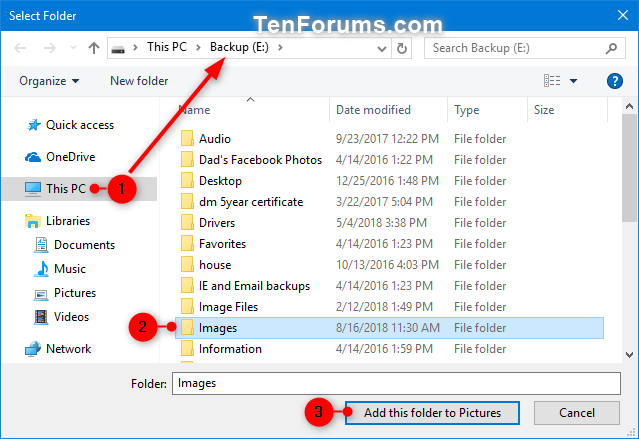
4 Browse to and select the folder you want to add on your PC, an external drive, or a network drive connected to your PC, and click/tap on Add this folder to Pictures. (see screenshot below)
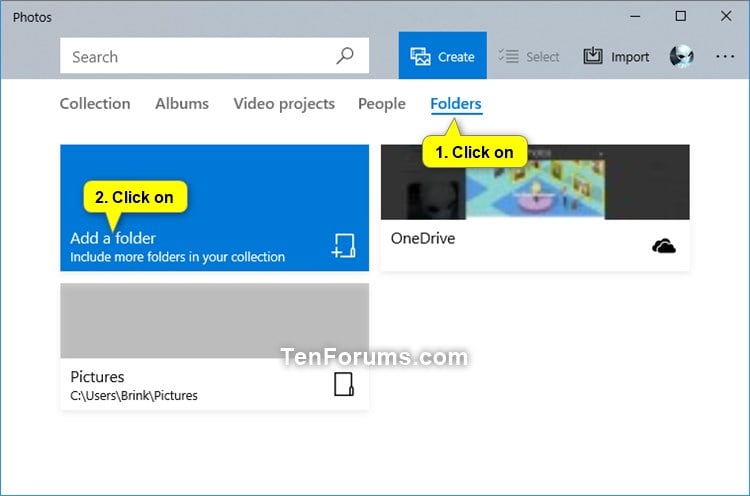
1 Open the Photos app.
2 Click/tap on the Folders at the top, and click/tap on Add a folder. (see screenshot below)
3 Browse to and select the folder you want to add on your PC, an external drive, or a network drive connected to your PC, and click/tap on Add this folder to Pictures. (see screenshot below)
1 Open the Photos app.
2 Click/tap on the See more (3 dots) button, and click/tap on Settings. (see screenshot below)
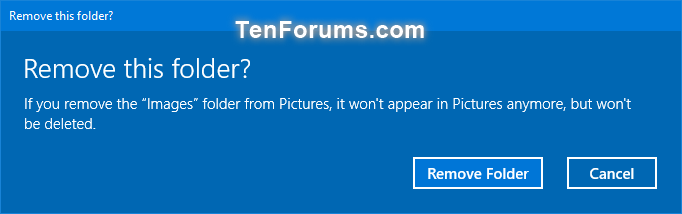
3 Under Sources, click/tap on the X to the right of the folder you want to remove. (see screenshot below)
4 Click/tap on Remove Folder to confirm. (see screenshot below)
That's it,
Shawn
Related Tutorials
- How to Sign in and Sign out of Photos app with Microsoft Account in Windows 10
- How to Turn On or Off Show OneDrive Cloud-only Content in Windows 10 Photos app
- How to Add or Remove Favorites in Photos app in Windows 10
- How to Backup and Restore Photos app Settings in Windows 10
- How to Change Photos app Live Tile Appearance on Start Menu in Windows 10
- How to Turn On or Off Face Detection and Recognition in Windows 10 Photos app
- How to Change Theme Mode for Photos app in Windows 10
- Photos App Keyboard Shortcuts in Windows 10
- How to Change Default Action of Mouse Wheel for Photos app in Windows 10
- How to Resize Image in Windows 10 Photos app
- How to Crop Image in Windows 10 Photos app
- How to Add 3D Effects to Images and Videos in Windows 10 Photos app
- How to Turn On or Off Hardware Accelerated Video Encoding in Windows 10 Photos app
- How to Turn On or Off Linked Duplicates in Windows 10 Photos app
- How to Search for Similar Images on Bing in Windows 10 Photos app
- How to Enable or Disable Indexing Network Locations in Photos app in Windows 10
Add and Remove Folders in Photos app in Windows 10
-
New #1
cant add a folder in photos tried settings Add a folder and nothing happens any idea why ??? thanks
-

Add and Remove Folders in Photos app in Windows 10
How to Add and Remove Folders in Photos app in Windows 10Published by Shawn BrinkCategory: Apps & Features
06 Jul 2020


 Quote
Quote
Tutorial Categories

Related Discussions
