

How to Create Elevated App Shortcut without UAC Prompt in Windows 10
When you open an application file with Run as administrator, you will get a UAC prompt for approval before the app is allowed to run with elevated rights.
In addition, Windows will not allow elevated apps to run at startup by default.
If you want to run an app as administrator (elevated) without getting a UAC prompt or at startup, then you can create an elevated task to run the application as a workaround to do so.
This tutorial will show you how to create a shortcut of an elevated task to run an app as administrator without getting a UAC prompt in Windows 10 and Windows 11.
You must be signed in as an administrator to create and use this elevated shortcut.
Contents
- Option One: Automatically Create Elevated App Shortcut without UAC Prompt using Script
- Option Two: Manually Create Elevated App Shortcut without UAC Prompt in Task Scheduler
Special thanks to Matthew Wai for creating the scripts in this option.
See also: How to Add Create Elevated Shortcut to New Context Menu in Windows 10
1 Click/tap on the download button below to download the Create_an_elevated_shortcut.bat file.
2 Save the .bat file to your desktop.
3 Unblock the .bat file.
4 Double click/tap on the Create an elevated shortcut.bat file to run it, and click/tap on Yes if prompted by UAC.
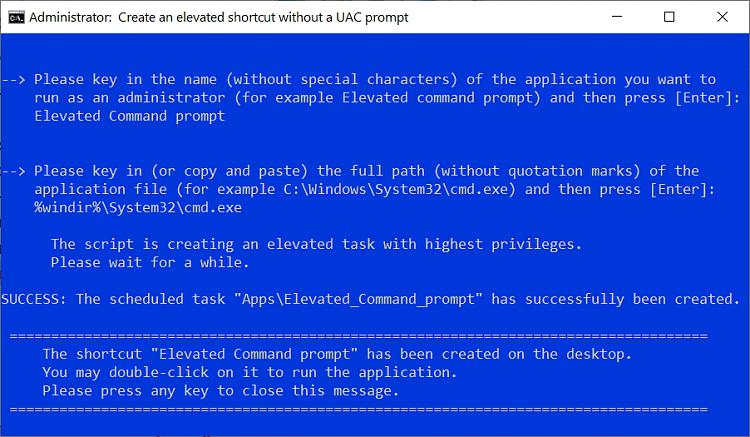
5 Type the name (ex: "Elevated Command Prompt") you want used for the shortcut and task name, and press Enter. (see screenshot below)
6 Type the full path of the application file without quotation marks (ex: "%windir%\System32\cmd.exe"), and press Enter.
7 A shortcut will now be created on your desktop using the application's default icon with the name you provided in step 5. This will be your elevated shortcut.
1 Press the Win + R keys to open the Run dialog, type taskschd.msc into Run, and click/tap on OK to open Task Scheduler.
2 Click/tap on Task Scheduler Library in the left pane of Task Scheduler, and click/tap on Create Task in the right Actions pane. (see screenshot below)
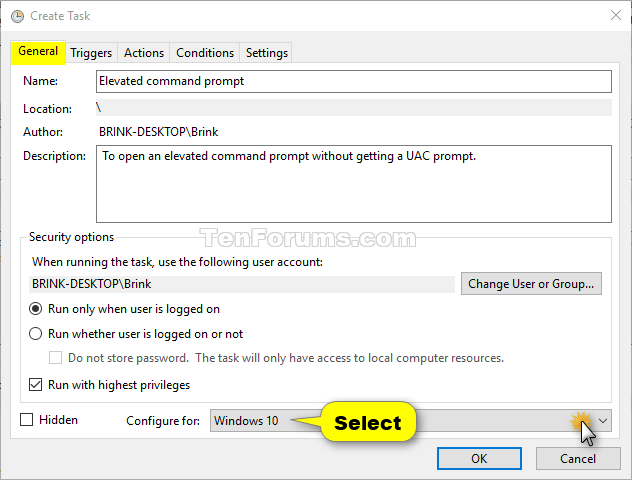
3 In the General tab, type a name (ex: "Elevated command prompt") you want for this task, and type an optional description of the task. (see screenshot below)
Make note of this task name. You will need to know it in step 8 and when you create a shortcut of this task in step 13 below.
4 In the General tab, check the Run with highest privileges box. (see screenshot below)
5 In the General tab, select Windows 10 in the Configure for drop down menu. (see screenshot below)
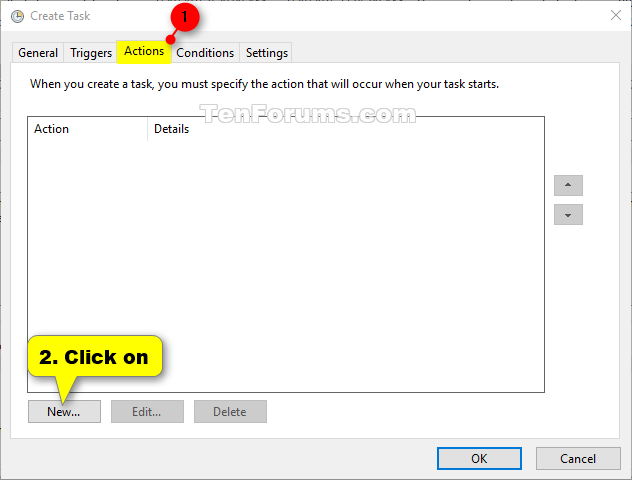
6 Click/tap on the Actions tab, and click/tap on the New button. (see screenshot below)
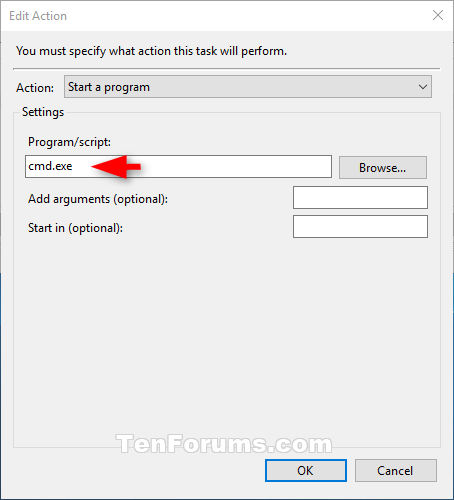
7 Type cmd.exe in the Program/script field. (see screenshot below)
This is what is being used to open the elevated shortcut from, so it cannot be changed to anything else.
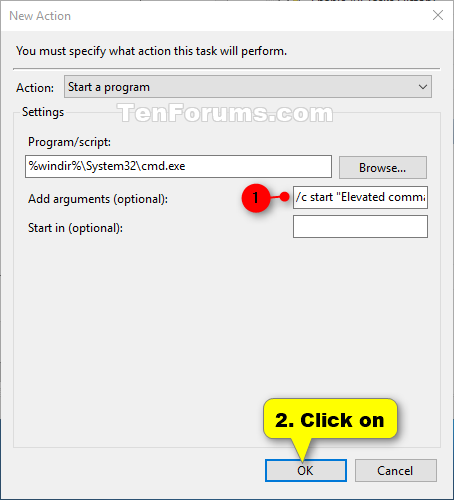
8 Type the command below into the Add arguments field, and click/tap on OK. (see screenshot below)
/c start "Task Name" "Full path of application file"
Substitute Task Name in the command above with the task name (ex: "Elevated command prompt") you used in step 3 above.
Substitute Full path of application file in the command above with the actual full path of the application file you want to run as administrator.
For example:/c start "Elevated command prompt" "%windir%\System32\cmd.exe"
9 You will now see this new action listed. (see screenshot below)
10 Click/tap on the Conditions tab, uncheck the Start the task only if the computer is on AC power box, and click/tap on OK. (see screenshot below)
11 You will now see this new task (ex: "Elevated command prompt") listed in the Task Scheduler Library. You can now close Task Scheduler if you like. (see screenshot below)
12 Right click or press and hold on your desktop, click/tap on New, and click/tap on Shortcut.
13 Type the command below into the location field, and click/tap on Next. (see screenshot below)
schtasks /run /tn "Task Name"
Substitute Task Name in the command above with the task name (ex: "Elevated command prompt") you used in step 3 above.
For example:schtasks /run /tn "Elevated command prompt"
14 Type a name (ex: "Elevated command prompt") you want for this shortcut of the task, and click/tap on Finish. (see screenshot below)
15 Right click or press and hold on the new shortcut on your desktop, and click/tap on Properties.
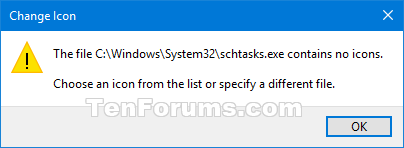
16 Click/tap on the Change Icon button in the Shortcut tab. (see screenshot below)
17 Click/tap on OK. (see screenshot below)
18 Click/tap on Browse, navigate to and select the application file (ex: "%windir%\System32\cmd.exe") you want to run as administrator, click/tap on Open, select the icon you want for the shortcut, and click/tap on OK. (see screenshots below)
You can use any icon you want for this shortcut.
19 Click/tap on OK. (see screenshot below)
20 You can run at startup, Pin to Taskbar, Pin to Start, add to All apps, add to Quick Launch, assign a keyboard shortcut to, or move this elevated shortcut to where you like for easy use.
That's it,
Shawn Brink
Related Tutorials
- How to Add Create Elevated Shortcut to New Context Menu in Windows 10
- How to Run an App as Administrator in Windows 10
- How to See if Process is Running as Administrator (elevated) in Windows 10
- How to Change User Account Control (UAC) Settings in Windows 10
- How to Enable or Disable User Account Control (UAC) in Windows
- How to Create Task to Run App or Script at Logon in Windows 10
- How to Enable or Disable Scheduled Task in Windows 10
- How to Delete Scheduled Task in Windows 10
Create Elevated Shortcut without UAC prompt in Windows 10
-
New #1
Went through this and it works for me with my Admin User.
Thanks loads. I tried a few other forum posts and this was the only one that worked for me.
Sys: Windows 10 Pro with Admin and Local Users.
Now next question is how to get it working for my Standard (now called Local User?) User?
I copied the new shortcut to the Local desktop but it don't work. I get that "Do you want this app ..." msg.
Checked the Security tab and the Local User had full privileges to it.
Suggestions appreciated
-
New #2
Hello rangergord, and welcome to Ten Forums. :)
You could use the method in the tutorial below to create an elevated task that a standard user can run without getting a UAC prompt, but it won't run at startup for a standard user.
Elevated Program Shortcut - Create for Standard User - Windows 7 Help Forums
-
New #3
Thanks for the suggestion.
I have anther question about these prompts.
Why do some apps require the prompt and some don't?
For example, I have two file managers, FreeCommanderXE which requires the annoying prompt both in the Admin and Local users and, FoldViewer, which does not have the prompt in either for the Admin or the Local User.
Was something written into the code or is there a setting?
-
New #4
It comes down to if the app is programmed to request for elevated rights (aka: "Run as administrator") to run.
If it does, then you'll get prompted by UAC.
-
New #5
Thanks. This allowed me to setup Speedfan to run on startup on windows 10.
-
-
New #7
Nice reply time. Made an account to show my appreciation.
-
New #8
I've tried the OP's directions and was successful at setting up a shortcut for VirtualBox on a standard user account.
However, I tried it for a VPN (Private Internet Access) and it starts fine, but eventually stops with an error that says, to the effect, "Needs Administrator Privileges to Run".
BTW, normally, the user is just prompted for the Admin password, and, when entered, no problem. For obvious reasons, would like to avoid the user from needing to know that password.
At some point in near future I'd like to try the RunAsSpc or elevated RunAs command solutions mentioned in a link above, but would like to know if anyone had any experience with VPNs or other programs that seem to have some hidden call to another program where the Admin rights may not carry over?
How did they overcome this problem?
Was it with one of these two other solutions, and, if not, any tips?
And, are these other solutions likely to bypass that or those calls?
Thanks.
-
-
New #9
Hello transplanted99, :)
The shortcut created using this tutorial can only be used in an administrator account.
The shortcut created in the tutorial below instead can be used in a standard user account that may work better for you, but not sure with a VPN.
Elevated Program Shortcut - Create for Standard User - Windows 7 Help Forums

Create Elevated Shortcut without UAC prompt in Windows 10
How to Create Elevated App Shortcut without UAC Prompt in Windows 10Published by Shawn BrinkCategory: Customization
09 Jul 2021


 Quote
QuoteTutorial Categories

Related Discussions
