

How to Schedule a Restart Time for Windows Update in Windows 10
Windows Update keeps Windows 10 updated by downloading and installing the latest updates, drivers, and hotfixes released by Microsoft.
Starting with Windows 10 build 14316, you can now set the time in which you are most active on your device by adjusting active hours. Active hours lets Windows know when you usually use this device. When a restart is necessary to finish installing an update, Windows won't automatically restart your device during active hours.
When a restart is scheduled, you can use a custom restart time to temporarily override active hours and schedule a custom time to finish installing the current update(s). When your computer restarts on the scheduled custom time, custom restart time will automatically be turned off, and Windows Update will only restart outside of active hours again. You can also manually turn off custom restart time at anytime if you change your mind.
See also: Providing customers with more choice and control in Creators Update
This tutorial will show you how to turn on or off to schedule a custom restart time for Windows Update to override active hours in Windows 10.
You will need to make sure that your device is plugged in at the scheduled custom restart time, or your computer will be unable to restart.
If a restart is not currently scheduled by Windows Update, then the restart options below will be grayed out.
Contents
- Option One: To Schedule a Time to Restart for Updates in Notification
- Option Two: To Schedule a Time to Restart for Updates in Notification Icon
- Option Three: To Schedule a Time to Restart for Updates in Settings
1 If you get a We've got an update for you notification asking if you're ready to restart now to finish installing updates, click/tap on the option below in the notification for you want to do: (see screenshot below)
Option Description Restart now The computer will be restarted now to finish installing updates. Pick a time Go to step 5 in Option Three below to schedule a time to restart. Snooze Will pause the update process completely for three days.
1 Right click or press and hold on the Windows Update Status notification icon on the taskbar. (see screenshot below)
2 Click/tap on Schedule restart, and go to step 5 in Option Three below to schedule a time to restart.
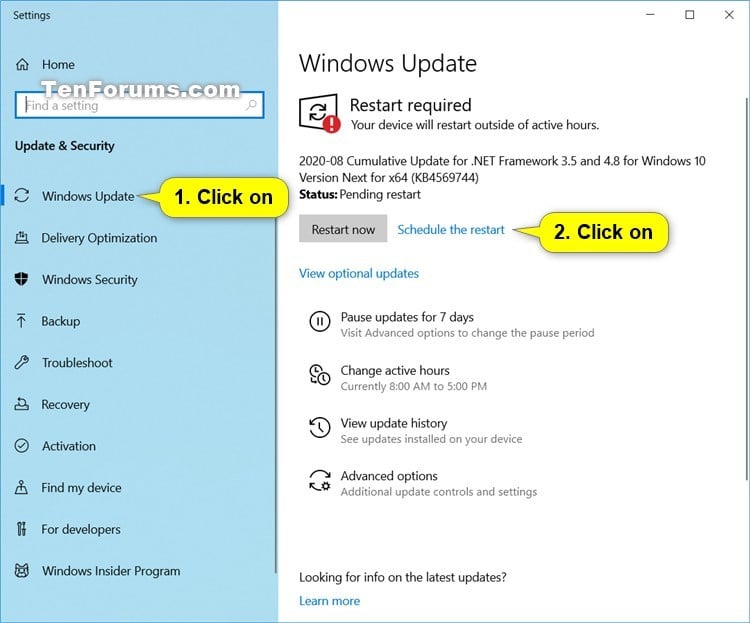
1 Open Settings, and click/tap on the Update & Security icon.
2 Click/tap on Windows Update on the left side, and click/tap on the Schedule the restart link on the right side. (see screenshot below)
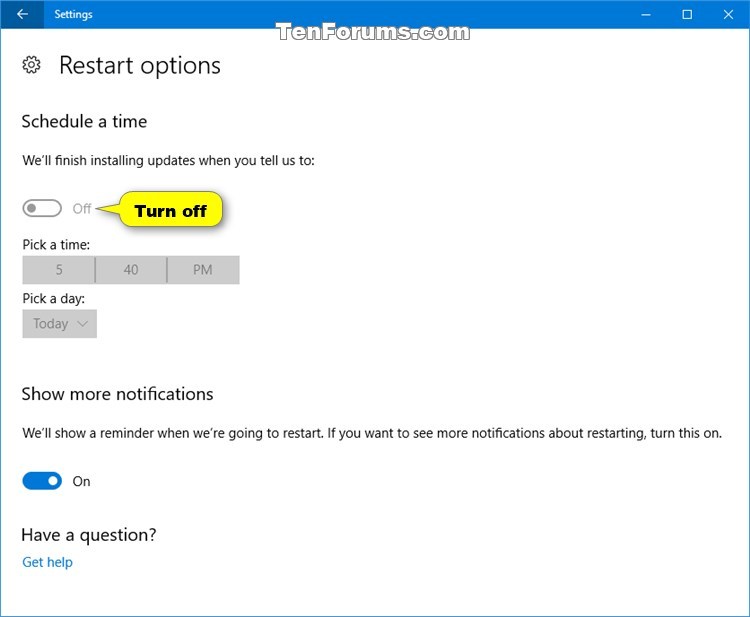
3 Do step 4 (off) or step 5 (on) below for what you would like to do.
This is the default setting.
A) Turn on schedule a time. (see screenshot below)
B) Pick a time you want to schedule for this custom restart time, and click/tap on the check mark to apply.
C) Pick a day you want to schedule for this custom restart time.
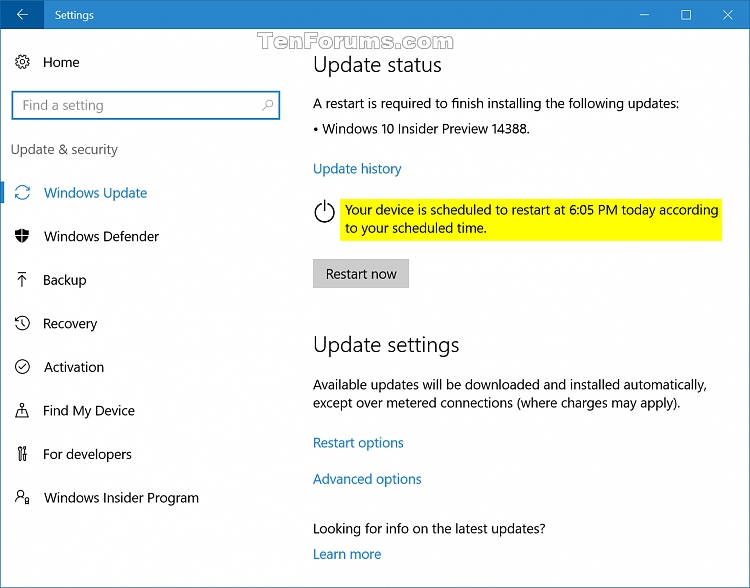
D) Your device will now be scheduled to automatically restart at the time and date you set. Go to step 6 below. (see screenshot below)
6 You can now close Settings if you like.
That's it,
Shawn Brink
Related Tutorials
- How to Check for and Install Windows Updates in Windows 10
- How to Enable or Disable Check for Windows Updates in Windows 10
- How to Enable or Disable Automatic Updates for Windows Update in Windows 10
- Choose How Windows Updates are Delivered in Windows 10
- How to Change Active Hours for Windows Update in Windows 10
- How to Specify Max Active Hours Range for Auto-restarts in Windows 10
- How to Turn On or Off Pause Updates in Windows 10
- How to Turn On or Off Show More Windows Update Restart Notifications in Windows 10
- How to Configure Auto-restart Required Notification for Updates in Windows 10
- How to Configure Auto-restart Reminder Notifications for Updates in Windows 10
- How to Configure Auto-restart Warning Notifications Schedule for Updates in Windows 10
- How to Specify Deadlines for Automatic Updates and Restarts in Windows 10
Schedule Restart Time for Windows Update in Windows 10
-
New #1
Hi Brink,
Under use a custom restart time my on/off switch is greyed out so I can't turn the feature on. It was working the last time I used it so I'm not sure whether it's something I've changed that may be causing this. Would you have any ideas?
-
New #2
Hello Kol12, :)
You'll only be able to actually set a custom restart time when you currently already have a restart scheduled.
-
New #3
Where/how am I meant to have a restart scheduled?
I'm currently downloading updates as normal (non-metered) I open WU today to find about 4 updates are ready to download with an available download button so I left it for now. I leave my PC for 10 minutes, come back and all but Cumulative update (KB3189866) have downloaded and installed themselves anyway. Is this the way it works? Do some updates download an install while the computer is idle?
Interestingly I still have the prompt to manually download the Cumulative update (KB3189866)
-
-
-
New #6
Well no it hasn't unfortunately, it didn't complete last night so I shutdown. Restarted today and it's been at 95% for over 3 hours. Many people are installing it manually but some people have decided to wait. If it doesn't complete later tonight I don't know, maybe there will be no choice but to install manually.
-

Schedule Restart Time for Windows Update in Windows 10
How to Schedule a Restart Time for Windows Update in Windows 10Published by Shawn BrinkCategory: Windows Update & Activation
07 Aug 2022


 Quote
QuoteTutorial Categories

Related Discussions
