

How to use Remote Desktop Connection to connect to and from your Windows 10 PC
RDP or Remote Desktop Protocol is the Windows protocol taking care of remote desktop connections. Remote Desktop Connection, short RDC (also called Remote Desktop) is the client application for Windows Remote Desktop Services using RDP to allow a user to remotely log into a networked computer running the terminal services server. RDC presents the desktop interface (or application GUI) of the remote system as if it were accessed locally.
A remote connection from a Windows PC to another Windows PC is easy and can be done without installing any additional software. The connection uses Remote Desktop Protocol (RDP) to let two computers, a remote host and a remote client talk to each other. The computer we are connecting to hosts the remote connection session and is therefore called a Remote Host, the Remote Client being the computer from which we are connecting to the remote host.
At the moment, Windows 10 still being a Technical Preview, all available editions can act as remote hosts. I will update this information if Microsoft makes changes in it; in Windows 8 and 8.1 only Pro and Enterprise editions can be hosts, the basic version version of 8 or 8.1 can only be used as client to connect to remote hosts, in Windows 7 Professional, Ultimate and Enterprise editions could be remote hosts and Starter, Home Basic and Home Premium only remote clients.
Microsoft has also published an RDC app for Android, iOS and MacOSX allowing these devices to connect to a Windows PC using RDP. Connecting from Linux computers you need to use XFreeRDP or similar third party program.
This tutorial will give you the basics to start using RDC.
Are you using virtual machines? I use Hyper-V for my virtualization needs and connect to my virtual machines using RDC. I simply launch the vm in the background without even opening its virtual machine connection window and when the Hyper-V manager tells me the vm is up and running waiting a user to sign in, I launch RDC and connect to my vm.
Using virtual machines over RDC instead of virtual connection makes them work faster and integrates them better to host system.
Use below links to jump directly to any part of the tutorial:
Part One: Some vocabulary
Part Two: Prepare Windows 10 PC Remote Host
Part Three: RDC from a Windows Remote Client (+ video)
Part Four: RDC from a Windows Phone Remote Client (+ video)
Part Five: RDC using Windows 10 Remote Desktop App
Part Six: RDC to and from Linux (+ video)
Part Seven: RDC from an Android, iOS or MacOSX Remote Client
Part Eight: RDC to a PC on another network over the Internet
Some terms you should know before starting:
- Remote Desktop Protocol RDPThe protocol used by Remote Desktop Connection to allow two computers, a remote host and client to communicate- Remote Desktop Connection RDCThe RDP client application, Windows program that lets you to connect remotely to other Windows computers- MSTSCMicrosoft Terminal Services Client, name of the RDC app executable file (mstsc.exe). You can launch RDC by typing mstsc.exe to RUN dialog (WIN + R) and hitting Enter- Remote HostThe computer hosting the remote session, in other words the computer you are connecting to. The basic and home editions of Windows cannot host a remote session, meaning you cannot connect to them using RDC. In Windows 7 you need a Professional edition or better, in Windows 8 and 8.1 a Pro or Enterprise edition to host a remote session. In Windows 10 Technical Preview both editions (Pro and Enterprise) can host a remote session. For example, you cannot connect from a Windows 10 Technical Preview computer to a Windows 7 Home premium because the Home Premium edition of Windows 7 cannot host a remote session- Remote ClientThe computer you use to connect to another computer using RDC. Any edition of Windows can be an RDC client. For example you can connect from a Windows 7 Home Premium computer to a Windows 10 Technical Preview computer
2.1.) Open the Start context menu by pressing WIN + X or right clicking the Start button. Select System:
2.2.) Click Remote Settings on the left. Select Allow remote connections to this computer (click screenshots to enlarge.):
2.3.) In case you want to allow connections from Vista and older Windows computers, do not select Allow connections only from computers running Remote Desktop with Network Level Authentication (highlighted in screenshot above). Only Windows 7 and later, Windows Phone 8.1 and later, Android, iOS and MacOSX support Network Level Authentication. As its more secure, select it but only if you will not connect with legacy Windows computers.
2.4.) Click OK to save settings. Close the System window
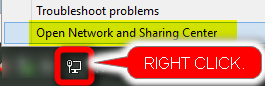
2.5.) Right click the network icon in Taskbar notification area and select Open Network and Sharing Center:
2.6.) If the network location is Public, we need to change it to Private. To do this, click the HomeGroup link:
2.7.) Click Change network location:
2.8.) Click Yes:
2.9.) You don't have to create or join HomeGroup, it is not needed for the remote connection. Simply click Close:
2.10.) Network location is now set to Private:
2.11.) Close the Network and Sharing Center. Your PC will now accept remote connections
Video: Windows 10 Remote Desktop Connection:
3.1.) In your client Windows computer search for Remote Desktop Connection, click it to start RDC:
Alternatively click WIN + R to open RUN dialog, type mstsc and click OK:
3.2.) Type the remote host computer name or local (private) IP address and click Connect if you want to connect using default settings (if default is OK for you, you can skip steps 3.3 to 3.8.):
3.3.) If you want to edit the settings for this connection, click Show options:
3.4.) General tab allows you to save the remote computer name or IP and username. If you want to start this connection simply by clicking a shortcut, click Save in Connection settings:
3.5.) In Display tab you can select a specific window size (remote host resolution) or full screen. You can also select the color depth. Notice that the only way to set remote session resolution is to use this dialog; when connection is created you cannot change the remote display resolution:
Note
When Full Screen is selected, remote session uses the full screen of your client computer and sets resolution accordingly. If for instance you have your client display resolution set to 1600*900, the remote host is shown on your desktop in full screen using 1600*900 resolution, regardless which local resolution is set on remote host.Tip
On multiple display systems, the Full Screen setting always opens the remote session full screen in display 1 using its resolution. You cannot move the full screen session to any other display (or rather, you can but it is shown windowed instead of full screen and can't be maximized to full screen).
There's a simple workaround for this: Instead of full screen, select remote session display size according to the resolution on your display where you want remote session to be shown. Now connect normally, the remote session opens in display 1 but you can now move the session window to another display, where it will change to full screen as soon as you maximize the window:An example: your display 1 is 1600*900, your secondary display 1920*1080. Set the remote session resolution to 1920*1080 instead of Full Screen. Remote session opens now in display 1; move it to display 2 and maximize, now you have full screen remote session in display 2.
3.6.) The next tab Local Resources lets you set how the audio of remote host is handled, both playback and recording, and which client resources can be used by the remote host:Audio: you can select if audio is played on remote client (your computer you are using to connect to remote host), not at all or if it's played on remote host.
Resources: You can select which drives and other devices on your local computer (client) can be used by the remote host. I recommend at least selecting all drives which makes it possible to simply copy & paste files between the two computers.
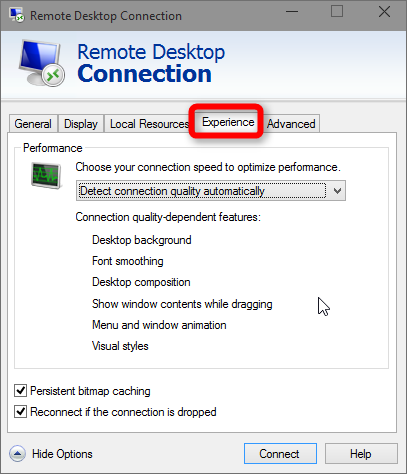
3.7.) Experience tab has settings regarding the connection quality. I recommend leaving them as they are with default values and selections:3.8.) In Advanced tab you can select if the authentication warning (see step 3.10.) is shown or not, alternatively if the connection should be created regardless of any warnings:
Again, leave the defaults. Click Connect when you are OK with settings.
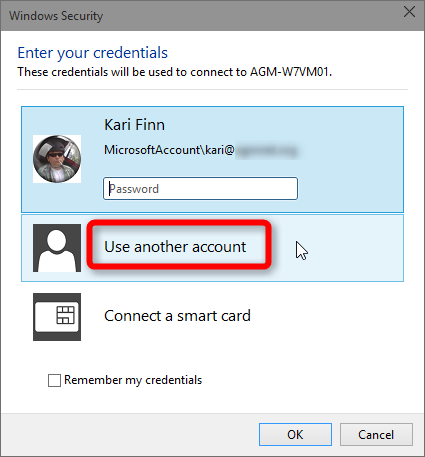
3.9.) You will get the Windows Security - Credentials dialog now. If the remote host has a user account with exactly the same credentials than the account you are currently signed in on your client computer, you can select the top most alternative enter your password and you will be connected to your remote host with credentials you have given
To get screenshots now I connected to my Windows 7 Ultimate virtual machine. As the account I am using at the moment on my Windows 10 remote client is a Microsoft Account which is unknown to Windows 7, I select Use another account:I enter my Windows 7 vm username and password and click OK:
Important:
- Only credentials given exactly correct work
- You must give credentials for an existing user profile on remote host, user profiles on client and their credentials do not work as such
- The user profile used for remote sign-in do not have to exist on client
- The user profile used for remote sign-in must have a password set. It is not possible to remotely sign in to a user account without existing password
- If using a simple username does not work and remote session cannot be created, try so called full username COMPUTER_NAME\USERNAME. For instance if the remote host is MyMonsterMachine and it has a user profile named Number1Gamer, use in remote sign in dialog username MyMonsterMachine\Number1Gamer
3.10.) You will now get a security warning about certificate. This is in this case not serious, it's a natural thing caused by non-existing authorization certificate on the remote host. In most cases, especially if the remote computer is your own there's no need to create a Certificate Authorization server and then publish your own security certificate to a Terminal server.
Translating Geek lingo to something understandable, just forget this. Select Don't ask me again for connections to this computer and click Yes:3.11.) You will now be connected to the remote host. You can use it as if it was a local computer or a virtual machine on your system. The resolution is what you set in step 3.5. and can't be changed:
3.12.) You cannot shutdown the remote host normally from Start Menu. You can only log off, disconnect (end) the remote session or lock the computer:
You can also disconnect simply by using the Close button on remote session window:
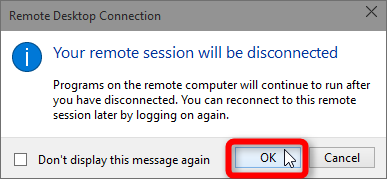
When disconnecting you will be shown a "Your remote session will be disconnected" dialog to confirm it:
If you need to shutdown, hibernate or restart the remote computer, use Command Prompt and following commands:
- shutdown -s -t XXX to shutdown in XXX seconds, if XXX = 1 shutdown immediately
- shutdown -r -t XXX to restart in XXX seconds, if XXX = 1 restart immediately
- shutdown -h to hibernate. The time switch (-t XXX) cannot be used with hibernation
The following rules apply:
- If a local user is using the remote host when you sign in remotely, the local user will be locked out seeing only the Welcome screen and notification that a remote user is signed in:
- If a local user signs in to a computer into which you have an open remote session, your remote session will be disconnected:
To unlock the remote host automatically when you finish the remote session, give this command in an elevated command prompt on the remote host:
This will end the remote session and unlock the remote host, restoring the current local user's desktop.Code:tscon 1 /dest:console
Video: Microsoft Remote Desktop App for Windows Phone:
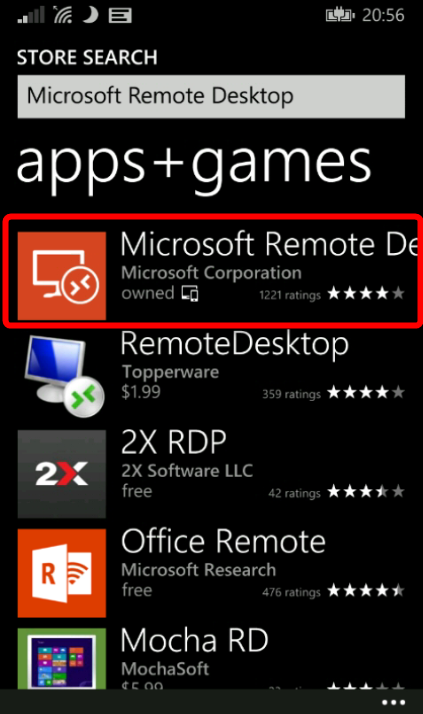
4.1.) Search the Windows Phone Store for Microsoft Remote Desktop, download and install it:
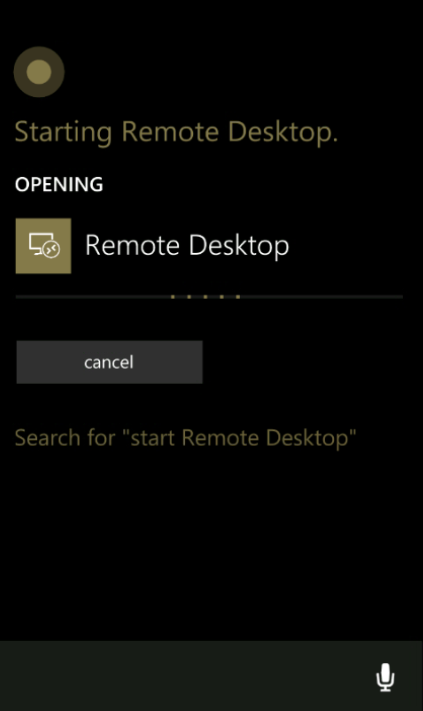
4.2.) Start Microsoft Remote Desktop (from hereon MRD). You can start it from Apps menu, pin to Start and launch from there, or if you like Cortana like me, tell her to start it for you:
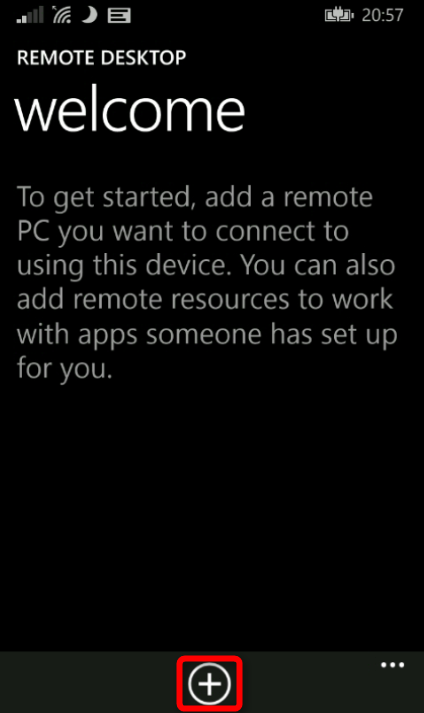
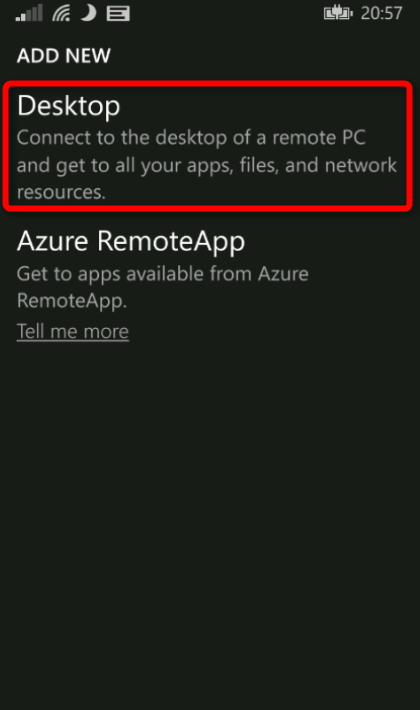
4.3.) Click the Plus sign to add a new remote host, select Desktop:
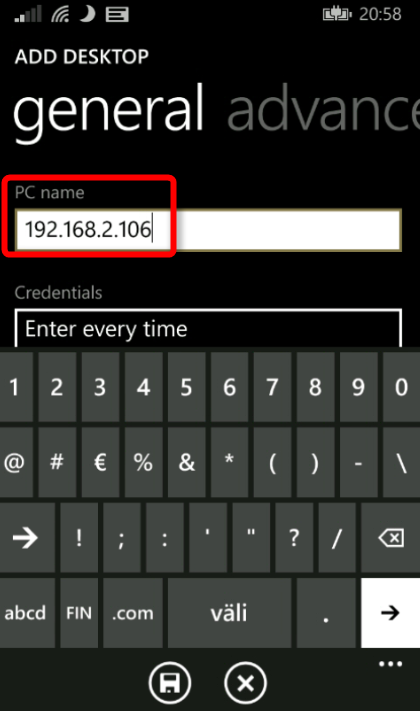
4.4.) Enter the IP address or computer name of the remote host, select Add credentials to enter and save the username and password now, or select Enter every time if you do not want to save credentials:
If you selected to save credentials, enter them now:
4.5.) Tap the connection you just created or tap the Plus sign to add another connection:
4.6.) MDR will connect now to remote host:
4.7.) Ignore the certificate warning (see step 3.10. for more information), tap Connect:
4.8.) You are now connected to remote desktop. Tap to left click, two finger tap for right click, open on-screen keyboard tapping the keyboard icon:
4.9.) Sign out or quit the MRD app to disconnect:
5.1.) Search Microsoft Store for the Microsoft Remote Desktop app, download and install it (click screenshots to enlarge):
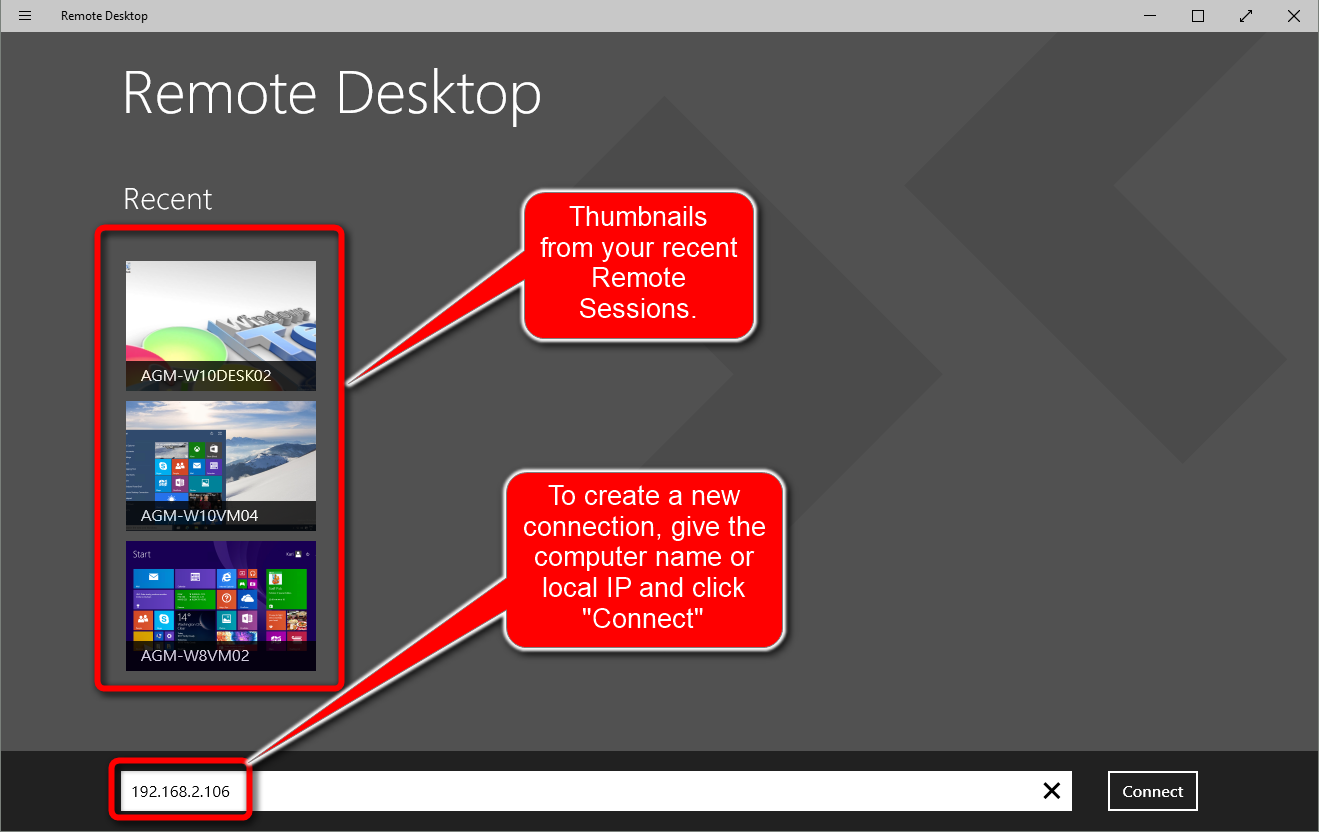
5.2.) The home page shows thumbnails of your recent remote sessions. You can open any of them by clicking the thumbnail, or to start a new session by giving the remote host's computer name or local IP:
5.3.) When connected, enter your credentials. If using a local account give the username as COMPUTERNAME\USERNAME:
5.4.) Accept the certificate warning by clicking Connect anyway:
5.5.) Click the remote host name at top of the window to open the menus:
5.6.) See screenshot for menu item explanations:
5.7.) Select the visual effects and what of your local computer's hardware the remote host is allowed to use:
5.8.) Close the connection either by closing the RD App window, or selecting Disconnect from remote host's Start Menu.
Although a Windows tutorial, lets also check how to use RDC between Windows 10 and other operating systems and devices. To start, the video below explains how to create a remote desktop connection from Windows 10 to Linux (in this example CentOS 7), and from Linux to Windows 10:
Consult the documentation of your preferred Linux distro to find out what programs you can use and how to get them.
Microsoft Remote Desktop App is available for Android, iOS and MacOSX devices. For instructions to setup and use MS RD App, see this Microsoft TechNet support article: https://technet.microsoft.com/en-us/.../dn473009.aspx
(Screenshot: Microsoft)
Downloads:
- Microsoft RD App for Android: https://play.google.com/store/apps/d....android&hl=en
- Microsoft RD App for iOS: https://itunes.apple.com/us/app/micr...714464092?mt=8
- Microsoft RD App for Mac: https://itunes.apple.com/us/app/micr...417?mt=12&ls=1
8.1.) A typical home network has one router and one broadband or cable connection to Internet. All networked devices belonging to the network use this same gateway to Internet and share a Public IP address, each of them having an individual Private IP address which the router, acting as a DHCP server assigns to them. You can check this easily by going to web address http://www.whatismyip.com/ from each of your device, you will find out that the IP (public) is the same whatever device you use.
8.2.) Your public IP "belongs" to your router. All your devices connect to it using an internal, local (private) IP address. If for example your public IP would be 123.456.789.100 and you try to make a remote connection to your PC at home over the Internet, the router must know which of your computers you want to reach.
This is done with so called port forwarding. Windows Remote Desktop Protocol, the brains behind the Remote Desktop Connection listens port number 3389.
8.3.) To get to a specific computer in any network over the Internet, we need to tell the router in that network that for now, all incoming traffic to port 3389 should be sent to computer with a local IP XXXX.
See the screenshot below. A home network with 5 computers, all having internal private IP addresses from 192.168.1.101 to 192.168.1.105. In router settings we have forwarded the port 3389 to the computer at bottom middle, with the private ip 192.168.1.103. We add a port number to IP by adding it to the end of the IP, separated with a colon so in this case the bottom middle computer is 192.168.1.103:3389:
(Click to enlarge.)
Now when you make a remote desktop connection to public IP address 123.456.789.100 of this network, the router knows that is should let you through to 192.168.1.103:3389. Sounds more complicated than what it in reality is.
8.4.) The tricky part is to change the port forwarding in your router. Every router manufacturer have different setup panels for their routers, it is impossible to give precise instructions. Consult the manual of your router or simply Google or Bing for "Port forwarding MyRouterName_and_Model"
Due IPTV and VoIP systems I am forced to use a router from my ISP here in my adopted home country. The router is excellent with one flaw: its language cannot be changed. The message in the screenshot below might not open to you as it's in German, but let me try to explain where I find the port forwarding settings in my router (see the numbers in screenshot):
- When signed in to router control panel, I go to Network > NAT & Port Rules >Port Rules
- I select the computer this new rule applies to, in my router's case I do not need to enter an IP address, I can use computer names instead
- I enter the port number I want to assign to the computer told in #2. In this case, by default the remote desktop port is 3389 so I enter it
This Microsoft support article is easy to understand and follow, I recommend you read it if the above did not help you in connecting remotely to your home computer: http://windows.microsoft.com/en-us/w...r-home-network
Warning
Forwarding port 3389 to one of your computers opens the access to it to everyone who knows your public IP. I recommend forwarding port 3389 only when absolutely needed.
If you are interested in helping to make this tutorial as complete as possible, I would be pleased if you posted screenshots or other instructions (online manual URL etc,) for forwarding ports on your router. It might help a fellow geek with the same model to get connected in the future :).
That's about it :). Post your comments, questions and suggestion in this thread.
Kari
Related Tutorials
- How to Enable or Disable Remote Desktop Connections to a Windows 10 PC
- Enable or Disable Always Prompt for Password upon Remote Desktop Connection to Windows PC
- How to Save Remote Desktop Connection Settings to RDP File in Windows
- How to Add or Remove Remote Desktop Users in Windows
- How to Allow or Prevent Users and Groups to Log on with Remote Desktop in Windows 10
- How to Deny Users and Groups to Log on with Remote Desktop in Windows 10
- How to Get and Give Remote Assistance with Quick Assist app in Windows 10
- Turn On or Off RDC 'Your remote session will be disconnected' Message in Windows
- How to Create Remote Desktop Connection Shortcut for Specific PC in Windows
- How to Delete Saved Credentials of a Remote Desktop Connection in Windows
- How to Remove Computer Entries from Remote Desktop Connection History in Windows 10
- How to Add a Remote Desktop Connection in Remote Desktop app on Windows 10 PC
- How to Remove a Remote Desktop Connection in Remote Desktop app on Windows 10 PC
- How to Change Global Settings in Remote Desktop app on Windows 10 PC
- How to Enable or Disable Remote Desktop (RDP) Access to Removable Storage Devices in Windows
RDC - Connect Remotely to your Windows 10 PC
-
-
-
New #3
A wonderful article. Extremely helpful... BUT It really does not give enough play to the point that only "pro" editions of windows may act as a remote host. Too bad the tech/insider previews did not offer a stripped down "home" version to evaluate. This could have been a major discussion point. Thank you for your superb efforts, screen clips, and explanation of the concepts and processes. I am just disappointed that folks in Redmond are forcing me to choose between upgrading to pro (not free) or replacing the OS with one that offers remote host/client utilities natively (free).
-
New #4
Hi Danliston, welcome to the Ten Forums.
A valid point. However, somewhat understandable, the same principle as in everything commercial; you buy the cheapest version of a certain car model you get polyester seats, plastic dashboard, no air conditioning, no navigator and a simple radio. You pay for the De Luxe model and you have leather and wood interior, air conditioning and state of the art entertainment system and navigator.
If you need remote host capability or any other of the Pro features, you have to pay for it. The Technical Preview / Insider Preview phase lasted almost 10 months, long enough that everyone who really need or want Windows 10 Pro instead of the Home edition had time to plan it, join the Insider program, install a preview build and now on 29th get the Pro for free. Those who didn't join the program in time can still get it for free but that requires an underlying, qualifying Windows 7 SP1 Professional or Ultimate edition or Windows 8.1 Pro.
For those only now "jumping in" and using a Home or Core edition of Windows 7 or 8.1 unfortunately have to pay for the Windows 10 Pro,
Kari
-
New #5
My intention was not to rub a nerve. I really did find the article useful. I also understand that I get a deluxe model for a deluxe price. My critique was more of the lack of separation/definition of the "host" desktop dependencies. The tutorial makes an assumption that people would not even be trying RDP [host] unless they have the deluxe version. Why would a simple home [premium] user ever need such capabilities right? <-that sounded sarcastic... sorry.
I thought I had found the answer to my prayers, only to find the solution was impossible with my version. Even though it is premium, it still is not pro, and will not work. I hope you can also understand that this is a bit of a bummer for me.
I also respect your defense of the product. Keep up the impressive work. I hope others will follow your example.
-
New #6
@danliston
It might be due English not being my native language hence my phrasing being somewhat unclear but in my previous post what I really wanted to say is that I totally agree with you and that your point is valid. In no way did I take your post as if you were "rubbing my nerve". For me it was and is a good, valid post, stating an obvious fact which prevents many Windows users to use Remote Desktop Connection.
My naive car example was only to tell why I at some level understand the Microsoft's reasoning. Really, I respect and appreciate the fact that you joined the forums in order to be able to post your opinion which I happen to share :)
I do not know how I should change the tutorial to make this unfortunate fact more clear. It's now told in Part One, before the instructional parts. You need Windows 10 Pro on your PC if you ever want to use Windows native Remote Desktop Connection to remotely connect to it. You can then remotely connect to it with Windows 10 Home, Windows 8 and 8.1 core editions, or Windows 7 Home editions.
Kari
-
New #7
No need to get logged out when someone else logs in.
A note about 3.12 (above)
You can still easily enable Concurrent Remote Desktop sessions. This enables many different users to all be logged onto the same computer via remote desktop at the same time, without getting kicked off when another user logs in.
It was a feature of Windows 2000 and can easily be added to all versions of Windows up to Windows 10 inclusive.
You can even setup a Remote Desktop shortcut on each individual users desktop so that they can Remote Desktop into a PC across the internet, and then Remote Desktop across to their own PC across the LAN.
It is a very handy feature of Windows and enables a whole office of workers to work offsite, all Remote Desktop-ing into one machine and then across to their own machines, all at the same time, all while someone is working on the Remote Access machine.
-
New #8
As most of the tutorials here at the Ten Forums, this one is covering a native Windows feature. In Windows server versions it is possible to allow concurrent remote connections but to do this in Windows 10 desktop editions is not possible without a third party program or a patch for termsrv.dll, the dynamic link library which limits the connections to one in desktop editions of Windows.
I will not include any processes requiring patching a Windows system file in my tutorials.
Anyway, reading your post first then checking the part of the tutorial in question (step 3.12) revealed that there's one tip which I have forgotten from the tutorial. This is now added to the end of step 3.12:
TipTo unlock the remote host automatically when you finish the remote session, give this command in an elevated command prompt on the remote host:
This will end the remote session and unlock the remote host, restoring the current local user's desktop.Code:tscon 1 /dest:console
Kari
-
-
New #9
Point taken.
Cheers.
Anyway, whether concurrent sessions is enabled or not, I have always been impressed with the ability to Remote Desktop into a string of PCs effectively.
Example:, I have had to Remote Desktop into my work PC from my Home PC, and then from my work machine, Remote Desktop across to another staff member's PC on our LAN, and from her Machine, Remote Desktop back into my work machine, to alter the desktop experience that she sees when she remote desktops into my work machine.
I've always been impressed by how many hops you can do without increase in lag.
It should also be noted in your tutorial that internet speed DRASTICALLY effects Remote Desktop connections usability.
In Australia we have very poor internet speeds and a 10MB down 500K up connection, connecting to another 10MB/500K, regardless of connection options, has so much lag as to make it virtually unusable.
Having the destination connection (work office) upgraded to a 13MB down / 13MB up symmetrical connection has vastly improved the experience.
I have also used the Microsoft Remote Desktop Connection App for Apple OSX and it works equally well (on a laptop with a usb wireless connection which is even slower).
It seems to me that the destination's connection speed has the most effect on the experience.
Cheers, Al.

RDC - Connect Remotely to your Windows 10 PC
How to use Remote Desktop Connection to connect to and from your Windows 10 PCPublished by Kari "Kalsarikänni" FinnCategory: Network & Sharing
15 May 2020


 Quote
QuoteTutorial Categories

Related Discussions
