

MemTest86+ - Test RAM With
MemTest86+ is a diagnostic tool designed to test Random Access Memory (RAM) for faults. MemTest86+ will verify that:
- RAM will accept and keep random patterns of data sent to it
- There are no errors when different parts of memory try to interact
- There are no conflicts between memory addresses
Memtest86+ runs from bootable media to isolate the RAM from the system, no other components are taken into account during the test.
Warning
IMPORTANT: Memtest86+ works with BIOS (legacy or UEFI).
The Memtest86+ binary is not signed by Microsoft, so you need to temporarily disable Secure Boot in your BIOS options. They are working on a better solution.
MemTest86+ needs to run for at least 8 passes to be anywhere near conclusive, anything less will not give a complete analysis of the RAM.
If you are asked to run MemTest86+ by a Ten Forums member make sure you run the full 8 passes for conclusive results. If you run less than 8 passes you will be asked to run it again.
Note
MemTest86+ has been known to discover errors in RAM in later passes than the eighth pass. This is for information only; if you feel there is a definite problem with the RAM and 8 passes have shown no errors feel free to continue for longer.
Running 8 passes of MemTest86+ is a long and drawn out exercise and the more RAM you have the longer it will take. It's recommended to run MemTest86+ just before you go to bed and leave it overnight.
Part One: Booting MemTest86+
Part Two: The Test Interface
Part Three: Results & Extended Testing
You will need a USB stick for this stage. Size is not important as the installation only takes up 180Kb of space.
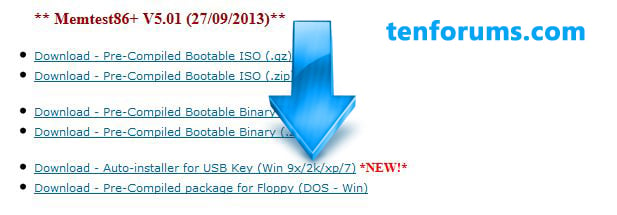
1: Go to the MemTest86+ website.
2: Scroll down to the Download (Pre-built & ISOs) section. Click on the Auto-installer for USB key (Win9x/2k/xp/7) link to download the Auto-installer tool.3: Locate the downloaded file and extract it.
4: Plug your USB drive into your chosen port.
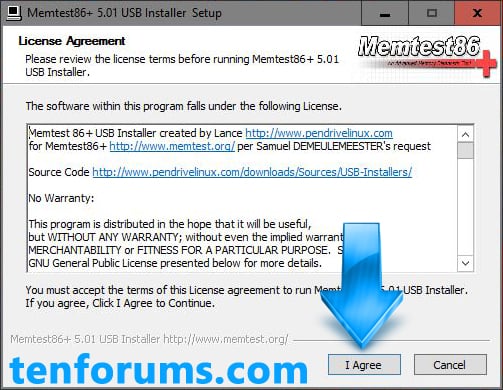
5: Open the extracted folder and click on the MemTest86+ USB installer. If prompted by the UAC click Yes.
6: Accept the terms to proceed.
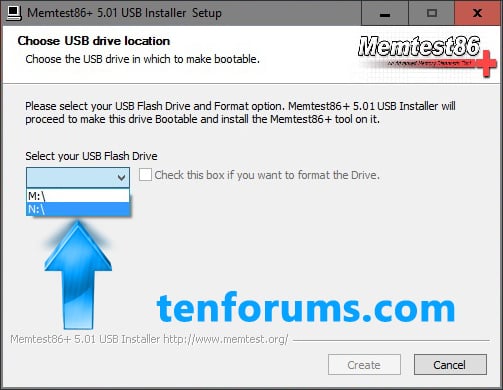
7: The Installer window will open. Select your USB drive from the dropdown list.
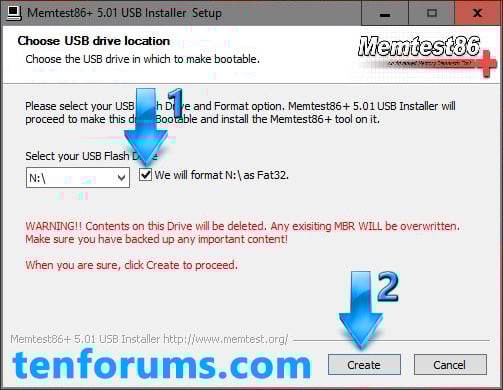
8:1) Check the option to format the drive.
2) Read the warning that the installer will completely erase the contents of the drive then click Create.
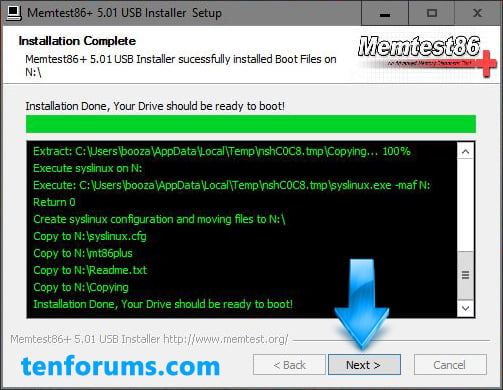
9: The installer will format the drive then create the bootable USB, the process should only take a few seconds. Once finished, click Next.
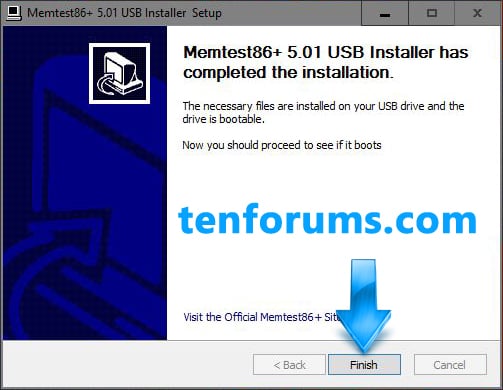
10: Click Finish then close the installer. Your bootable USB stick is now ready to use.
11: With your USB stick inserted, boot into BIOS. Select Boot options and select the bootable USB stick you created. When you exit the BIOS after saving your changes your PC will boot into MemTest86+ and it will start running automatically, you do not have to do anything after selecting the boot device and exiting the BIOS.
The MemTest86+ test interface contains a wealth of information, but for the purpose of testing for bad RAM we're only interested in two sections. These are highlighted below.
1: PASSES
As mentioned in the warning at the start of this tutorial, it is imperative when testing RAM with MemTest86+ that you run it for at least 8 passes. This is the minimum requirement to obtain anywhere near conclusive results, anything less is inconclusive and unreliable. The 8 passes must be run consecutively, for example you cannot run 3 passes in one session and 5 passes in another session.
The passes section is highlighted below.
2: FAILURES
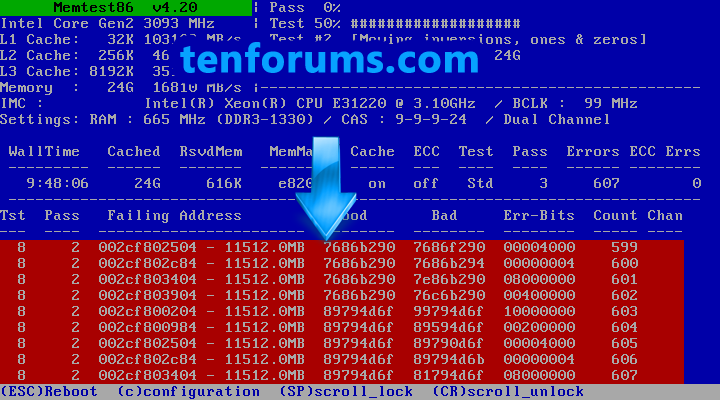
If MemTest86+ detects errors with the RAM it will highlight as red lines underneath the information section. If just one error is detected (one error equals one red line entry) then there is an issue with the RAM and/or the DIMM slot the RAM is installed in. If an error does present itself while testing you can stop the test, just one error is enough to indicate failing RAM.
The errors section is highlighted below.
If MemTest86+ runs for 8 passes without throwing up an error then it's more or less a certainty that your RAM is good. If however MemTest86+ does find errors then it's a case of determining if it's actually your RAM that's faulty or one or more of your DIMM slots. To determine this you will need to test every stick of RAM in every DIMM slot.
For example, if you have two sticks of RAM and two DIMM slots:
If the output is like this then you have bad RAM so the stick(s) need replacing. The first stick of RAM fails in both DIMM slots but the second stick of RAM passes in both DIMM slots.
TEST SLOT 1 SLOT 2 RAM 1 ERROR ERROR RAM 2 GOOD GOOD
If the output is like this then you should replace the motherboard. Both sticks of RAM fail in the first DIMM slot but both sticks pass in the second DIMM slot.
TEST SLOT 1 SLOT 2 RAM 1 ERROR GOOD RAM 2 ERROR GOOD
That's it,
Gav.
MemTest86+ - Test RAM
-
-
-
New #3
Hello, I had several BSODs in the past and already tried out MemTest86+ (with 0 errors). Afterwards I used Driver Verifier with no crashes, thus a user told me to use MemTest86+ with SMP enabled. Can someone please tell me how to enable it?
My thread if someone would like to help me: IRQL/KMODE when I watch a stream/video Any help is much appreciated.
-
New #4
I accidentally got the Passmark commercial (free) version of MemTest86 v6 for my tests.
Will a run of that version for 8 consecutive passes with no errors be acceptable in these forums to rule out bad ram?
I have 16 GB ram and it's already taken 8 hours to run 4 passes of MemTest86 v6 so would be nice if I didn't need to repeat to move forward etc.
-
-
-
New #7
-
-
-
New #9


 Quote
Quote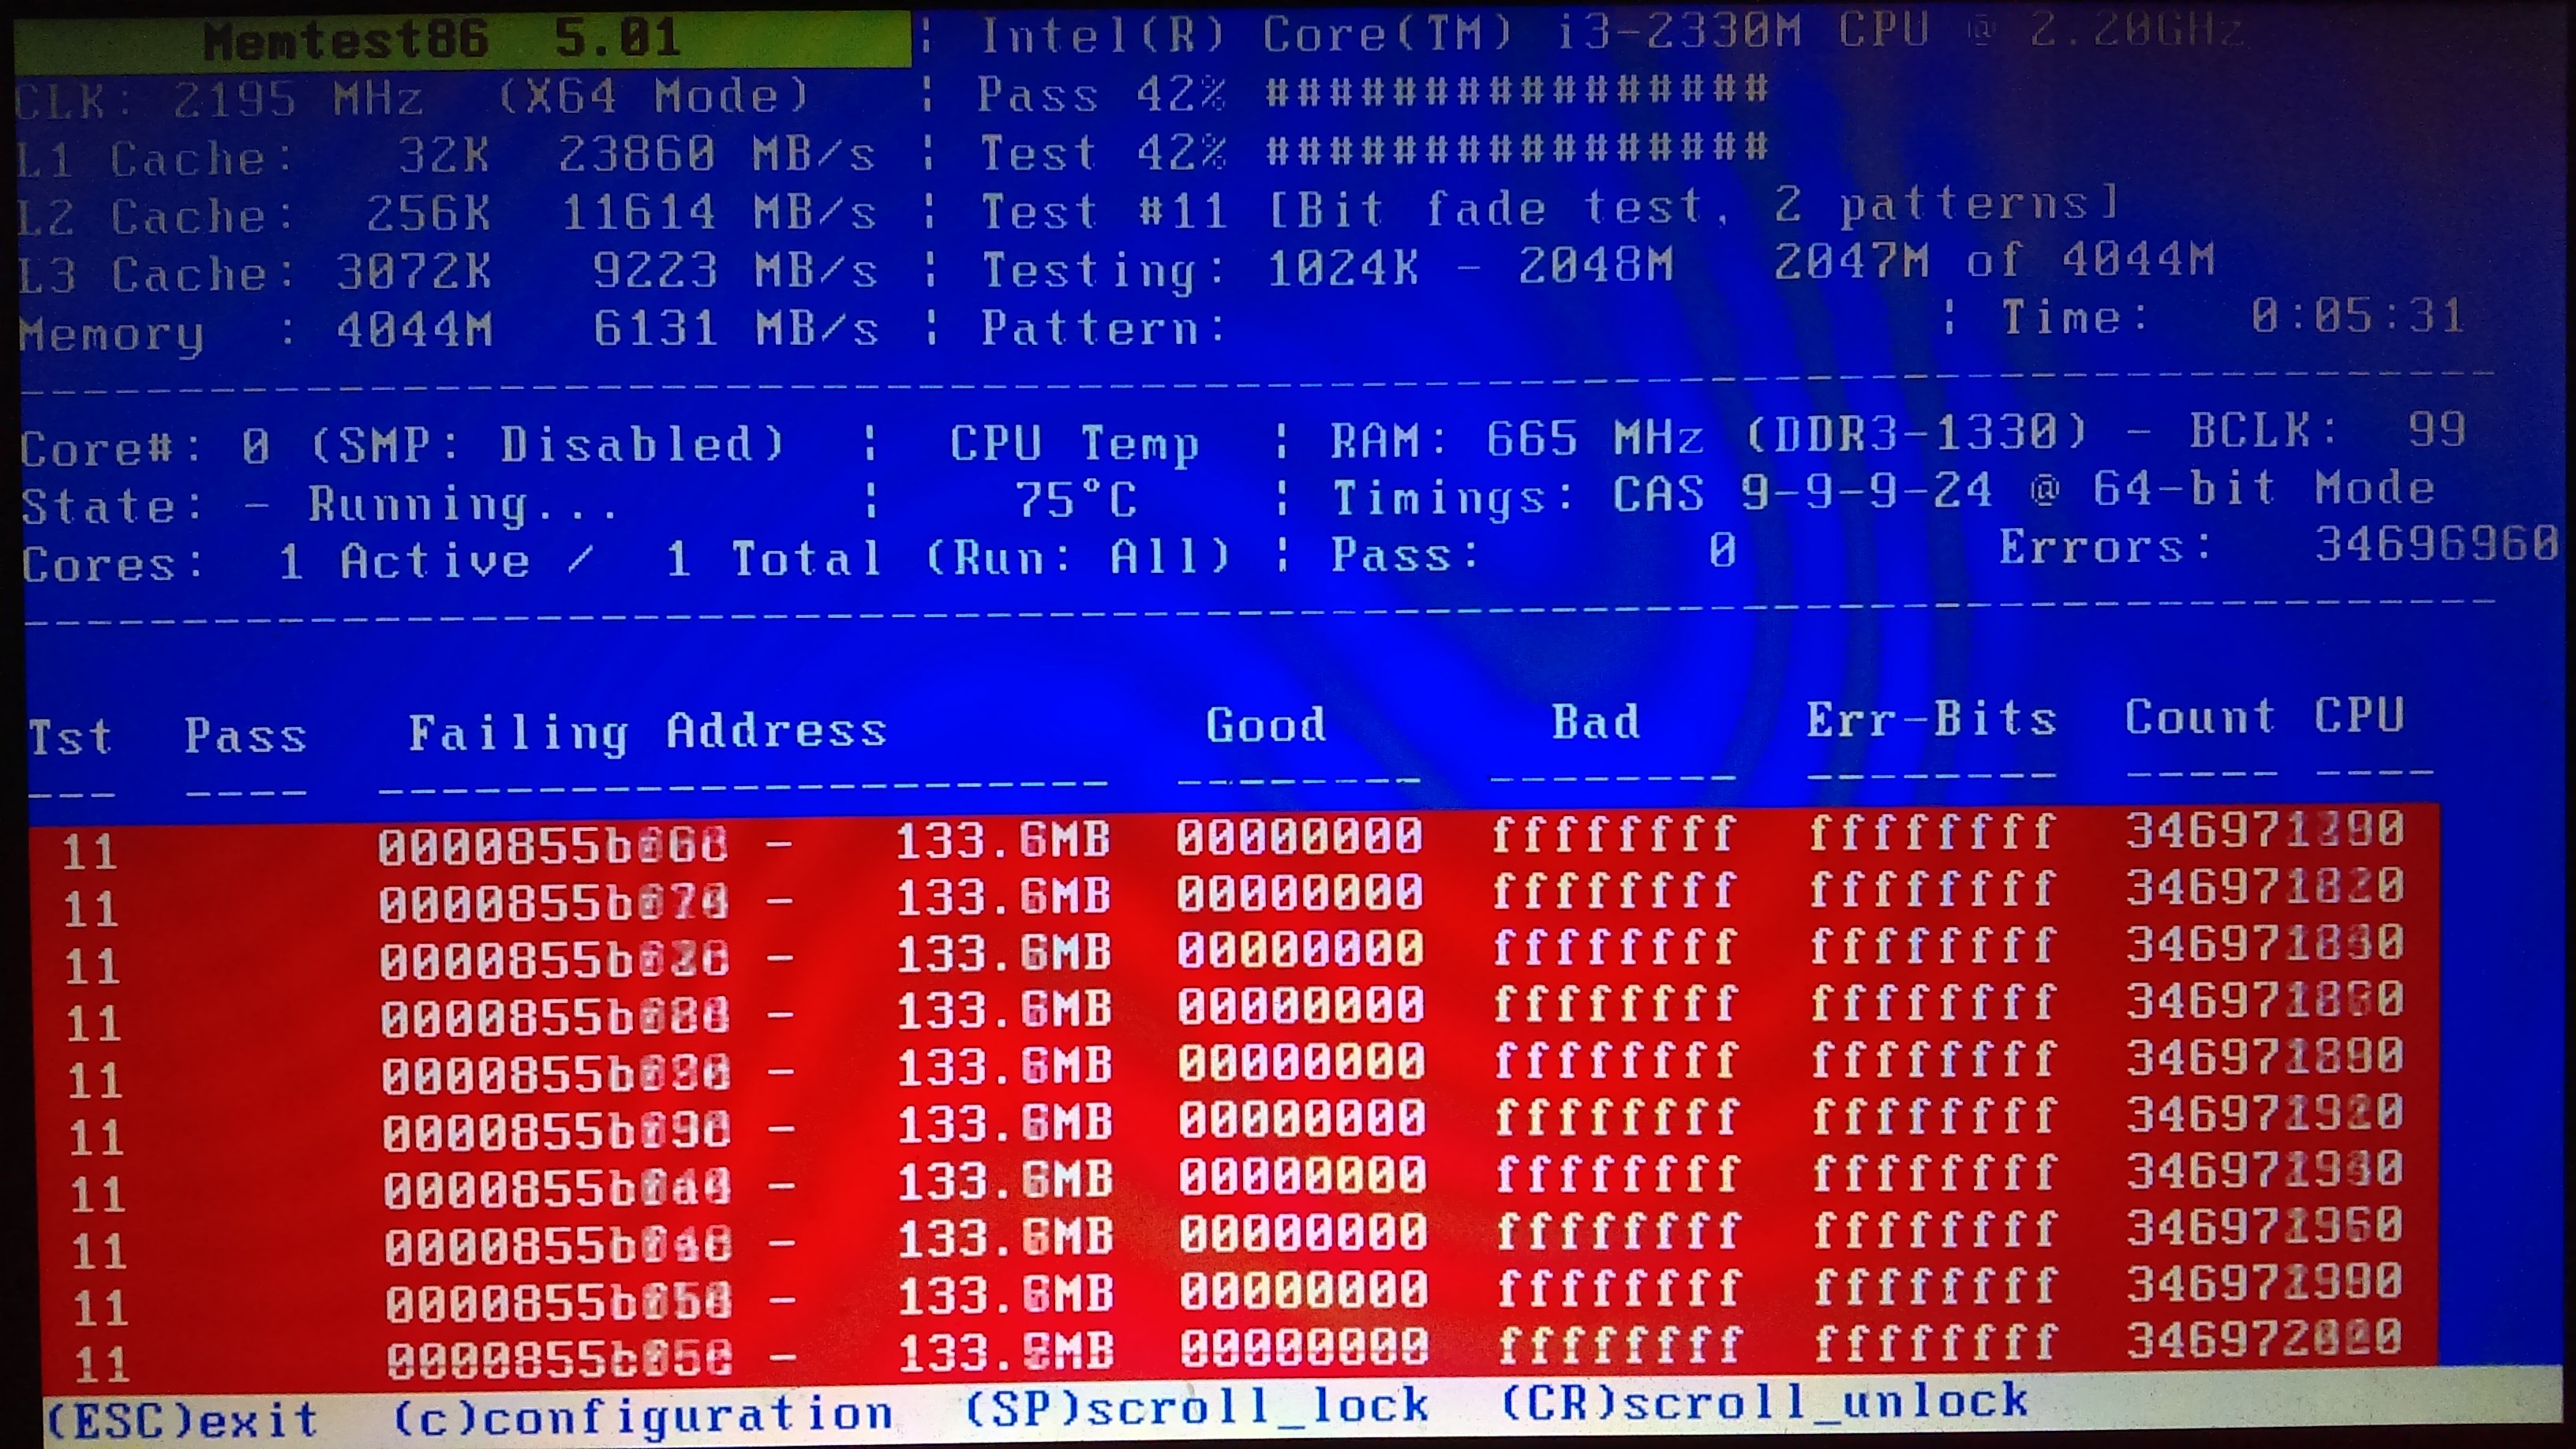
Tutorial Categories

Related Discussions
