

How to Remove User Account Picture on Sign-in Screen in Windows 10
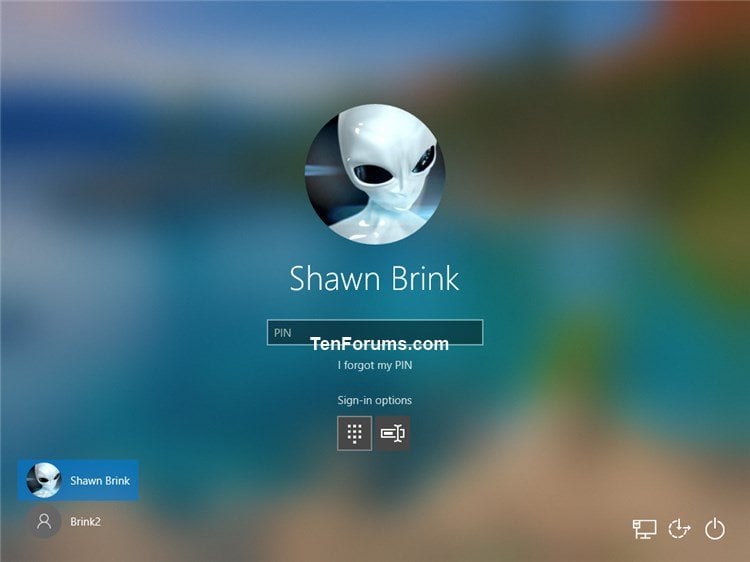
A user's account picture will show on the sign-in screen by default in Windows 10.
This tutorial will show you how to remove the user account picture on the sign-in screen for all users in Windows 10.
You must be signed in as an administrator to remove the user account picture on the sign-in screen.
If you run a sfc /scannow command, it will restore the original User-192.png system file undoing the removal of the user account picture on the sign-in screen.
Contents
- Option One: To Remove User Account Picture on Sign-in Screen
- Option Two: To Undo Remove User Account Picture on Sign-in Screen
EXAMPLE: Add and remove user account picture on sign-in screen
1 Click/tap on the Download button below to download the Transparent_User-192.zip file.
2 Save the Transparent_User-192.zip file to your desktop.
3 Unblock the Transparent_User-192.zip file.
4 Open the ZIP file, and extract (drag and drop) the transparent User-192.png file to your desktop.
5 Open File Explorer (Win+E).
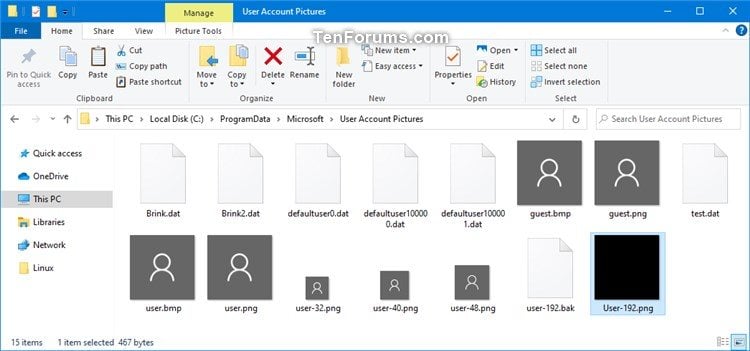
6 Copy and paste the %ProgramData%\Microsoft\User Account Pictures location into the address bar of File Explorer, and press Enter.
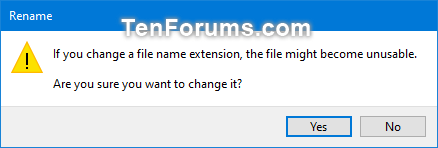
7 In the User Account Pictures folder, rename the user-192.png file to user-192.bak to change its file name extension, and click/tap on Yes to approve when prompted. (see screenshots below)
user-192.bak will serve as the backup of the original user-192.png file.
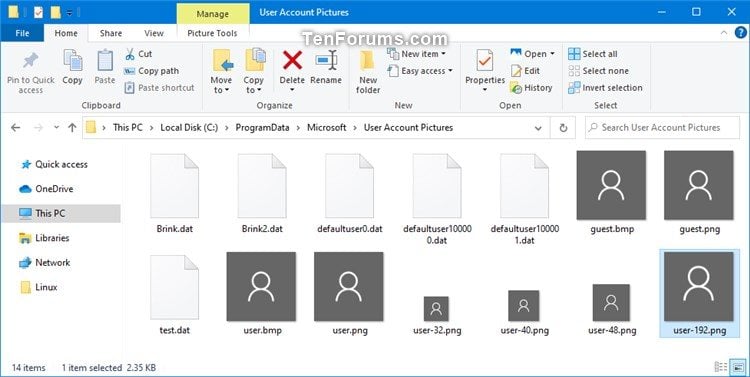
8 Copy or Move the transparent User-192.png file from step 4 into the User Account Pictures folder. (see screenshot below)
9 You can now close File Explorer if you like.
10 Enable apply default account picture to all users (click on link) to apply.
This is the default setting.
1 Open File Explorer (Win+E).
2 Copy and paste the %ProgramData%\Microsoft\User Account Pictures location into the address bar of File Explorer, and press Enter.
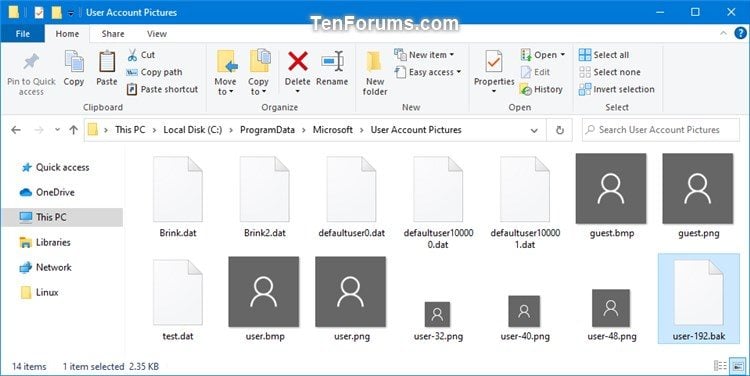
3 In the User Account Pictures folder, delete the transparent User-192.png file with a black square. (see screenshot below)
4 In the User Account Pictures folder, rename the user-192.bak file to user-192.png to change its file name extension, and click/tap on Yes to approve when prompted. (see screenshots below)
5 You can now close File Explorer if you like.
6 Disable (not configured) apply default account picture to all users (click on link) to apply.
That's it,
Shawn
Related Tutorials
- How to Change Your Account Picture in Windows 10
- How to Delete Recent Account Picture History in Windows 10
- How to Change Default Account Picture in Windows 10
- How to Apply Default Account Picture to All Users in Windows 10
- How to Turn On or Off Show Lock Screen Background on Sign-in Screen in Windows 10
- How to Enable or Disable Sign-in Screen Background Image in Windows 10
- How to Enable or Disable Acrylic Blur Effect on Sign-in Screen Background in Windows 10
- How to Hide or Show Your Email Address on Sign-in Screen in Windows 10
Remove User Account Picture on Sign-in Screen in Windows 10

Remove User Account Picture on Sign-in Screen in Windows 10
How to Remove User Account Picture on Sign-in Screen in Windows 10Published by Shawn BrinkCategory: User Accounts
18 Jul 2020

Tutorial Categories

Related Discussions
