

How to Rename Shortcuts in Win+X Quick Link Menu in Windows 10
The Win+X Quick Link menu is a pop-up menu from the Start button that includes shortcuts of common management, configuration, and other power user Windows tools.
This tutorial will show you how to rename any shortcuts you want in the Win+X Quick Link menu for your account in Windows 10.
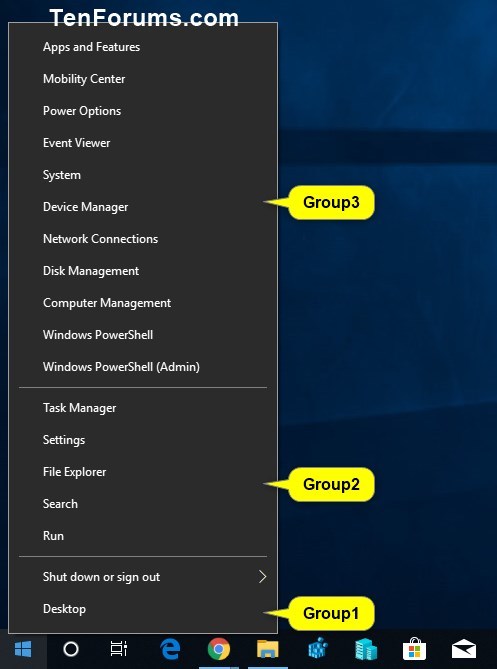
EXAMPLE: Default shortcuts and groups on Win+X Quick Link menu
Here's How:
1 Open File Explorer (Win+E).
2 Copy and paste %LocalAppdata%\Microsoft\Windows\WinX into the address bar of File Explorer, and press Enter.
3 Open the Group1 (bottom), Group2 (middle), or Group3 (top) folder for the Win+X Quick Link menu group you want to rename a shortcut in. (see screenshot below)
4 Right click or press and hold on the shortcut (ex: "File Explorer") you want to rename, and click/tap on Properties. (see screenshot below)
5 In the Shortcut tab, type the name you want for this shortcut in the Comment field, and click/tap on OK. (see screenshot below)
6 Repeat steps 3 to 5 if you would like to rename any other shortcuts in the Win+X menu.
7 When finished, restart the explorer process or sign out and sign in to apply your changes to the Win+X Quick Link menu.
8 You can now open your Win+X Quick Link menu to see your renamed shortcut(s). (see screenshot below)
That's it,
Shawn
Related Tutorials
- How to Open Win+X Quick Link Menu in Windows 10
- How to Add or Remove Default Items on Win+X Quick Link Menu in Windows 10
- How to Add Custom Shortcuts to Win+X Quick Link Menu in Windows 10
- How to Add Win+X Classic Menu to context menu in Windows 10
- How to Show Command Prompt or Windows PowerShell on Win+X menu in Windows 10
- How to Add or Remove Control Panel on Win+X Menu in Windows 10
- How to Add or Remove Settings on Win+X Menu in Windows 10
- Open Apps and Features from Win+X Menu to Control Panel or Settings in Windows 10
- How to Open Power Options from Win+X Menu to Control Panel or Settings in Windows 10
- How to Open System from Win+X Menu to Control Panel or Settings in Windows 10
- How to Change Network Connections in Win+X to Open from Control Panel or Settings in Windows 10
Rename Shortcuts in Win+X Quick Link Menu in Windows 10

Rename Shortcuts in Win+X Quick Link Menu in Windows 10
How to Rename Shortcuts in Win+X Quick Link Menu in Windows 10Published by Shawn BrinkCategory: Customization
11 Apr 2020


Tutorial Categories

Related Discussions
