

How to Turn On or Off Core Isolation Virtualization-based Security for Memory Integrity in Windows 10
The Windows 10 Creators Update introduced a new experience called Windows Security to make it is easier for you to view and control the security protections you choose and better understand the security features already protecting you on your Windows 10 device.
Starting with Windows 10 build 17093, the Device security page was added to Windows Security that provides you with status reporting and management of security features built into your devices including toggling features on to provide enhanced protections.
One Device security is Core isolation that provides virtualization-based security features for added protection against malware and other attacks by isolating computer processes from your operating system and device.
Memory integrity is a feature of core isolation. By turning on the Memory integrity setting, you can help prevent malicious code from accessing high-security processes in the event of an attack. Memory integrity is a feature of Windows that ensures code running in the Windows kernel is securely designed and trustworthy. It uses hardware virtualization and Hyper-V to protect Windows kernel mode processes from the injection and execution of malicious or unverified code. The integrity of code that runs on Windows is validated by memory integrity, making Windows resistant to attacks from malicious software. Memory integrity is a powerful security boundary that helps to block many types of malware from running in Windows 10 and Windows Server 2016 environments.
See also:
- Windows Defender System Guard: Making a leap forward in platform security with memory integrity - Microsoft Tech Community - 167303
- Core isolation | Microsoft Docs
- Device protection in Windows Security | Microsoft Support
- Enable virtualization-based protection of code integrity | Microsoft Docs
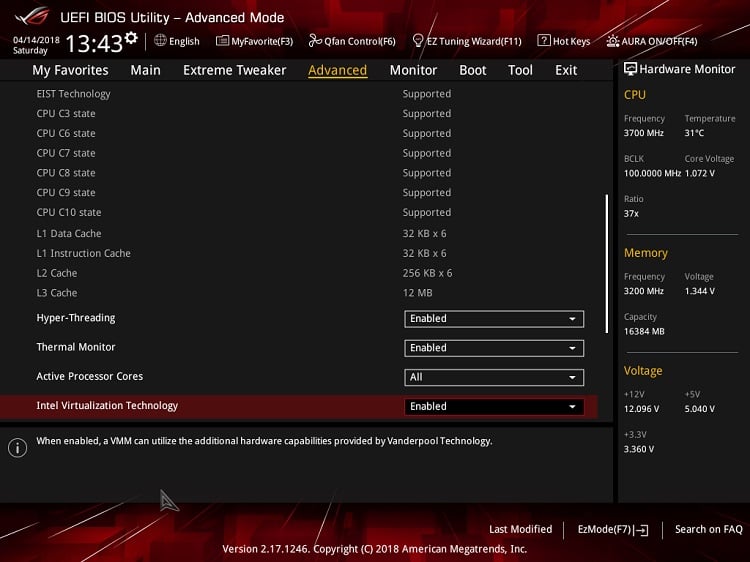
It is required to have Virtualization enabled for your CPU in your UEFI firmware settings to have Core isolation Memory integrity available.
This tutorial will show you how to turn on or off Core isolation virtualization-based security for Memory integrity in Windows 10.
You must be signed in as an administrator to turn on or off Memory integrity.
Contents
- Option One: Turn On or Off Core Isolation Memory Integrity in Windows Security
- Option Two: Turn On or Off Core Isolation Memory Integrity using a REG file
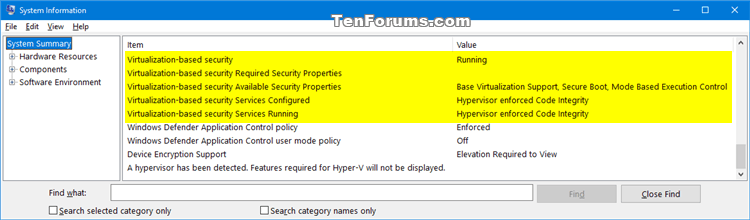
EXAMPLE: Core Isolation (Hypervisor enforced code integrity) shown as enabled in msinfo32
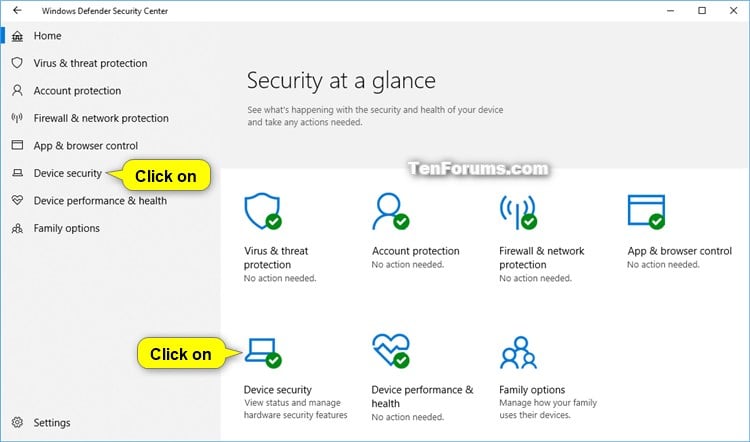
1 Open Windows Security, and click/tap on the Device security icon. (see screenshot below)
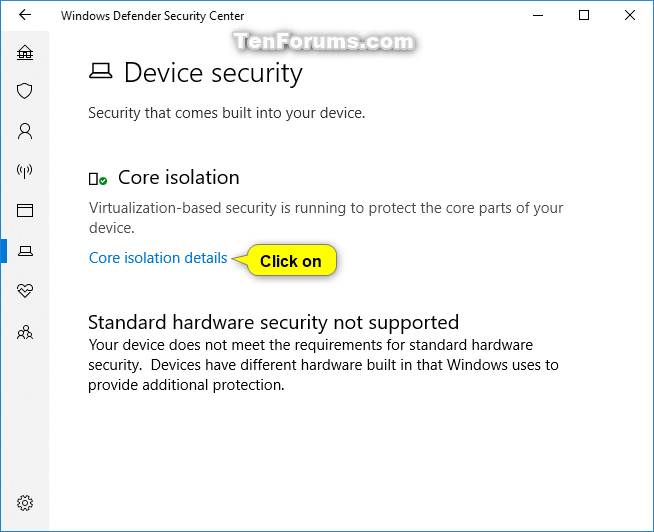
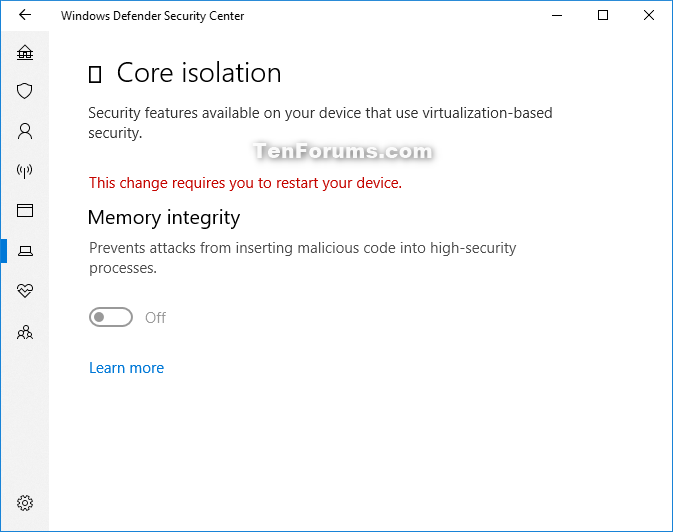
2 Click/tap on the Core isolation details link. (see screenshot below)
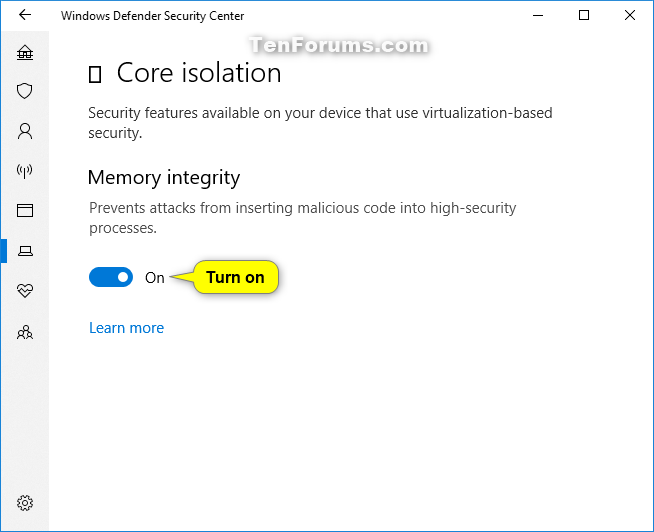
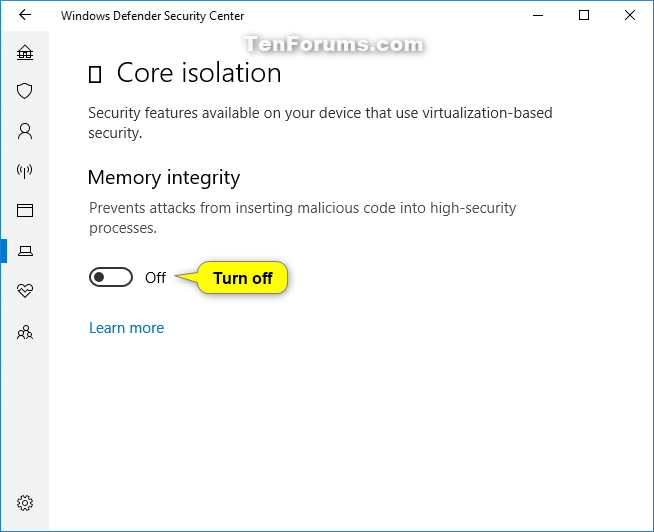
3 Turn On or Off (default) Memory integrity for what you want. (see screenshots below)
4 Click/tap on Yes when prompted by UAC.
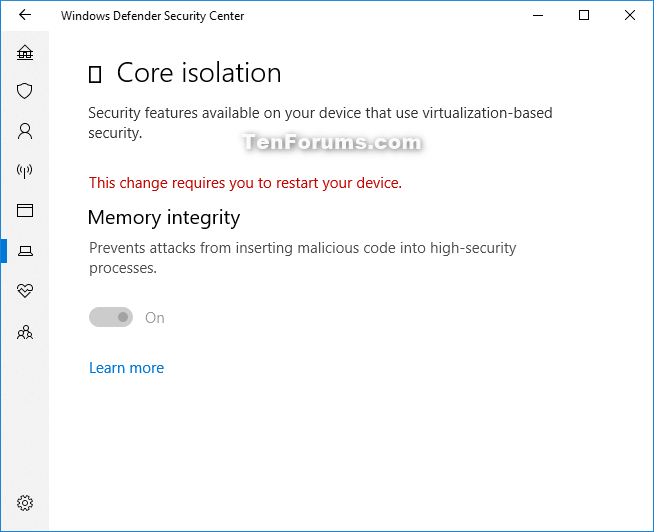
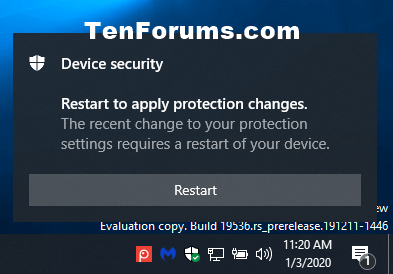
5 Restart the computer to apply. (see screenshots below)
The downloadable .reg files below will modify the DWORD value in the registry key below.
HKEY_LOCAL_MACHINE\SYSTEM\CurrentControlSet\Control\DeviceGuard\Scenarios\HypervisorEnforcedCodeIntegrity
Enabled DWORD
0 = Off
1 = On
1 Do step 2 (on) or step 3 (off) below for what you would like to do.
A) Click/tap on the Download button below to download the file below, and go to step 4 below.
Turn_ON_Core_isolation_Memory_integrity.reg
Download
This is the default setting.
A) Click/tap on the Download button below to download the file below, and go to step 4 below.
Turn_OFF_Core_isolation_Memory_integrity.reg
Download
4 Save the .reg file to your desktop.
5 Double click/tap on the downloaded .reg file to merge it.
6 When prompted, click/tap on Run, Yes (UAC), Yes, and OK to approve the merge.
7 Restart the computer to apply.
8 If you like, you can now delete the downloaded .reg file.
That's it,
Shawn Brink
Turn On or Off Core Isolation Memory Integrity in Windows 10
-
New #1
first of all excuse me for my english but i have some questions.
So, if i don't misunderstand the MS article, device that meet the minimum requirements have (part of) VBS enabled by default regardless of the type of installation (clean or upgrade) while HVCI depends on the type of installation performed?
Example (assuming that the device meets the minimum requirements):
clean install→VBS, HVCI on
upgrade→VBS on, HVCI off (even if it can be turned on post upgrade via memory integrity switch)Last edited by Ita1; 25 Mar 2018 at 11:33.
-
New #2
Hello Ita1, :)
I'm not sure either, but this setting has always been turned off by default for me so far.
-
New #3
this setting = VBS, right?
What's the meaning than of "for older systems, customers will have the ability to opt in post upgrade using [...]"?
Older system=upgrade?
-
New #4
Yes, core isolation is VBS.
The line below means that they will be able to set it like in the tutorial.
...for older systems, customers will have the ability to opt in post upgrade using the UI in Windows Defender Security Center (WDSC).
-
New #5
txs for your kind reply Brink!
right
yes but for devices that meet the minimum requirements otherwise the reliance on hardware would be useless.The line below means that they will be able to set it like in the tutorial.
So, i think that older system should be explained as "system that come from an older branch" (eg 10 FCU) otherwise it doesn't make sense...
-
New #6
From the article you linked Shawn:
My Logitech webcam is one of those drivers that doesn't work now, with this turned on.While hypervisor-protected code integrity compliance has been a requirement for all drivers since Windows 10 Anniversary Update (1607), some drivers may still not be compatible. This may cause devices or software to malfunction. Such issues may occur after Memory integrity protection has been turned on or during the enablement process itself. If you’re an application developer and want to validate if your drivers and software packages are compliant with memory integrity, you can follow the steps outlined here.
We worked hard to mitigate impacted experiences, so if an incompatibility exists for a boot-critical driver, Memory integrity protection will be silently turned off. If you encounter incompatibilities with other apps, Microsoft advises that you check for updates for the specific app and version encountering the issue before turning off memory integrity protection. The following links show some examples of commonly-used APIs that cause executable memory to be allocated, along with some example fixes:
But, Microsoft provides their own generic drivers for webcams(in Device Manager), just basic ones with no frills, but enough to work in Skype.
Samsung and Logitech are notorious for not updating their certificates, so it is to be expected I guess
-
-
New #8
Your welcome Shawn.
I have upgraded my main system to the RP(yeah I couldn't wait ) and now have the option, and turned it on.
If the generic driver hadn't worked, I would have turned it off, but I don't need any of the extra features anyhow.
By the way, one will need to do the same for the web cams mic also.
-
-
New #9
Hmm, this below is what I'm seeing in Windows 10 build 17639.
I'm unable to turn off "Memory integrity", but I do not have any group policies configured despite the red message below.


Turn On or Off Core Isolation Memory Integrity in Windows 10
How to Turn On or Off Core Isolation Virtualization-based Security for Memory Integrity in Windows 10Published by Shawn BrinkCategory: Security System
22 Mar 2022

 Quote
QuoteTutorial Categories

Related Discussions
