

How to Turn On or Off ClearType in Windows 10
ClearType makes the text you see on your displays sharper, clearer, and easier to read.
See also: Improving font rendering in Microsoft Edge | Windows Blogs
This tutorial will show you how to to turn on or off ClearType Text Tuner for each display for your account in Windows 10.
Here's How:
1 Press the Win + R keys to open Run, type cttune into Run, and click/tap on OK to open ClearType Text Tuner.
2 Check (on - default) or uncheck (off) the Turn on ClearType check box for what you want to do, and click/tap on Next. (see screenshots below)
You can quickly check or uncheck Turn on ClearType to see a preview of how your text would look with and without ClearType.

3 If you have multiple displays, you will be asked to select Yes or No to tune all displays or only one selected dispay, and click/tap on Next. (see screenshots below)
4 If your display is not set to it's native screen resolution, then you will be asked to select to change to native resolution or keep current resolution, and click/tap on Next. (see screenshots below)
5 Click/tap on the text sample (1 of 5) that looks best to you, and click/tap on Next. (see screenshots below)
6 Click/tap on the text sample (2 of 5) that looks best to you, and click/tap on Next. (see screenshots below)
7 Click/tap on the text sample (3 of 5) that looks best to you, and click/tap on Next. (see screenshots below)
8 Click/tap on the text sample (4 of 5) that looks best to you, and click/tap on Next. (see screenshots below)
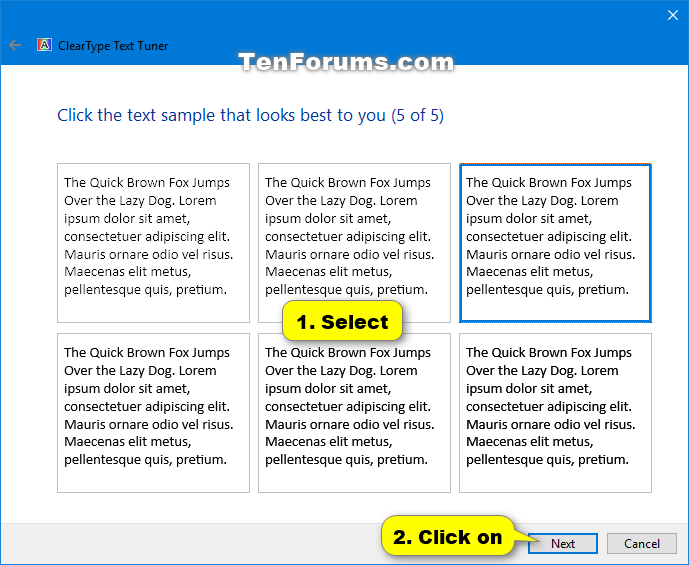
9 Click/tap on the text sample (5 of 5) that looks best to you, and click/tap on Next. (see screenshots below)
10 If you have multiple displays and selected Yes in step 3 above, then click/tap on Next and go to step 4 above to repeat these steps for your other displays. (see screenshots below)
11 When finished, click/tap on the Finish button. (see screenshots below)
That's it,
Shawn
Related Tutorials
- How to Enable or Disable Enhance Text Contrast in Microsoft Edge
- How to Enable or Disable Font Smoothing in Windows
- How to Adjust Screen Brightness in Windows 10
- How to Change Visual Effects Settings in Windows 10
- How to Calibrate a Monitor in Windows 10
- How to Run VESA Certified DisplayHDR Tests on Display in Windows 10
Turn On or Off ClearType in Windows 10
Turn On or Off ClearType in Windows 10
How to Turn On or Off ClearType in Windows 10Published by Shawn BrinkCategory: General Tips
02 Jun 2021


Tutorial Categories

Related Discussions
