

How to Create and Use Live Folders on Start in Windows 10
Live Folders allows you to group tiles on your Start screen into one or more folders on Start. You can arrange and resize tiles in a Live Folder how you want. You can also arrange, resize, and group the tile of a Live Folder how you want like any other tile on your Start screen.
Live Folders have been available since Windows Phone 8.1 on Windows 10 Mobile phones, but haven't been available on a Windows 10 PC yet.
Starting with Windows 10 build 15002, you can now now be able to group your Start tiles into folders. Tile folders are a way for you to organize and personal your tiles in Start, and were happy to now bring this to Windows 10 PCs.
Starting with Windows 10 build 17666, Microsoft has added the ability to name your tiles for live folders on Start. When you expand the folder, youll see a new option to name it. The name will be visible when the folder is medium, wide, or large-sized.
This tutorial will show you how to create and use Live Folders on your Start screen in Windows 10.
Contents
- Option One: How to Create a Live Folder on Start
- Option Two: How to Open and Close a Live Folder on Start
- Option Three: How to Resize a Live Folder on Start
- Option Four: How to Add Tiles to a Live Folder on Start
- Option Five: How to Name or Rename a Tile Folder on Start
- Option Six: How to Remove Tiles from a Live Folder on Start
- Option Seven: How to Remove a Live Folder on Start
EXAMPLE: Start tile folder naming
1 Open your Start menu .
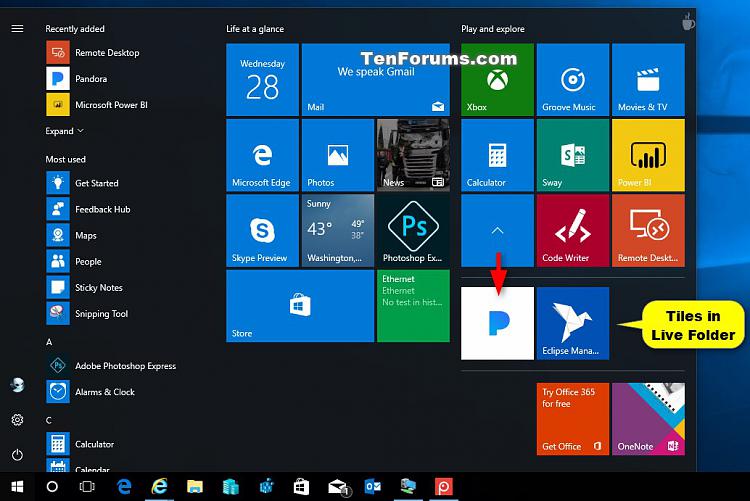
2 Drag and drop a tile you want in a folder on another tile you also want in the same folder. (see screenshot below)
3 The two tiles will now be grouped into the same Live Folder. (see screenshots below)
1 Open your Start menu .
2 Click/tap on a Live Folder tile to open it. (see screenshot below)
3 While the Live Folder is open, you can click/tap on an app's tile to open the app. You can also arrange and resize tiles in this Live Folder how you want. (see screenshot below)
4 Click/tap on the Live Folder arrow to close it. (see screenshot below)
1. Open your Start menu.
2. Right click or press and hold on a Live Folder tile you want to resize, click/tap on Resize, and click/tap on the size (ex: small, medium, wide, or large) you want. (see screenshot below)
1 Open your Start menu .
2 Do step 3 or step 4 below for how you would like to add a tile to a Live Folder.
3 Drag and drop a tile on the Live Folder tile, and go to step 5 below. (see screenshot below)
4 Open the Live Folder you want to add tiles to. (see screenshot below)
5 The tile(s) will now be added to the Live Folder. (see screenshot below)
6 When finished adding tiles, you can close the Live Folder. (see screenshot below)
7 You will now see the added tile(s) on the tile of the Live Folder. (see screenshot below)
This option is only available starting with Windows 10 build 17666.
1 Open your Start menu .
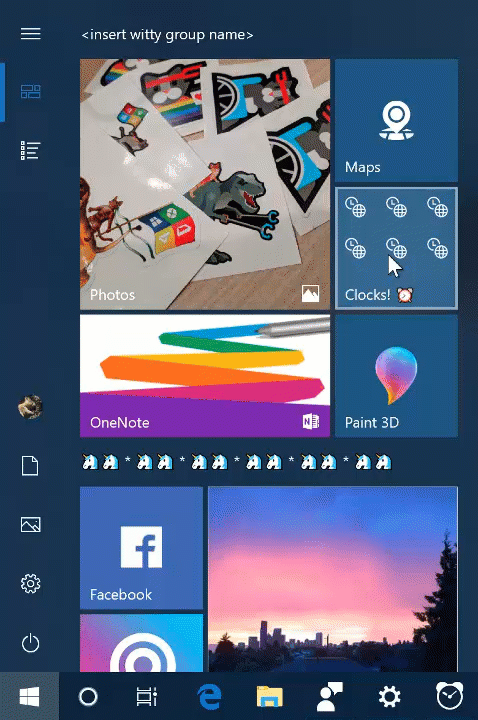
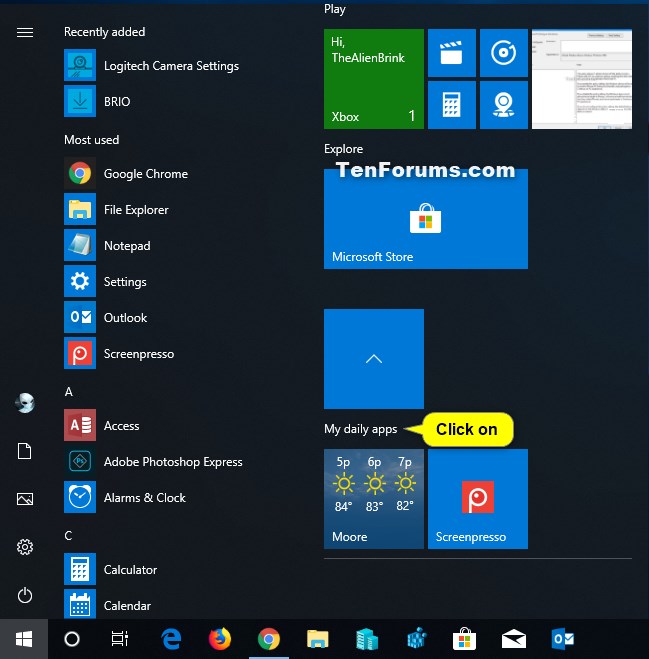
2 Click/tap on the tile of a live folder on Start you want to rename. This will expand the folder. (see screenshot below)
3 Click/tap on the option to name the folder. (see screenshots below)

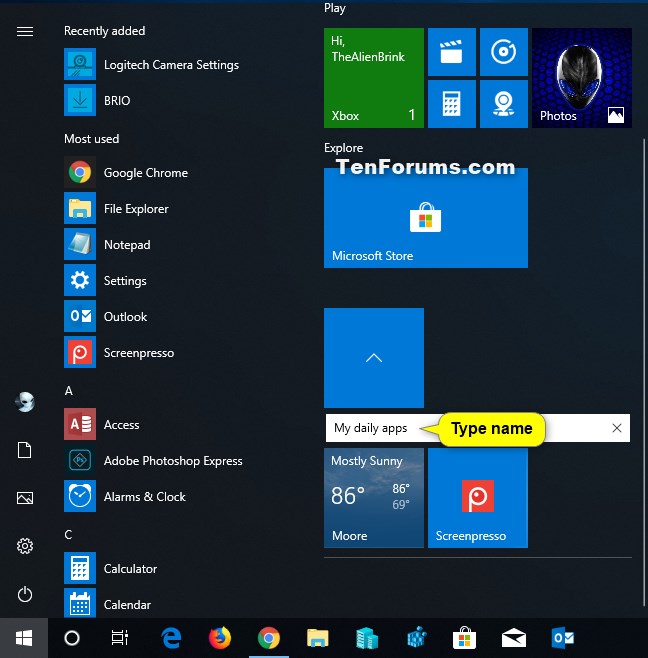
4 Type a name you want to display on the tile of this live folder. (see screenshot below)
5 Click/tap on the folder's arrow to close it. (see screenshot below)
6 The tile of this live folder on Start has now been named or renamed. (see screenshot below)
1 Open your Start menu .
2 Open the Live Folder you want to remove tiles from. (see screenshot below)
3 Drag and drop a tile from within the Live Folder to where you want on Start. (see screenshot below)
4 The tile will now be removed from the Live Folder. (see screenshot below)
1 Open your Start menu .
2 Remove all tiles from the Live Folder you want to remove.
Starting with Windows 10 build 18298, you can now right click or press and hold on a Live Folder on Start, and click/tap on Unpin folder from Start.
That's it,
Shawn
Related Tutorials
- How to Group your App Tiles on Start in Windows 10
- How to Resize Tiles on Start Menu in Windows 10
- How to Turn On or Off 'Show more tiles' on Start in Windows 10
- How to Resize your Start Menu in Windows 10
- How to Reset Start Menu Layout to Default in Windows 10
- How to Backup and Restore Start Menu Layout in Windows 10
Create and Use Live Folders on Start in Windows 10
-
New #1
Is it possible to get rid of the live folder tiles altogether? I won't be using live folders at all and want just my usual list on the start menu.
-

Create and Use Live Folders on Start in Windows 10
How to Create and Use Live Folders on Start in Windows 10Published by Shawn BrinkCategory: Customization
08 Dec 2019


 Quote
QuoteTutorial Categories

Related Discussions
