

How to Change Account Type of Users in Windows 10
When you set up Windows, you were required to create a user account. This account is an administrator account that allows you to set up your PC and install any apps that you would like to use. When you add an account on your PC in Windows, it will be a standard user account by default.
Guest - No longer valid in Windows 10. Guest accounts were good to allow people temporary use of your PC. A guest account is not able to install apps, hardware, change settings, and can only be a local account. See: How to Add a Guest Account in Windows 10
Standard User - Standard user accounts are good for everyday usage, and can be a local account or Microsoft account. Standard user accounts can use most apps and change system settings that do not affect other users. If any action that requires elevated rights is attempted while signed in as a standard user, Windows will display a UAC prompt for the password of an administrator for approval. If UAC is set to "Never notify", then a standard user will automatically just be denied the elevated action.
Administrator - Administrator accounts have complete access to the PC and can make any desired changes. Administrators can be a local account or Microsoft account. If any action that requires elevated rights is attempted while signed in as an administrator, Windows will display a UAC prompt for the administrator to confirm (Yes or No) or enter their password first.
This tutorial will show you how to change the account type of users to be either a guest, standard user, or administrator in Windows 10.
You must be signed in as an administrator to change a user's account type.
If you do not have another administrator account to use, you can enable and use the built-in "Administrator" account to change a user's account type.
You need to always keep at least one administrator account enabled on the PC to be able to sign in to for performing any action in Windows that require administrator (elevated) rights.
Contents
- Option One: To Change a User's Account Type in Settings
- Option Two: To Change a User's Account Type in Control Panel
- Option Three: To Change a User's Account Type in netplwiz
- Option Four: To Change a User's Account Type in Command Prompt
1 Open Settings, and click/tap on the Accounts icon.
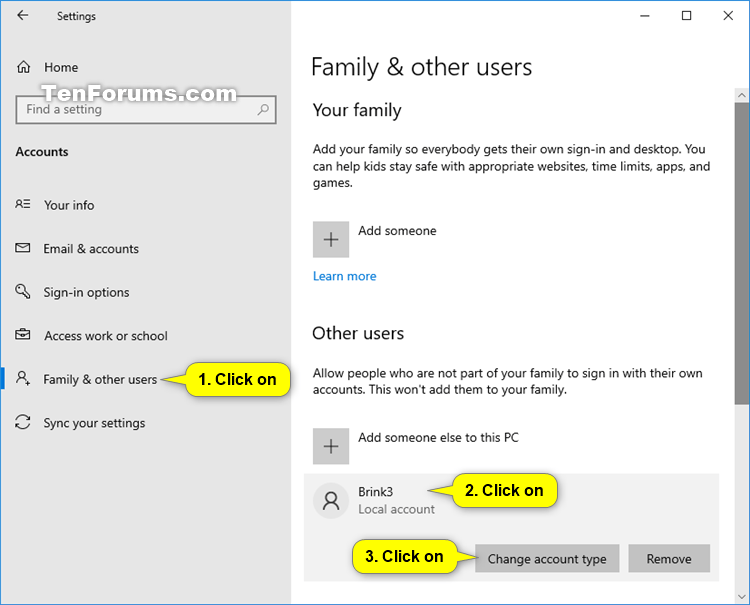
2 Click/tap on Family & other users on the left side, click/tap on an account (ex: Brink3) under Other users or Your family you want to change the type of, and click/tap on Change account type. (see screenshot below)
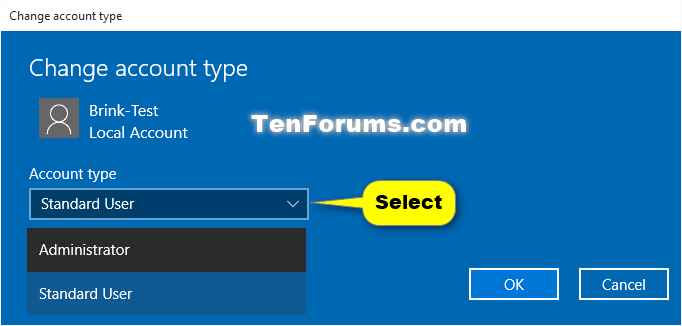
3 Select the account type you want to change the account to, and click/tap on OK. (see screenshot below)
4 You can now close Settings if you like.
1 Open the Control Panel (icons view), and click/tap on the User Accounts icon.
2 Click/tap on the Manage another account link. (see screenshot below)
3 If prompted by UAC, click/tap on Yes.
4 Click/tap on the account (ex: Brink-Test} that you would like to change the type of. (see screenshot below)
5 Click/tap on the Change the account type link. (see screenshot below)
6 Select (dot) the account type you want to change the account to, and click/tap on Change Account Type. (see screenshot below)
7 You can now close the Control Panel if you like.
1 Type netplwiz in the search box (Win+S) on Start menu or taskbar, and press Enter to open advanced User Accounts.
2 If prompted by UAC, click/tap on Yes.
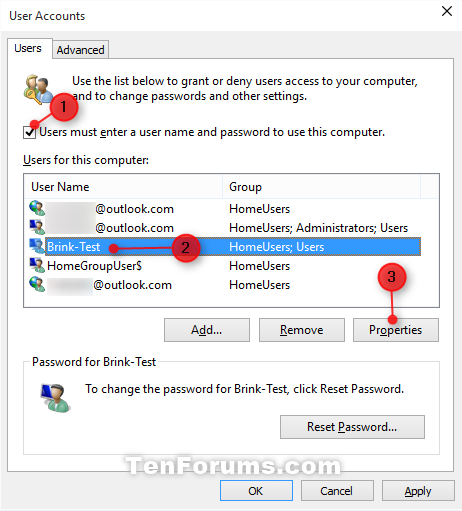
3 Check the Users must enter a user name and password to use this computer box, select the user name (ex: Brink-Test) of the account that you want to change the type of, and click/tap on the Properties button. (see screenshot below)
4 Select (dot) the account type you want to change the account to, and click/tap on OK. (see screenshot below)
5 If you had set Windows to automatically sign in to an account at startup, then you will need to set it again.
6 You can now close the netplwiz if you like.
1 Open an elevated command prompt.
2 Do step 3 (see current type), step 4 (guest), step 5 (standard user), step 6 (administrator), or step 7 (remove) below for what you would like to do.
A) In the elevated command prompt, copy and paste the commands below one at a time for each account type, and press Enter after each one. (see screenshots below)
net localgroup guests
net localgroup users
net localgroup administrators
B) Do step 4 (guest), step 5 (standard user), step 6 (administrator), or step 7 (remove) below for what you would like to do.
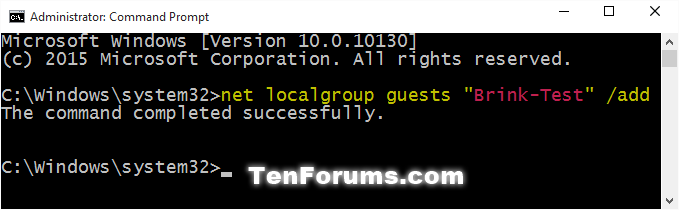
A) Type the command below into the elevated command prompt, and press Enter. (see screenshot below)
net localgroup guests "UserName" /add
Substitute UserName in the command above with the actual user name (ex: Brink-Test) from step 3.
For example:net localgroup guests "Brink-Test" /add
B) Go to step 7 below, and remove the user from being a standard user and administrator account type.
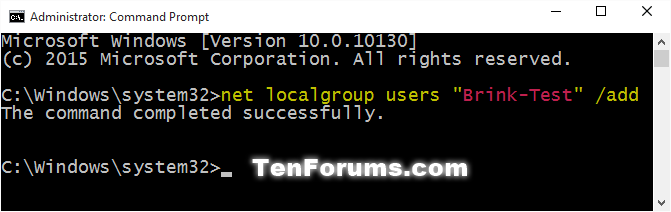
A) Type the command below into the elevated command prompt, and press Enter. (see screenshot below)
net localgroup users "UserName" /add
Substitute UserName in the command above with the actual user name (ex: Brink-Test) from step 3.
For example:net localgroup users "Brink-Test" /add
B) Go to step 7 below, and remove the user from being a guest and administrator account type.
A) Type the command below into the elevated command prompt, and press Enter. (see screenshot below)
net localgroup administrators "UserName" /add
Substitute UserName in the command above with the actual user name (ex: Brink-Test) from step 3.
For example:net localgroup administrators "Brink-Test" /add
B) Go to step 7 below, and remove the user from being a guest and standard user account type.
A) In the elevated command prompt, type the commands below one at a time for only the account types you want to remove the user from, and press Enter after each one.
net localgroup guests "UserName" /delete
net localgroup users "UserName" /delete
net localgroup administrators "UserName" /delete
Substitute UserName in the command above with the actual user name (ex: Brink-Test) from step 3.
For example:
net localgroup guests "Brink-Test" /delete
net localgroup users "Brink-Test" /delete
net localgroup administrators "Brink-Test" /delete
B) When finished, go to step 8 below.
8 When finished, you can close the elevated command prompt if you like.
That's it,
Shawn Brink
Related Tutorials
- How to Add a Local Account or Microsoft Account in Windows 10
- How to Add a Guest Account in Windows 10
- How to Enable or Disable User Accounts in Windows 10
- How to Enable or Disable Built-in Elevated Administrator Account in Windows 10
- How to Check if User is a Local Account or Microsoft Account in Windows 10
- How to Switch to a Local Account from a Microsoft Account in Windows 10
- How to Switch to a Microsoft Account from a Local Account in Windows 10
- How to Determine if Users are an Administrator or Standard User in Windows 10
- How to Add or Remove Users from Groups in Windows 10
- How to Change User Name of Account in Windows 10
Change Account Type in Windows 10
-
New #1
Don't rush into action without taking account warnings
Hi
I'm the only user on my computer and while using the commands to change my user name, i forgot to set user type to administrator before applying the changes.
Now a can't make administrator type changes to the computer :change administrator type back to administrator.
I can't user the "yes option" when asked about administration staffs
Is there a way to correct this?
PS. there seems to be an administrator account on the computer. The one automatically created by windows.
-
New #2
Hello ezerextat, and welcome to Ten Forums. :)
If you are able to sign in to this other administrator account, you could fix your account from it.
-
New #3
Thanks a lot
I know of that account from this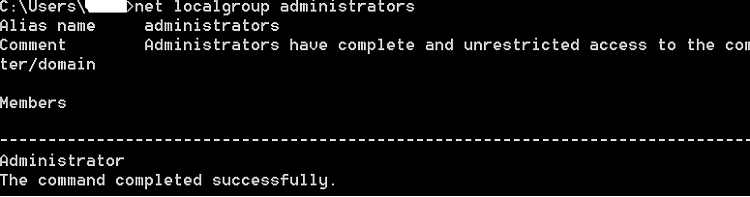
But as U can see, i can't use the system32 cmd, so i can't make changes from there.
All the help i got from the internet:
-start with something like "You must be signed in as an administrator to be able to do the steps in this tutorial." :)
-Tried taking control of C: but the pop up "user account Control" right keeps coming and I can't click the Yes button.
-No way to do this apart from reinstalling the system (is that even possible without an administrative account...even with a USB recovery drive?)
-Going to a store where they will use some magic tools to work around
Is there other ways to use the default administration account? ... or other solutions to the original problem?
Thks.
-
New #4
You might see if you may be able to use OPTION FOUR in the tutorial below to enable the built-in Administrator. Afterwards, sign in to it.
https://www.tenforums.com/tutorials/2...a.html#option4
-
New #5
Thkx again
I will first have to make a recovery drive then try the tutorial.
I will post the result then to the thread
-
New #6
Managed to get my computer back but I had to reinstall the system.
First I tried to enable the built in admin account but it still did not show up at the login screen. Then I used regedit to check the values as instructed, the value was already 10, but the account still didn't show up.
Then while trying to set up another admin account using the cmd I ended up with a black screen (windows wont boot)
So I instead reinstalled windows 8.
(if u have x/windows/sytem32, type c: and it switches to c:> )
I think where are some problems with how the windows 10 account staffs are presented to the user. Just changing a user name shouldn't end up with someone (who doesn't know a lot about computers) loosing total control on their own system.
I think It should not allow (ensure that) the only account on the system not having administration capabilities. At least for people who doesn't know a lot about computers.
I still think windows 10 is Ok. I will switch back to it soon enough. Just have to put up some precautions. We learn from experience.
Thanks again for your help.
-
New #7
Thank you for posting back with your results.
Yeah, it would be nice if Windows would prevent users from being able to cripple their only admin account.
-
New #8
please help me
i'm the only user of my computer and i was the administrator.
then i did something wrong in "netplwiz" and now my account has changed to "guest". so i can't enter the UAC and the "yes" option is disable for me.
also at the windows sign in screen now there are two account with my name that i can use both with my password but i'm not the admin anyway.
i don't know what should i do!!!
-
-
New #9
Hello Milad, and welcome to Ten Forums. :)
See if you may be able to use OPTION FOUR in the tutorial below to enable the built-in Administrator account. If successful, sign in to the built-in Administrator afterwards to undo what you did in netplwiz. It sounds like you need to make your account an administrator type again, and remove it from the guest group.
https://www.tenforums.com/tutorials/2...a.html#option4

Change Account Type in Windows 10
How to Change Account Type of Users in Windows 10Published by Shawn BrinkCategory: User Accounts
21 Oct 2021


 Quote
Quote
Tutorial Categories

Related Discussions
