

How to Create and Restore a System Image Backup with Macrium Reflect
UPDATE, MAY 19th, 2021
Macrium Reflect version 8 was released this week. I will completely update / rewrite this tutorial in the next few days. I will remove this note when the tutorial is up-to-date.
Kari
Information
To begin I quote myself from the Macrium viBoot tutorial:
This tutorial will show you the basics of Macrium Reflect, how to create backup images and restore them. We will not go deeply into more advanced features which will be covered in another tutorial in near future. However, the Macrium Reflect user interface and its functions and features like scheduling and backup plans are quite self-explanatory as you will see.I want to start with a very subjective, personal opinion: Macrium Reflect Free is the best available free imaging solution for Windows.
That being said there are quite a many alternatives for those searching for a free, easy to use imaging solution to create regular backups of your Windows installation. I have tried most of them, been quite happy with some but never found anything that comes even close to Macrium Reflect. It is extremely easy to use even for newbies and does exactly what it is designed to do, backing up your Windows system allowing an easy restore when something goes wrong.
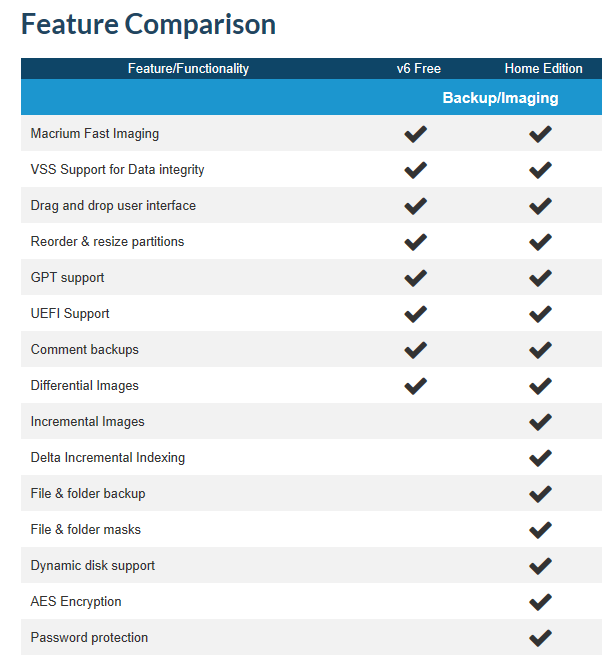
The free edition of Macrium Reflect is enough for most average users, although I have to say that ability to create incremental backups alone is for me a good enough reason to get the full Home edition. To check price of Home edition in your region please see Macrium Reflect for Home Use. In continetal Europe the price is at the moment of writing this 62.95 for one PC or 125.90 for four machines (pay 2, get 4).
Feature comparison, Free vs. Home:
If any questions about a feature you don't understand, don't hesitate to post in this thread.
Part One: Install Macrium Reflect Part Two: Create Rescue Media Part Three: Create a Full Backup image Part Four: Create Differential and / or Incremental backups Part Five: Restore a system backup Part Six: Service, update & upgrade a Macrium Image
Notice that you can click / tap screenshots to enlarge them.
1.) Download Macrium Reflect Free or a 30-day trial of Home Edition from Macrium Reflect Free
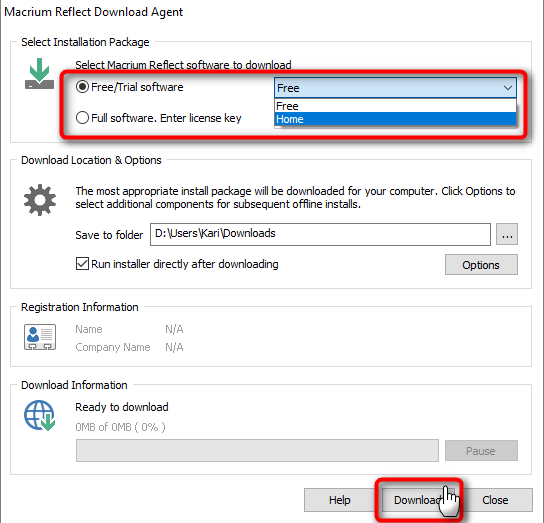
2.) Run the installer, select Free or Home, click Download:
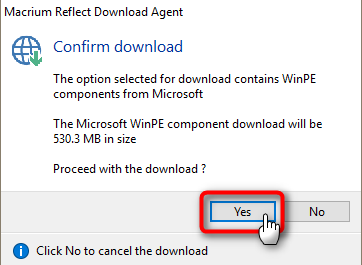
3.) Windows PE is kind of stripped down mini operating system (see Wikipedia). Its components need to be downloaded, accept download:
4.) When PE components have been downloaded Macrium installer starts. Install normally accepting all prompts
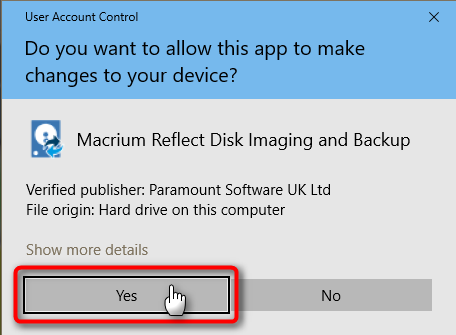
1.) Run Macrium Reflect. It always runs elevated, a UAC prompt will be shown if you have not turned UAC off. Accept it:
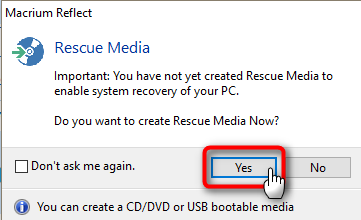
2.) When run first time Reflect suggests you to create WinPE rescue media, either an ISO image, a CD/DVD or a USB drive:
Creating the rescue media now is highly recommended, your image backups are useless if in case of emergency you cannot boot your PC to restore an image backup.
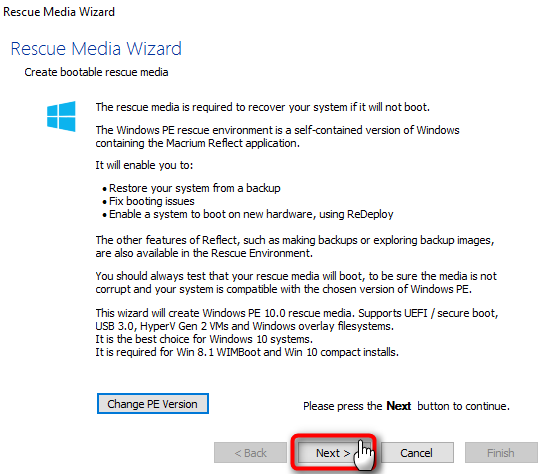
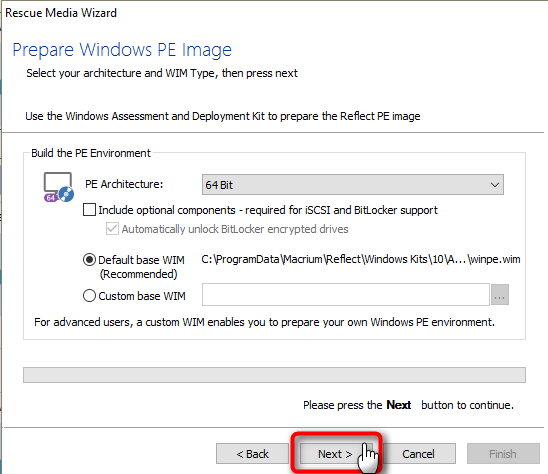
3.) Correct WinPE version is automatically selected. Click Next:
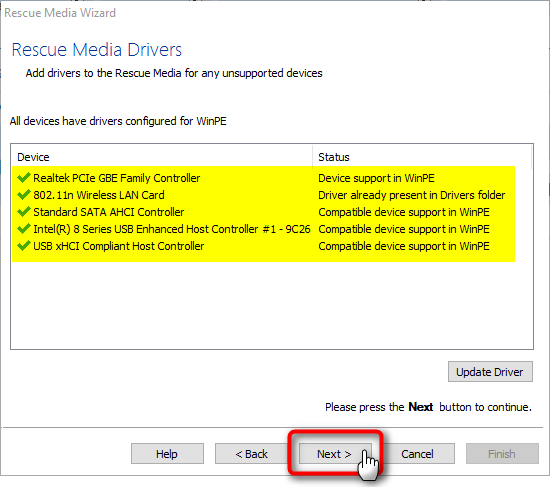
4.) Reflect will list your network and storage drivers (yellow highlight) and include them in rescue media. Click Next:
5.) Click Next:
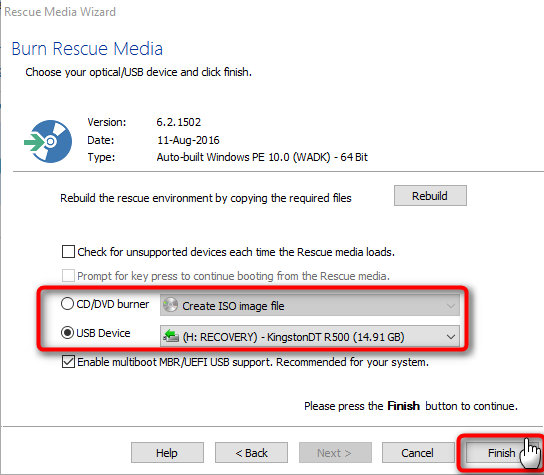
6.) Select the media you prefer (CD/DVD, USB), click Finish:
7.) Rescue media will be created, Click OK when done:
Tip
OPTIONAL:
If you want to you can also add Macrium Rescue to Windows boot menu. It is a very practical option to be used when you want to restore an image or reset Windows boot records in case Windows refuses to boot normally.
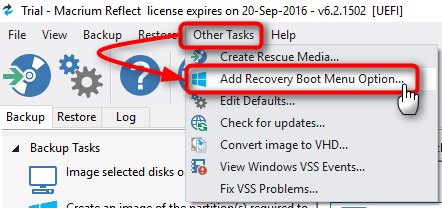
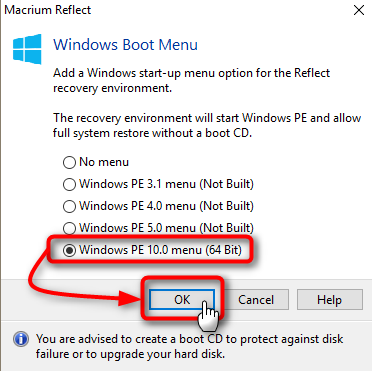
To add Macrium Rescue to boot menu select Add recovery Boot Menu Option from Other Tasks menu:Select Windows 10 PE, click OK, accept all following prompts:
This will add Macrium Rescue to your Windows boot menu;
1.) By default Reflect opens showing Backup (Home edition) or Disk Image (Free edition) tab. You can see all connected disks on right pane, with selection boxes for each disk (#1 in screenshot) and for each partition (#2) in case you don't want to image / restore all partitions of a selected disk:Note
Color highlights in screenshot above show my primary disk where Windows is installed (yellow), secondary disk where I will store my user data (green), and an additional external disk I have reserved for Macrium Reflect image backups (blue)
The target drive for your Macrium images cannot be included in a system image. At this point I always start with unselecting it (blue).
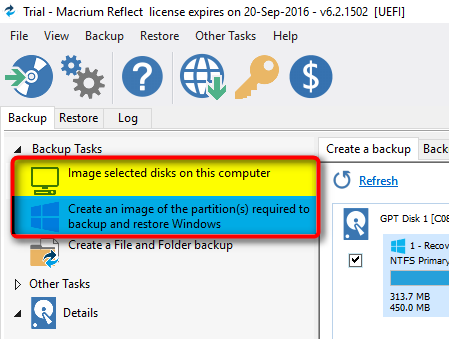
2.) Select if you want to image all selected disks and partitions or only the disks and partitions required to restore Windows. The latter would only select system reserved and C: partitions on a legacy BIOS / MBR system, or all EFI system partitions and C: partition on a UEFI / GPT system:
3.) Select the target / destination for your image, in my case now I select Backups folder on my external backup disk E: (blue highlight in screenshot in Part 3 Step 1 above).
When done click Advanced Options:
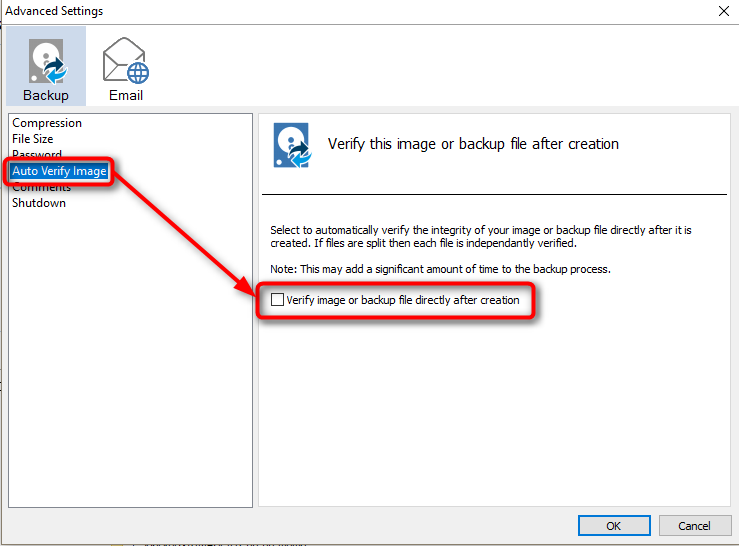
4.) If you want to be sure your images are OK, you need to verify them. You can verify manually after each backup, or set them to be automatically verified:
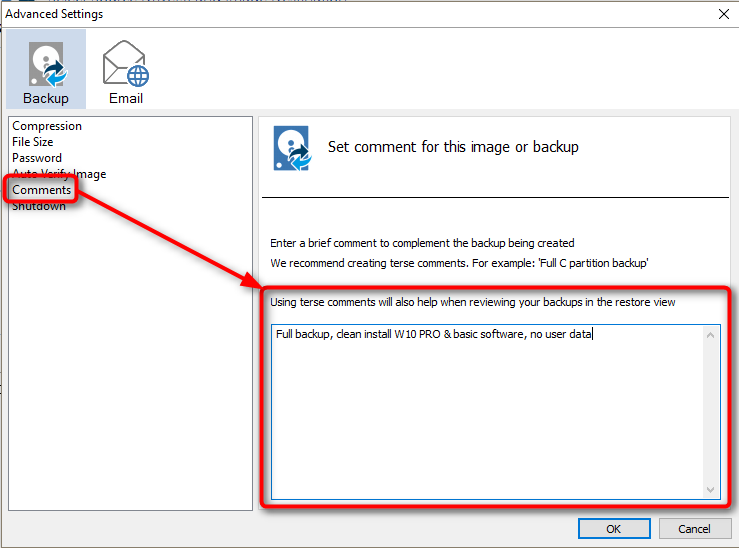
5.) To keep track of your images, add a descriptive comment. Click OK when done, click Next to continue:
6.) We will cover the backup templates and scheduling in another tutorial in near future. For now, for our basic imaging needs select purge level (= when selected image storage has X GB of free space, remove oldest images) and click Finish:
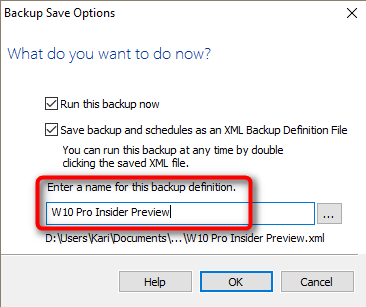
7.) Enter a name for your first backup definition, click OK:
8.) Reflect starts imaging selected disks and partitions. It will first create a snapshot of your system (#1 in screenshot below). Image will be created based on this snapshot; when snapshot has been made and Reflect starts the imaging process, you can continue working normally with Windows. Anything you change (save, copy, delete) after a snapshot has been created will not be included in system image.
You can also change the imaging process priority (#2). Low priority gives more system resources to Windows, high priority uses as much resources for imaging as possible.
If you want to you can tell Reflect to shutdown, suspend or hibernate PC when image has been done (#3). I find this option very practical, often setting Reflect to create an image when I go to bed selecting Shutdown on completion.
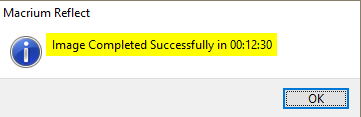
9.) Image will be created quite fast, the actual speed depending on your hardware:
10.) Click Restore tab to see image properties and to manually verify it if you so prefer:
Notice that verifying an image takes about as much time as it took to create it.
Differential Backup / Image
A differential backup checks what has been changed since the last full backup and only saves those changes. When restoring a differential backup both differential image and full backup image must be available on same folder on backup storage drive.
Because only changes since last full backup will be saved, differential images can be quite small compared to full backup, of course depending how big changes user has made. The later a differential backup is created, the more changes have been made, the bigger the differential image will be.Incremental Backup / Image
(Not available in Free edition!)An incremental backup checks what has been changed since the last backup regardless if the last backup was full, differential or incremental and only saves those changes. When restoring an incremental backup all differential and incremental images and full backup image must be available on same folder on backup storage drive.
Incremental images can be really small. An example: if you take daily incremental backups and today you just browsed the web and got a few emails but did not download or install anything, today's incremental backup is only a few kilobytes, a megabyte or two max.
This video will show a bit more graphical demonstration about differential and incremental images:
1.) Click Backup Definition Files, right click your definition, select Run now > Prompt:
2.) Select your preferred image type, I will now run a differential image after installing some software, click Set backup comment to enter a descriptive comment to this image:
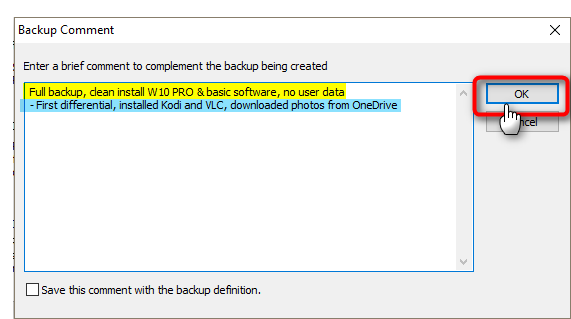
3.) The comment from your last full backup will be shown (yellow highlight), add comment for this differential or incremental image (blue), click OK:
4.) Click Finish to start backup
5.) Again a snapshot will be created. Because this is a differential (or incremental) backup and only changes will be saved, Reflect checks the changes and starts then imaging them: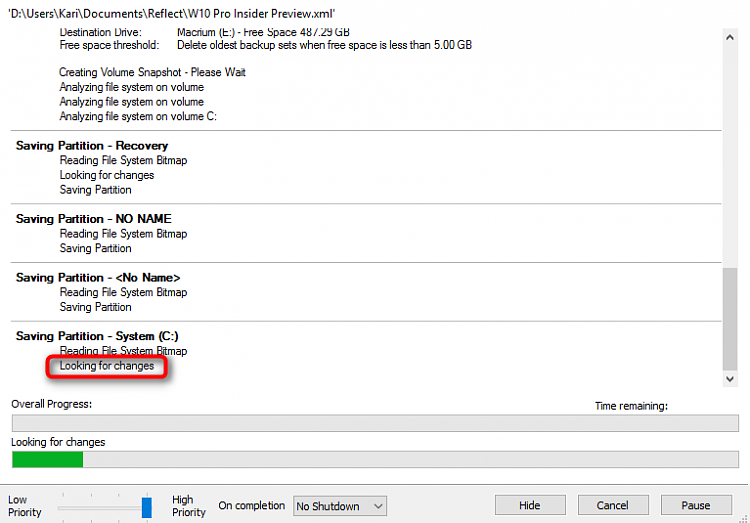
6.) Because there were not too many changes the image was created relatively fast:
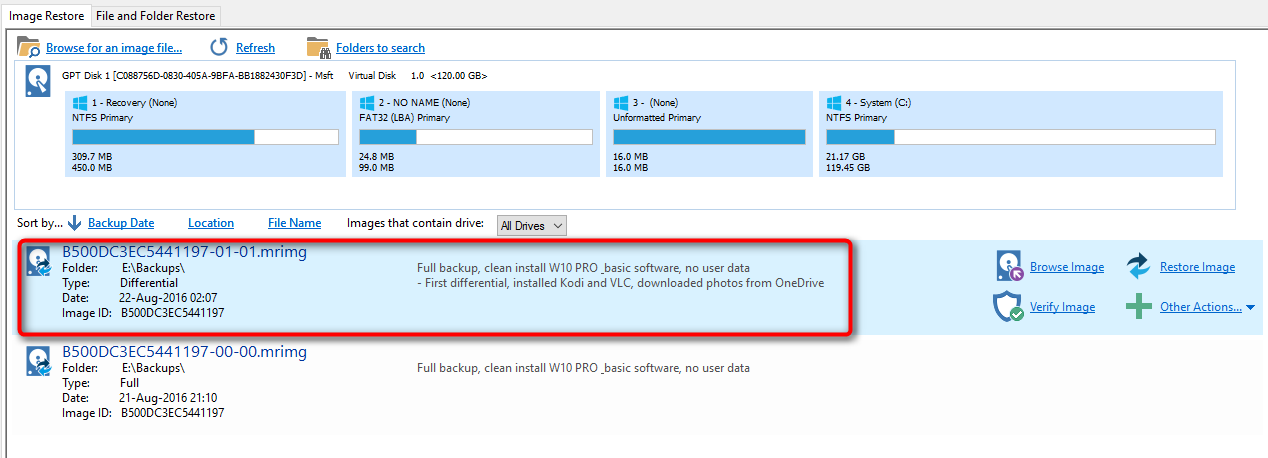
7.) Clicking Restore tab top left you can now see the new differential (or incremental) image listed on top of the full image on right pane: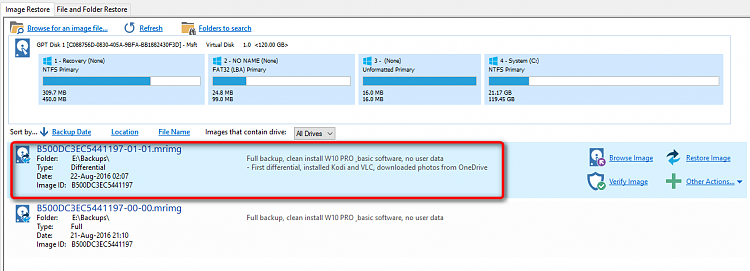
8.) This, our first full backup and subsequent differential and / or incremental image (or images) is called a backup set. Default file name for a backup file is XX-YY-ZZ where XX is a 16 character ID same for all files in same set, YY is the ID (increment) number for that file in the set (00 = full backup, 01, 02 and so on subsequent full, differential and incremental images), and ZZ is total number of files in set (starting from 00, 04 is fifth file) and is usually same than YY except when one or more backup files are split for instance when you save backups to DVDs or bigger than 4GB files to FAT32 disks.
The file extension is always .mrimg.
- Example 1, no split files:
- Full backup: DF2BBBA4AE813494-00-00
- Next differential or incremental: DF2BBBA4AE813494-01-01
- Next differential or incremental: DF2BBBA4AE813494-02-02
- Next differential or incremental: DF2BBBA4AE813494-03-03
- Example 2, split files:
- Full backup Part 1: DF2BBBA4AE813494-00-00
- Full backup Part 2: DF2BBBA4AE813494-00-01
- Full backup Part 3: DF2BBBA4AE813494-00-02
- First differential or incremental Part 1: DF2BBBA4AE813494-01-03
- First differential or incremental Part 2: DF2BBBA4AE813494-01-04
- Next differential or incremental, only one part: DF2BBBA4AE813494-02-05
It might be that you have easier to understand this if you read it from Macrium support article
9.) I downloaded some photos from OneDrive to PC, let's create an incremental backup before we look these backup image files in File Explorer.
As above in steps 1 and 2 I run new backup, this time incremental. The photos I downloaded do not need much storage space. Incremental backup only saves changes since the last backup which in our example case now is the differential image created above, imaging is fast:
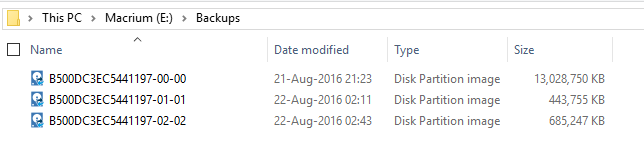
10.) Checking the folder where I have stored my images I can see that they have the same ID, only difference being the increment number. I can also see that whereas the full backup is over 13 GB, the subsequent differential and incremental images are much smaller:
11.) Remember to keep all backup image files belonging to same set in same folder. You cannot restore your differential or incremental image if some files are missing.
1.) You can restore a full backup or if you want to any of your subsequent differential or incremental images:
- Restoring a full backup does restore only the full backup, not differential or incremental images created after it
- Restoring a differential backup will restore the last full backup and changes saved in selected differential backup (only these two files needed regardless how many differential and incremental backups have been made between full backup and selected differential backup)
- Restoring an incremental backup will restore set of backups (full, differential, incremental) up to selected incremental backup
2.) Although restoring an image backup is fully possible when started from Windows desktop, I recommend restoring only when PC is booted to Macrium Rescue console (PE),either selecting Macrium Rescue from Windows boot menu or booting with Macrium Rescue USB device you created in Part 2. An old school geek as I am, I get bad feeling when replacing system files on a running system, therefore always using restore from WinPE, booting to Macrium Rescue environment instead of Windows
3.) Macrium's WinPE environment looks slightly different than when Reflect is run from Windows desktop. Select Restore tab and either browse to the image you want to restore, or select one from right pane. In this example I will now restore the XX-02-02 image (yellow highlight) which is an incremental backup. It will also restore my full backup XX-00-00 (green) and changes saved in differential backup XX-01-01 (blue):
4.) Start restore:
5.) Click Next and Finish in following prompts
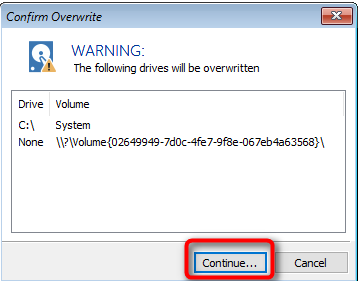
6.) You will be warned that drives will be overwritten. Click Continue:
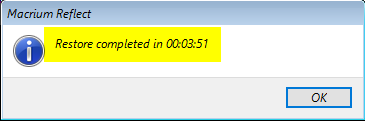
7.) Restoring is relatively fast:
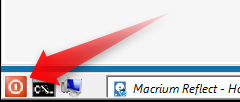
8.) Click the reboot button on bottom left corner to restart your PC. It will now boot to restored Windows 10, being exactly as it was when the restored image was created:
Macrium viBoot is a new application from Macrium Software that allows you to mount a Macrium system image (full, differential or incremental) as a virtual machine to extract files from it, add files to it, update your installed Windows on that image and even upgrade it.
See Macrium viBoot tutorial: Macrium viBoot - Create Virtual Machine using Macrium Image - Windows 10 Forums
Please do not post any viBoot issues or questions in this thread, use its own tutorial thread for that.
That's it geeks! Happy computing :)
Kari
Related Tutorials
- Macrium viBoot - Create Virtual Machine using Macrium Image - Windows 10 Forums
- How to Create a System Image in Windows 10
- How to Create Hardware Independent System Image for Installing Windows 10
- How to Create a Macrium Reflect Rescue Partition
Backup and Restore with Macrium Reflect
-
-
-
New #3
Thanks Kari
I just got a new email from them with a code discount 20% of
BUT it is for 4 PCs I just want for my PC so i went to-there website Because i really like there product but Leider
they only offer 2 PCs and above I will stay with the free version
Your Tutorials are always Great help
many thanks for your time
-
-
New #5
Thank you so much for this Kari, in the past I have been one of those fly by night, hope everything carries on going right type of guys. I recently made a mrimg, then did a clean install, am busy loading only the neccessary programs onto my computer and then I plan on doing an image of my c drive. Again thank you - I am new to Macrium Reflect and this seems just what i need Still got to work through it).
-
-
-
-
-
Backup and Restore with Macrium Reflect
How to Create and Restore a System Image Backup with Macrium ReflectPublished by Kari "Kalsarikänni" FinnCategory: Backup & Restore
19 May 2021


 Quote
QuoteTutorial Categories

Related Discussions
