

How to Do a System Restore of Windows 10
System protection (if turned on) is a feature that allows you to perform a system restore that takes your PC back to an earlier point in time, called a system restore point. This can be handy if your PC isn't working well and you recently installed an app, driver, or update.
Each restore point contains the necessary information needed to restore the system to the chosen state. Restore points are automatically generated when you install a new app, driver, or Windows update, and generated when you create a restore point manually. Restoring wont affect your personal files in your %UserProfile% folder, but it will remove apps, drivers, and updates installed after the restore point was created.
See also:
- System Restore | Microsoft Docs
- Monitored File Name Extensions | Microsoft Docs (Files with these extensions are monitored by System Restore.)
- Restoring the System | Microsoft Docs ("To restore a system, System Restore undoes file changes made to monitored files, recapturing the file state at the time of the selected restore point.")
This tutorial will show you how to do a System Restore to restore your Windows 10 back to an earlier point in time.
You must be signed in as an administrator to be able to perform a System Restore.
When you do a System Restore, system protection will automatically create a restore point before proceeding, so you can undo the changes made by the System Restore if needed.
If you do a system restore while in safe mode, it cannot be undone.
If you do a system restore from the System Recovery Options menu, it cannot be undone.
For a Windows 11 version of this tutorial, see:
Use System Restore on Windows 11
Contents
- Option One: To Do a System Restore of Windows 10 at Boot
- Option Two: To Do a System Restore of Windows 10 in Windows 10
1 Boot to advanced startup options.
2 Click/tap on Troubleshoot. (see screenshot below)
3 Click/tap on Advanced options. (see screenshot below)
4 Click/tap on System Restore. (see screenshot below)
5 If prompted, click/tap on an administrator account you want to provide credentials for. (see screenshot below)
A) Enter the password for this administrator account, and click/tap on Continue. (see screenshot below)
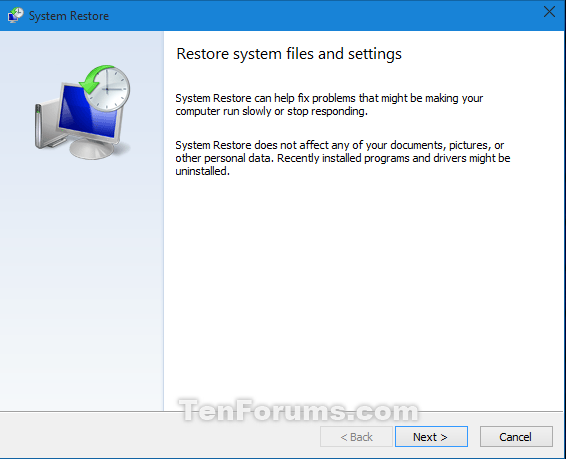
6 If this is your first time doing a System Restore, click/tap on Next. (see screenshot below)
7 If you had previously done a System Restore, select (dot) Choose a different restore point, and click/tap on Next. (see screenshot below)
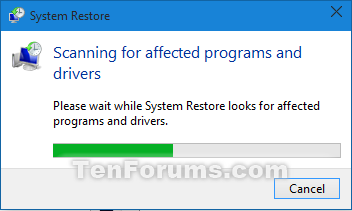
8 Select a restore point (ex: "System restore test") that you would like to restore Windows back to, and click/tap on the Scan for affected programs button. (see screenshot below)
If displayed, check the Show more restore points box at the bottom left corner to be able to see any older restore points (if available) that are not listed.
9 Review what will be affected by using the selected restore point. When finished, click/tap on Close. (see screenshots below)
10 When you are ready to do a System Restore with a selected restore point, click/tap on Next. (see screenshot below step 8)
11 Click/tap on Finish to begin the System Restore. (see screenshot below)
12 Click/tap on Yes to confirm. This is your last chance to cancel the System Restore. (see screenshot below)
13 Your PC will now restart and perform a System Restore. (see screenshots below)
14 When the System Restore has completed successfully, click/tap on Restart. (see screenshot below)
15 When you have signed back in to your desktop, click/tap on Close. (see screenshot below)
This option will not be available while in Safe mode.
1 Do step 2, step 3, step 4, step 5 , or step 6 below for how you would like to open System Restore.
2 Press the Win + R keys to open Run, type rstrui.exe into Run, click/tap on OK, and go to step 10 below.
3 Open the Win+X Quick Link menu, click/tap on System, click/tap on the System info link towards the bottom on the right side, and go to step 7 below.
4 Open the Control Panel (icons view), click/tap on the System icon, and go to step 7 below.
5 Open the Control Panel (icons view), click/tap on the Recovery icon, click/tap on the Open System Restore link, click/tap on Yes if prompted by UAC, and go to step 10 below. (see screenshot below)
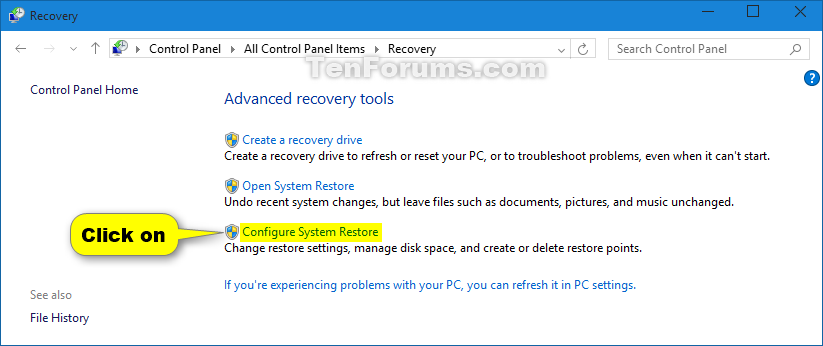
6 Open the Control Panel (icons view), click/tap on the Recovery icon, click/tap on the Configure System Restore link, and go to step 8 below. (see screenshot below)
7 Click/tap on the System protection link on the left side. (see screenshot below)
Starting with Windows 10 build 20161, you will need to click/tap on About on the left side, and click/tap on the System protection link instead.
8 If prompted by UAC, click/tap on Yes.
9 Click/tap on the System Restore button.. (see screenshot below)
10 If this is your first time doing a System Restore, click/tap on Next. (see screenshot below)
11 If you had previously done a System Restore, select (dot) Choose a different restore point, and click/tap on Next. (see screenshot below)
12 Select a restore point (ex: "System restore test") that you would like to restore Windows back to, and click/tap on the Scan for affected programs button. (see screenshot below)
If displayed, check the Show other restore points box at the bottom left corner to be able to see any older restore points (if available) that are not listed.
13 Review what will be affected by using the selected restore point. When finished, click/tap on Close. (see screenshots below)
14 When you are ready to do a System Restore with a selected restore point, click/tap on Next. (see screenshot below step 12)
15 Click/tap on Finish to begin the System Restore. (see screenshot below)
16 Click/tap on Yes to confirm. This is your last chance to cancel the System Restore. (see screenshot below)
17 Your PC will now restart and perform a System Restore. (see screenshots below)
18 When the System Restore has completed successfully and you have signed back in to your desktop, click/tap on Close. (see screenshot below)
That's it,
Shawn Brink
Related Tutorials
- How to Undo a System Restore in Windows 10
- How to Enable or Disable System Restore in Windows 7, Windows 8, and Windows 10
- How to Enable or Disable System Restore Configuration in Windows 7, Windows 8, and Windows 10
- How to Turn On or Off System Protection for Drives in Windows 10
- How to Change System Protection Maximum Storage Size for Drive in Windows 10
- How to Create a System Restore Point in Windows 10
- How to See List of All Available System Restore Points in Windows
- How to Delete System Restore Points in Windows 10
- How to Make a 'Create System Restore Point' Shortcut in Windows 10
- How to Add a 'Create Restore Point' Context Menu in Windows 10
- How to Refresh Windows 10
- How to Reset Windows 10
- How to Run SFC Command to Repair System Files in Windows 10
- How to Do a Repair Install of Windows 10 with an In-place Upgrade
- How to Automatically Create System Restore Point on Schedule in Windows 10
- How to Restore Previous Versions of Files, Folders, and Drives in Windows 10
- How to Change System Restore Point Creation Frequency in Windows 10
- How to Add System Protection Context Menu in Windows 10
System Restore Windows 10
-
New #1
restore problems
Brink,
If this is not the right place to post, please move...
I have had consistent problems with doing a restore from a restore point, starting back with 1st build 9841. No problem creating one. I've tried both from boot and inline. I've probably done 100's of these on Win 7 and a few on Win 8.1, but 10tp causes issues. I think I may have had 1 go right since TP started. Scenario is usually about 2 mins into restore, I get an error that the restore point is damaged or otherwise unusable. Sometimes it will complete successfully, but weird issues after restart. Just this morning, to test, I created one, made a few changes to system settings (put cortana back on taskbar), installed some innocuous program, changed by wallpaper. Ran for a while, about 30 mins. Then, thru the system protection UI, same place I created it, I fired up restore and let it go to completion and restart. Thought all looked ok. My changes were restored back, the app I installed was gone, BUT.... so was the START MENU! Gone! No click on start button, no win key, nothing! I had to re-image from backup.
I have no problems doing a re-imaging from backup VHDs. Just these restore points 99.9% of the time fail or restore strangely. I get no errors when I create them.
I'm lost...
-
New #2
Hey Dick,
So far System Restore has worked well for me on my build 9926 installation.
If you haven't already, you might consider either to refresh or reset Windows 10 to see how it performs afterwards.
-
New #3
Hey Shawn, how did you get a couple classic windows in there? (Option One, Steps 13 and 14)
All the rest are Metro windows!?
-
New #4
Hey Edwin,
That's just what it had when I was doing a System Restore in a VM to get the screenshots. I was shocked that they were classic at boot at well, but were modern when starting in from within Windows 10. It may all be modern by the time it's RTM though.
-
New #5
One thing I have found though, that might also pertain to another thread about Restore Points not working.....
I can never do a System Restore with my AVG Anti-Virus program running. It's very easy to disable though....
just a quick right click on the system tray icon, gives me a little menu, where I can temporarily disable AVG, and then I can do a System Restore without any problem.
Some other programs that can screw up a System Restore, may not be so easily disabled.
Just a thought!

-
-
New #7
I have not been successful restoring from a Restore Point without numerous glitches setting in. I've tried maybe 5 or 6.
-
New #8
very useful guide..many thanks Shawn.
-
-
New #9
Thanx for this tutorial...have done system restore twice, worked like a charm. Perhaps I should curb my "let's run this up the flag pole and see how it flies" attitude and just wait.

System Restore Windows 10
How to Do a System Restore in Windows 10Published by Shawn BrinkCategory: Performance & Maintenance
01 Aug 2022


 Quote
QuoteTutorial Categories

Related Discussions
