

How to Set a Display as Main Display in Windows 10
If you have two or more displays connected to your PC, then you will be able to select which display you want as the main display for all users by default.
The display set to be the main display will act as the active desktop, show the clock and notification area on the taskbar, sign in, lock, and CTRL+ALT+DELETE screens will open on, and most items will open on the main display by default when you initially open them.
See also:
- Set up dual monitors on Windows 10 | Microsoft Support
- How to use multiple monitors in Windows 10 | Microsoft Support
This tutorial will show you how to set a display to be the main display when you have multiple displays connected to your Windows 10 PC.
Any user on the PC will be able to set a display as the main display.
The display set as the main display will be applied to all users on the PC.
Contents
- Option One: Set a Display as Main Display in Settings
- Option Two: Set a Display as Main Display in NVIDIA Control Panel
EXAMPLE: Display set as Main Display
1 Do step 2 or step 3 below for how you would like to open Display settings.
2 Right click or press and hold on your desktop, click/tap on Display settings, and go to step 4 below. (see screenshot below)
3 Open Settings, click/tap on the System icon, and go to step 4 below.
4 On the right side of Display, click/tap on the display number at the top that you want to make the main display, and check the Make this my main display box under Multiple displays. (see screenshot below)
You can click/tap on the Identity button to briefly display numbers on your display(s) to help see which display belongs with each number.
If Make this my main display is grayed out, then it means that the currently selected display is already set as the main display.
5 When finished, you can close Settings if you like.
This option will only be available if you have NVIDIA graphics and the latest NVIDIA GeForce graphics driver installed.
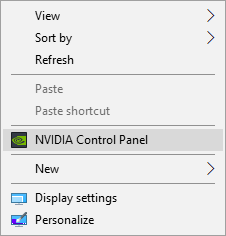
1 Right click or press and hold on your desktop, and click/tap on NVIDIA Control Panel. (see screenshot below)
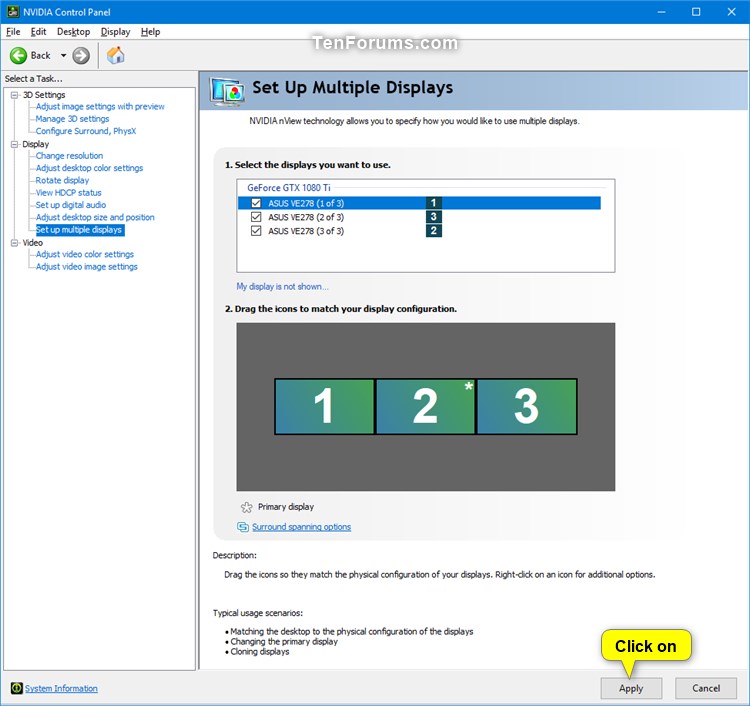
2 Click/tap on the Set up multiple displays link under Display in the left pane, right click on the display number you want to set as the main display, and click/tap on Make primary. (see screenshot below)
The display number with an asterisk * on it is the current primary (main) display.
You can click/tap on Identity in the context menu to briefly display the number on the display it is for.
3 Click/tap on Apply. (see screenshot below)
4 Click/tap on Yes to confirm. (see screenshot below)
You will only have 20 seconds to click/tap on Yes before your changes automatically revert back to what it was set to before.
That's it,
Shawn
Related Tutorials
- How to Create a Display Switch shortcut in Windows 10
- How to Change Presentation Mode to Project Display in Windows 10
- How to Change Screen Resolution of Displays in Windows 10
- How to Rearrange Multiple Displays in Windows 10
- How to Change Settings and Layout for Multiple Displays in Windows 10
- How to Show News Bar on Primary or Secondary Monitor in Windows 10
- How to Remove Display from Desktop in Windows 10
Change Main Display in Windows 10
-
New #1
what if the "make this my main display" check box is unchecked and greyed out? that's what's happening to me, i can't set the monitor i want to the main display, windows is forcing the monitor i want to set as 2 to 1.... any help would be appreciated!
-
New #2
Hello aeneas1,
Do you have "Extend desktop to this display" set for your displays in the "Multiple displays" drop down?
-
New #3
yes i do....
this has been an adventure, just when i think i'm getting close i hit another bump... thing is, i use multiple (2) displays every day with my work pc and have never had any prob at all, it's a very straightforward process, but with my new setup it's like pulling teeth....
speaking of my new setup, it's actually a home theater system as follows:
windows 10/64, home edition, nuc i5, 16 gb mem.... i've connected the nuc's display port to my 1366 x 768 monitor using a display port to hdmi cable, and the nuc's hdmi port to my 1920 x 1080 tv's hdmi input... i want the 1366 x 768 monitor to be my main display but i just can't make it work, the tv is always the main display... i guess i could try connecting the display port to the tv and the hdmi to the monitor, but that would require some elbow grease given my equipment rack, would much rather do it within windows if at all possible....
-
New #4
It will be interesting to hear how that works out.
I assume that you have already tried different connections to the monitor to see if one may work better than the other.
If you like, you might also see if the program DisplayFusion may work better for your situation.
-
New #5
Hi,
I currently use two displays. While this configuration feature works 95% of the time, regularly the boot ends up with swapped content of the screens (main display icons in the secondary, secondary ones in the main, the main display remains the main one) and fewer times with the task bars also swapped (main display changed).
Like aeneas1, I don't have access to "Make this my main display" (greyed) in the first case even if the "Extend these displays" appears in the combo. In the second case, swapping "main" attribute keeps the icons swapped.
Will there be a way to lock the configuration [1][2] / [2][1] to monitor IDs?
Regards.
-
New #6
Hello Faeldihn, and welcome to Ten Forums. :)
The monitor IDs is determined by the port on the graphics card the monitor is connect to. You can swap the connections for the monitors on your graphics card to change them.
-
New #7
But when using two different connection types, will this still work? Which is the priority connection? I would've thought it would be the VGA, since that is the PnP that is most common, but I use the VGA, as my desktop monitor, and the HDMI to my TV monitor. It's the TV monitor (HDMI) that always ID's as No. 1.
-
-
-
New #9
Didn't think so. I just got used to the backward priority, and am living with it.
Change Main Display in Windows 10
How to Set a Display as Main Display in Windows 10Published by Shawn BrinkCategory: General Tips
01 May 2021


 Quote
Quote
Tutorial Categories

Related Discussions
