

How to Enable or Disable Disk Write Caching in Windows 10
Disk write caching is a feature that improves system performance by using fast volatile memory (RAM) to collect write commands sent to data storage devices and cache them until the slower storage device (ex: hard disk) can be written to later. This allows applications to run faster by allowing them to proceed without waiting for data write-requests to be written to the disk.
While disk write caching may increase system performance, it can also increase the chances of data loss in case of power or system failures before the data from the write-cache buffer is flushed by writing the data to the disk.
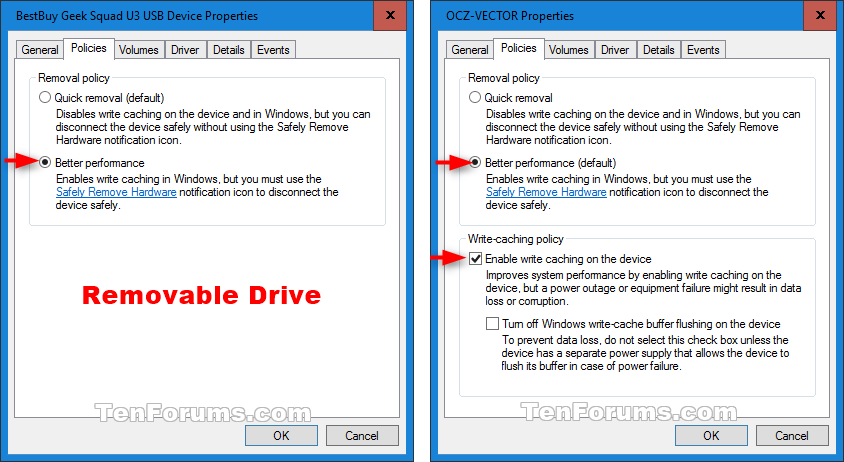
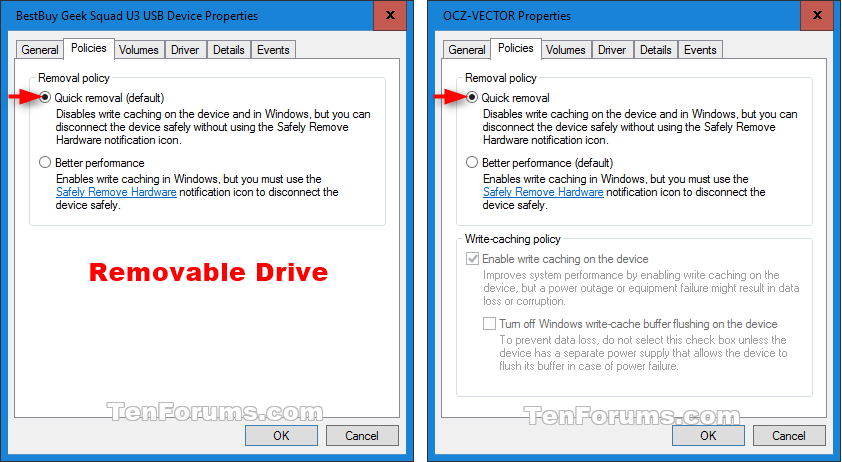
Windows defines two main policies, Quick removal and Better performance, that control how the system interacts with external storage devices such as USB thumb drives or Thunderbolt-enabled external drives. Beginning in Windows 10 version 1809, the default policy is Quick removal.
In earlier versions of Windows the default policy was Better performance.
You can change the policy setting for each external device, and the policy that you set remains in effect if you disconnect the device and then connect it again to the same computer port.
You can use the storage device policy setting to change the manner in which Windows manages storage devices to better meet your needs. The policy settings have the following effects:
- Quick removal - This policy manages storage operations in a manner that keeps the device ready to remove at any time. You can remove the device without using the Safely Remove Hardware process. However, to do this, Windows cannot cache disk write operations. This may degrade system performance.
- Better performance - This policy manages storage operations in a manner that improves system performance. When this policy is in effect, Windows can cache write operations to the external device. However, you must use the Safely Remove Hardware process to remove the external drive. The Safely Remove Hardware process protects the integrity of data on the device by making sure that all cached operations finish.
Removable disks have disk write caching disabled by default for quick removal without having to use Safely Remove Hardware.
Internal disks have disk write caching enabled by default for better performance, but you must use Safely Remove Hardware before disconnecting the disk to prevent data loss.
Update: Change in default removal policy for external storage media in Windows 10, version 1809 | Microsoft Docs
See also: Internal SATA Drives show up as removeable media | Windows Support
This tutorial will show you how to enable or disable disk write caching on storage devices for better performance or quick removal in Windows 10.
You must be signed in as an administrator to be able to enable or disable disk write caching.
Here's How:
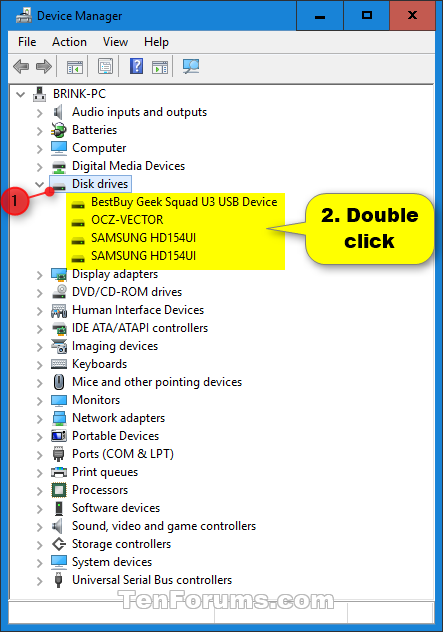
1 Open Device Manager (devmgmt.msc).
2 Expand open Disk drives, and double click/tap on the disk that you want to enable or disable write caching. (see screenshot below)
3 Do step 4 (enable) or step 5 (disable) below for what you would like to do.
A) Click/tap on the Policies tab, and select (dot) Better performance. (see screenshots below)
B) Check the Enable write caching on the device box under Write-caching policy.
C) Check or uncheck the Turn off Windows write-cache buffer flushing on the device under Write-caching policy.
To prevent data loss, do not check Turn off Windows write-cache buffer flushing on the device unless the device (disk) has a separate power supply (ex: UPS) that allows the device to flush its buffer in case of power failure.
D) Click/tap on OK, and go to step 6 below.
A) Click/tap on the Policies tab, select (dot) Quick removal, click/tap on OK, and go to step 6 below. (see screenshots below)
6 If prompted to restart the computer to apply, click/tap on Yes or No for what you want to do. (see screenshot below)
Yes = Restarts the computer immediately. Be sure to save and close everything first.
No = Allows you to manually restart the computer later when you're ready. Your changes will not be applied until you restart the computer.
That's it,
Shawn
Enable or Disable Disk Write Caching in Windows 10
-
New #1
No Policy Tab
Shawn,
Thanks. Nice tutorial, but I don't have a policy tab on the property sheet. Now what?
-
New #2
Hello captain, and welcome to Ten Forums. :)
Please go ahead and post some screenshots showing what you see in Device Manager and Properties for this device to see if it may reveal anything.
https://www.tenforums.com/tutorials/1...en-forums.html
-
New #3
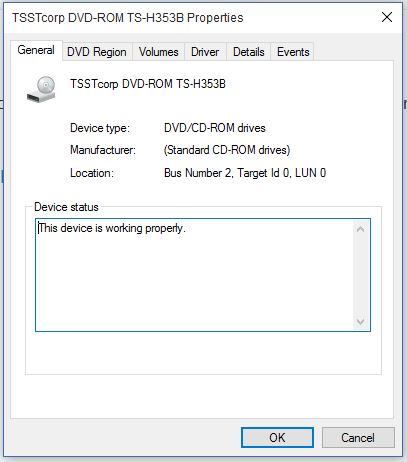
Sure. Pretty simple really. Missing tab.
Last edited by Brink; 21 Sep 2015 at 12:16. Reason: broken quote
-
-
New #5
Ooops. That explains it. Thanks.
-
-
New #7
hi Brink,
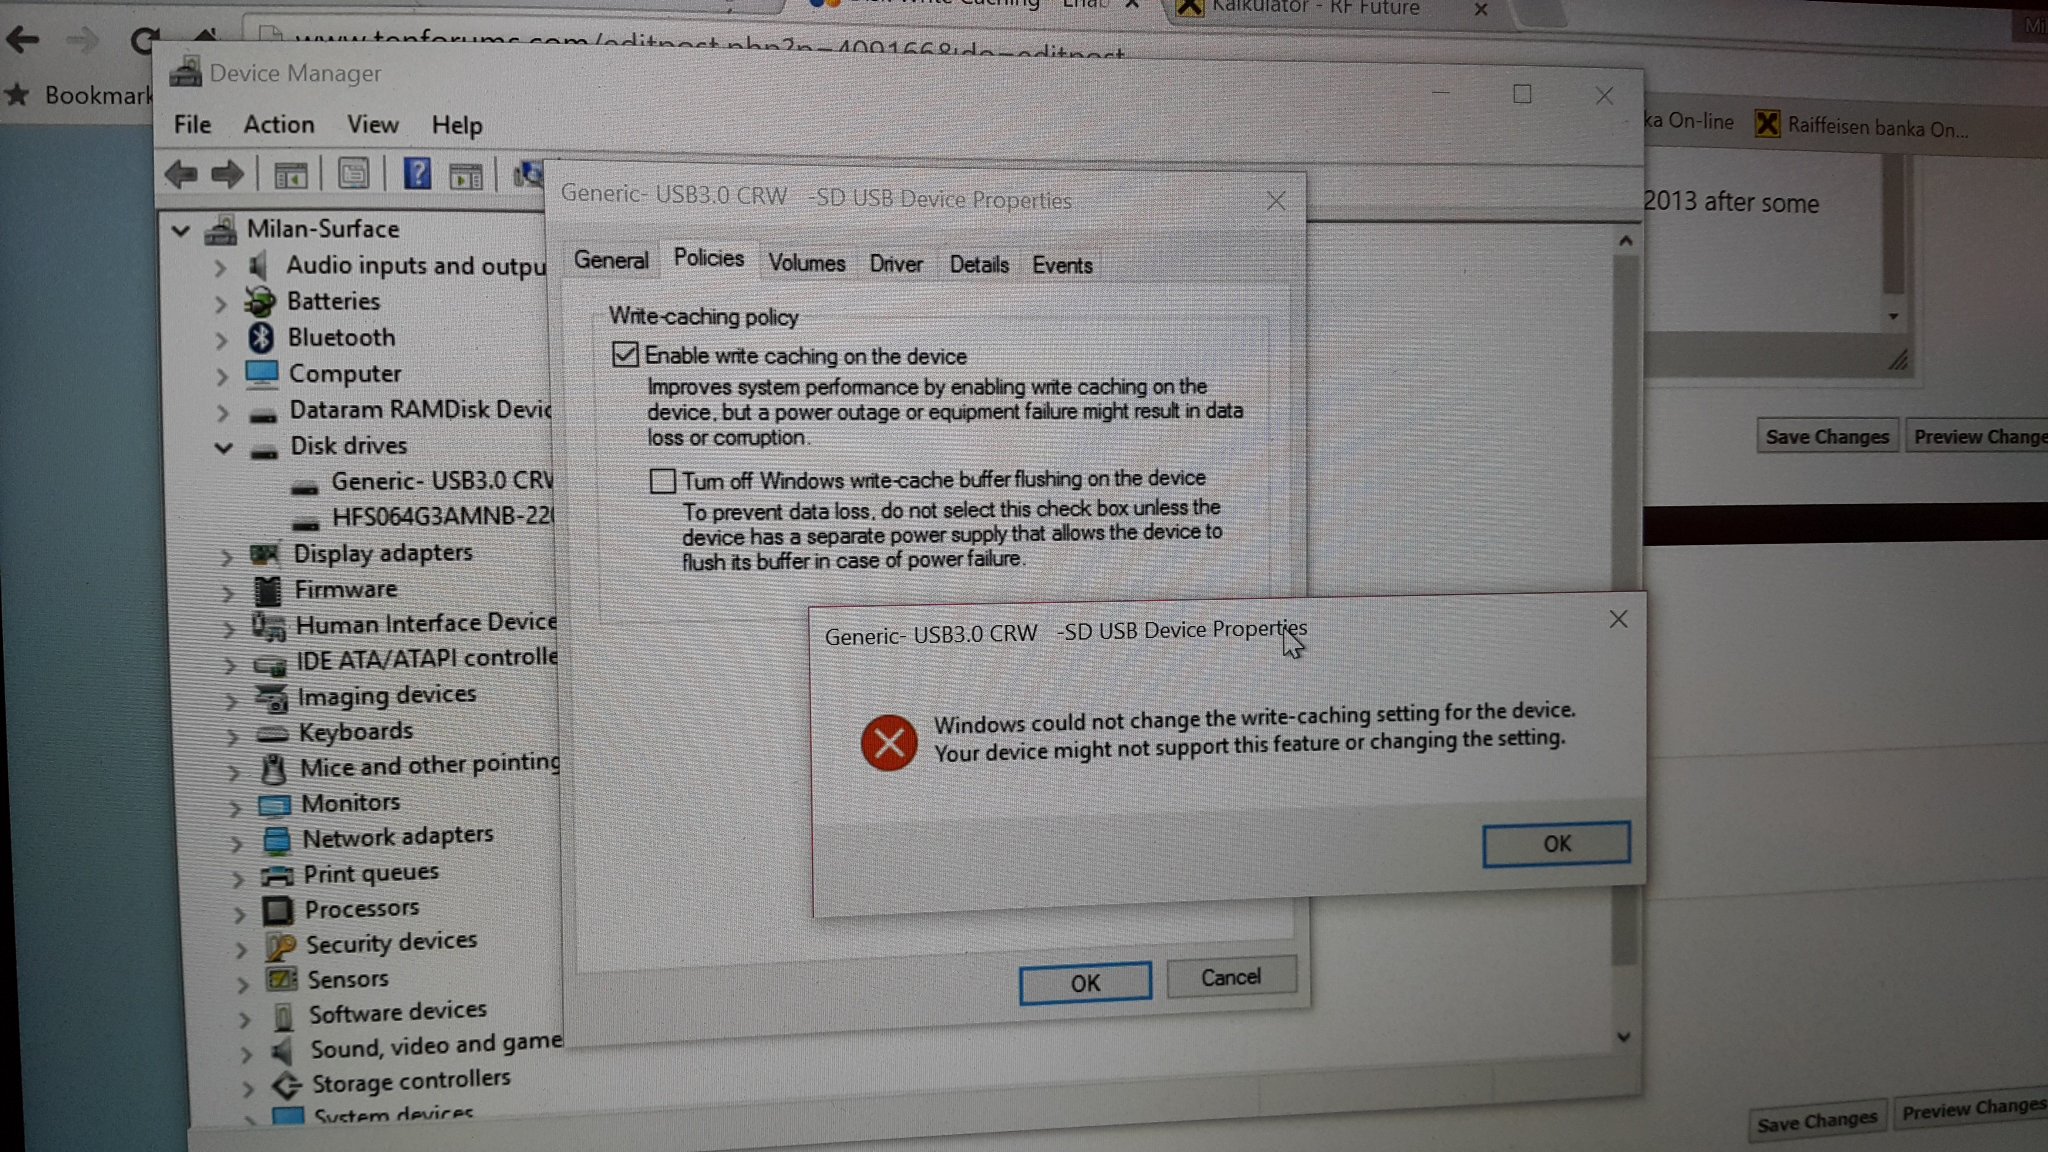
I can't enable write caching on my Micro SD card 128 GB on Win 10 Surface Pro 2 ?
On Win 7 I was able and works ok.
If I try enable in device manager I get windows error - could not change write caching settings on this device...
Something wrong with WIN 10. I keep my Outlook files on my SD card and always freeze up my outlook 2013 after some time and I must restart computer.
thanks in advance with expert help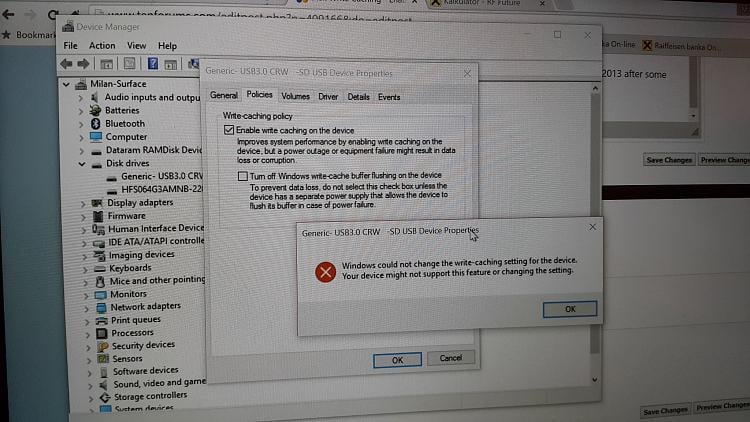
-
New #8
Hello milanbl30, and welcome to Ten Forums. :)
Personally, I wouldn't recommend enabling write caching on removable media to help prevent data loss if it should be disconnected by mistake.
-
-
New #9
Enable or Disable Disk Write Caching in Windows 10
How to Enable or Disable Disk Write Caching in Windows 10Published by Shawn BrinkCategory: Performance & Maintenance
14 Feb 2020


 Quote
Quote
Tutorial Categories

Related Discussions
