How to Install PowerShell 7 in Windows 8, Windows 10, and Windows 11
Microsoft has announced the Generally Available (GA) release of PowerShell 7.0 on March 4, 2020.
PowerShell 7 has been released on November 11, 2020.
PowerShell 7 is the latest major update to PowerShell, a cross-platform (Windows, Linux, and macOS) automation tool and configuration framework optimized for dealing with structured data (e.g. JSON, CSV, XML, etc.), REST APIs, and object models. PowerShell includes a command-line shell, object-oriented scripting language, and a set of tools for executing scripts/cmdlets and managing modules.
See also:
- Migrating from Windows PowerShell 5.1 to PowerShell 7 | Microsoft Docs
- What's New in PowerShell 7.0 | Microsoft Docs
- GitHub - PowerShell/PowerShell: PowerShell for every system!
- Releases . PowerShell/PowerShell . GitHub
- PowerShell Preview app | Microsoft Store
This tutorial will show you how to download and install PowerShell 7 in Windows 8.1, Windows 10, and Windows 11.
You must be signed in as an administrator to install PowerShell 7.
Installing PowerShell 7 will not replace the built-in Windows PowerShell included in Windows by default.
Contents
- Option One: Install PowerShell 7 from Microsoft Store
- Option Two: Install PowerShell 7 from GitHub
EXAMPLE: PowerShell 7 installed in Windows

1 Go to the Powershell latest release page on GitHub.
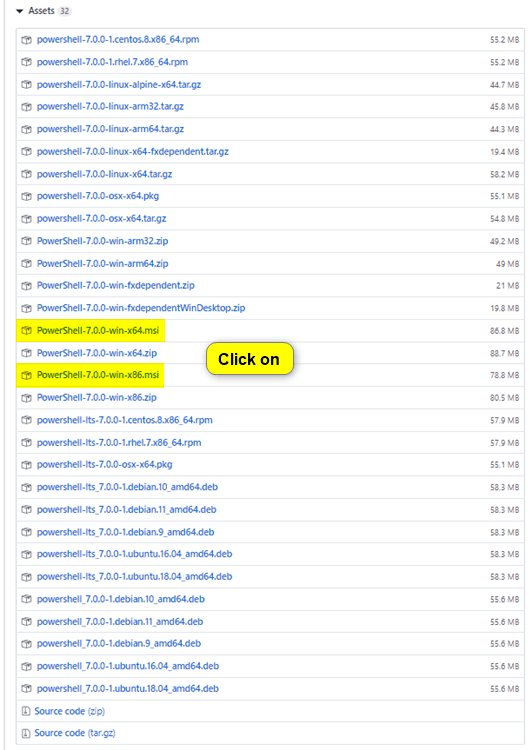
2 Scroll down to the Assets section for PowerShell 7.0.3 (or latest release), and click/tap on the link of the MSI file (ex: "PowerShell-7.1.0-win-x64.msi") to install a 32-bit (x86) or 64-bit (x64) PowerShell 7 for your 32-bit or 64-bit Windows. (see screenshots below)
You can install the PowerShell-7.1.0-win-x86.msi and/or PowerShell-7.0.3-win-x64.msi file in 64-bit Windows 10.
You can only install the PowerShell-7.1.0-win-x86.msi file in 32-bit Windows 10.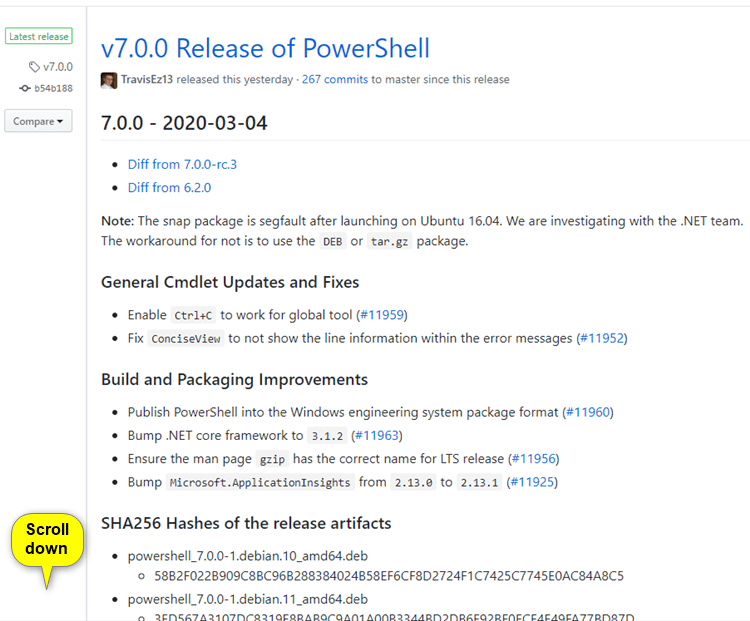
3 Save the MSI file (ex: "PowerShell-7.0.3-win-x64.msi") to your desktop, and run it.
4 Click/tap on Next. (see screenshot below)
5 Click/tap on Next. (see screenshot below)
If you would like to change where PowerShell 7.1 will be installed to, click/tap on the Change button first, and select the folder or drive location you want to install to instead.
6 Check options you want, uncheck the options you do not want, and click/tap on Next. (see screenshot below)
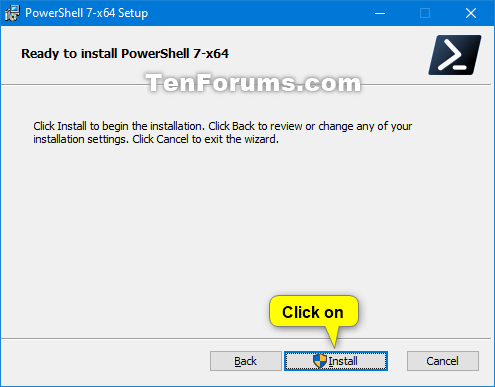
7 Click/tap on Finish. (see screenshot below)
8 If prompted by UAC, click/tap on Yes to approve.
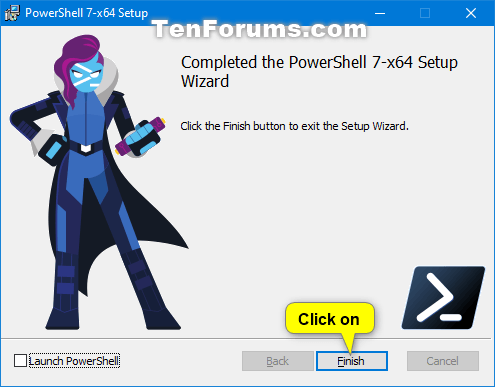
9 Click/tap on Finish. (see screenshot below)
Check the Launch PowerShell box before clicking on Finish if you wanted to open Powershell 7.1 now.
That's it,
Shawn Brink
Related Tutorials
- How to Add or Remove PowerShell 7 Open Here Context Menu in Windows 10
- How to Add "Edit or Run with" PS1 File Context Menu in Windows 10
How to Install PowerShell 7 in Windows 8, Windows 10, and Windows 11
-
-
-
New #3
Will this replace the built-in PowerShell that included with windows 10?
-
-
-
-
-
New #8
How does one arrange for PS 7 to be the default in Windows 10?
-
-
New #9
Hello wigit, and welcome to Ten Forums.
You would basically just have to run PS 7 instead of PS.
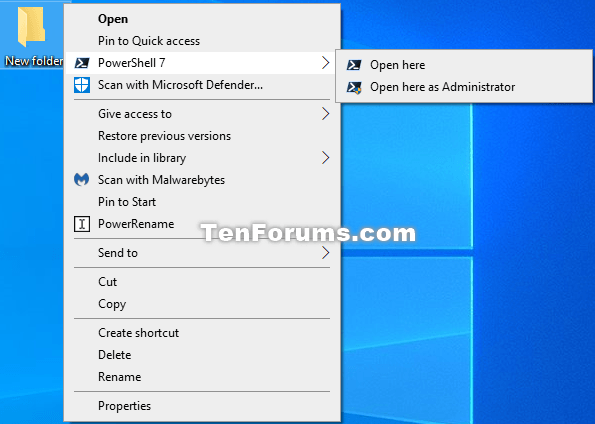
If you are familiar with changing values in the registry, you could change the values in the command keys to use the PS 7 executable path instead of powershell.exe for the context menus like below.
Open PowerShell window here context menu - Add in Windows 10
Add Open PowerShell window here as administrator in Windows 10
Next, you could add a PS 7 shortcut to the Win+X menu like below.
Add Custom Shortcuts to Win+X Quick Link Menu in Windows 10
How to Install PowerShell 7 in Windows 8, Windows 10, and Windows 11
Published by Shawn BrinkCategory: Apps & Features04 May 2023
Tutorial Categories


Related Discussions





 Quote
Quote

