

How to Deny Users and Groups to Log on with Remote Desktop in Windows 10
You can use the Remote Desktop Connection (mstsc.exe) or Microsoft Remote Desktop app to connect to and control your Windows 10 PC from a remote device. When you allow remote desktop connections to your PC, you can use another device to connect to your PC and have access to all of your apps, files, and network resources as if you were sitting at your desk.
By default, administrators and added Remote Desktop Users are allowed to connect (log on) remotely to your computer through Remote Desktop Services.
See also: Deny log on through Remote Desktop Services (Windows 10) | Microsoft Docs
This tutorial will show you how to deny specific users and groups to log on with a Remote Desktop connection in Windows 10.
You must be signed in as an administrator to deny users and groups to log on through Remote Desktop Services.
This Deny log on through Remote Desktop Services policy will override the Allow log on through Remote Desktop Services policy.
- Option One: Deny Users and Groups to Log on with Remote Desktop in Local Security Policy
- Option Two: Undeny Users and Groups to Log on with Remote Desktop in Local Security Policy
- Option Three: Deny or Undeny Users and Groups to Log on with Remote Desktop in Command Prompt
All editions can use Option Three below.
1. Press the Win+R keys to open Run, type secpol.msc into Run, and click/tap on OK to open Local Security Policy.
2. Expand open Local Policies in the left pane of Local Security Policy, click/tap on User Rights Assignment, and double click/tap on the Deny log on through Remote Desktop Services policy in the right pane. (see screenshot below)
3. Click/tap on the Add User or Group button. (see screenshot below)
4. Click/tap on the Advanced button. (see screenshot below)
5. Click/tap on the Object Types button. (see screenshot below)
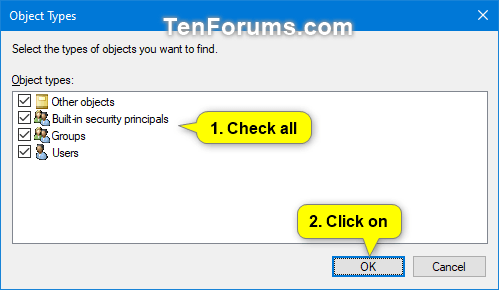
6. Check all the boxes for Object types, and click/tap on the OK. (see screenshot below)
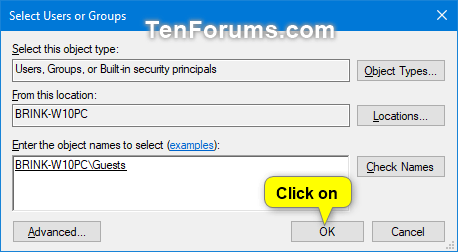
7. Click/tap on the Find Now button, select the name of the user or group (ex: "Guests") you want to add to deny, and click/tap on OK. (see screenshots below)
If you like, you can press and hold the Ctrl key to select more than one user and/or group.

8. Click/tap on OK. (see screenshot below)
9. Click/tap on OK. (see screenshot below)
10. When finished, you can close Local Users and Groups if you like.
All editions can use Option Three below.
1. Press the Win+R keys to open Run, type secpol.msc into Run, and click/tap on OK to open Local Security Policy.
2. Expand open Local Policies in the left pane of Local Security Policy, click/tap on User Rights Assignment, and double click/tap on the Deny log on through Remote Desktop Services policy in the right pane. (see screenshot below)
3. Select the user or group (ex: "Guests") you want to remove to undeny, and click/tap on the Remove button. (see screenshot below)
4. Click/tap on OK. (see screenshot below)
5. When finished, you can close Local Users and Groups if you like.
1. If you haven't already, you will need to do the following below before continuing on to step 2 below.
A) Download the ntrights.exe file below from the Windows Server 2003 Resource Kit Tools.
B) Save the ntrights.zip file to your desktop, and unblock it.
C) Open the ntrights.zip file, copy or move the ntrights.exe file into your C:\Windows\System32 folder, and click/tap on Continue to approve.
2. Open an elevated command prompt.
3. Type the command you want below into the elevated command prompt, and press Enter.
(Add user or group to allow)

ntrights +r SeDenyRemoteInteractiveLogonRight -u "User or Group"
OR
(Remove user or group to prevent)
ntrights -r SeDenyRemoteInteractiveLogonRight -u "User or Group"
For example:ntrights +r SeDenyRemoteInteractiveLogonRight -u "Guests"
4. When finished, you can close the elevated command prompt if you like.
That's it,
Shawn
Related Tutorials
- How to Add or Remove Users from Groups in Windows 10
- How to Change User Rights Assignment Security Policy Settings in Windows 10
- How to Allow or Prevent Users and Groups to Sign in Locally to Windows 10
- How to Deny Users and Groups to Sign in Locally to Windows 10
- How to Add or Remove Remote Desktop Users in Windows
- How to Allow or Prevent Users and Groups to Log on with Remote Desktop in Windows 10
- How to Enable or Disable Remote Desktop Connections to a Windows 10 PC
- Enable or Disable Always Prompt for Password upon Remote Desktop Connection to Windows PC
- How to use Remote Desktop Connection to connect to and from your Windows 10 PC
- How to Add a Remote Desktop Connection in Remote Desktop app on Windows 10 PC
Deny Users and Groups to Log on with Remote Desktop in Windows 10

Deny Users and Groups to Log on with Remote Desktop in Windows 10
How to Deny Users and Groups to Log on with Remote Desktop in Windows 10Published by Shawn BrinkCategory: Network & Sharing
30 Mar 2019


Tutorial Categories

Related Discussions
