

How to Export and Import Contacts for People app in Windows 10
The People app included in Windows 10 puts all the ways you connect with all your friends, family, colleagues, and acquaintances in one place, so its faster than ever to keep in touch.
You can use the People app to see all your contacts in one place, listed alphabetically. Contacts in the People app are also available to your Outlook.com account.
The Mail app uses the People app for Windows 10 to store contact information.
While you cannot directly export your contacts from the People app, you can export your contacts from Outlook.com to a CSV file and then import them back and/or import them into other email apps such as Gmail or Yahoo, or other versions of Outlook.
You can import contacts from various services, including Outlook, Exchange, Gmail, and iCloud.
See also: People app help | Microsoft support
This tutorial will show you how to export (backup) and import (restore) your contacts for the People app in Windows 10.
Contents
- Option One: Export Contacts from Outlook.com for People app to a CSV file
- Option Two: Import Contacts to Outlook.com for People app from a CSV file
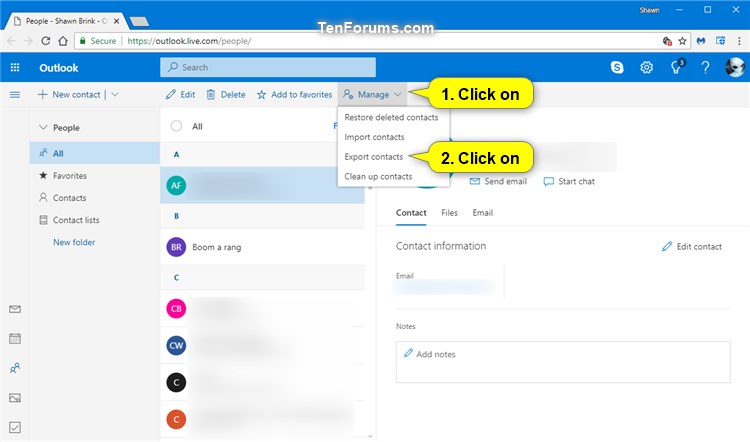
1 Go to the Outlook.com People webpage, and sign in with your Outlook.com account if not already.
2 Click/tap on Manage on the toolbar, and click/tap on Export contacts. (see screenshot below)
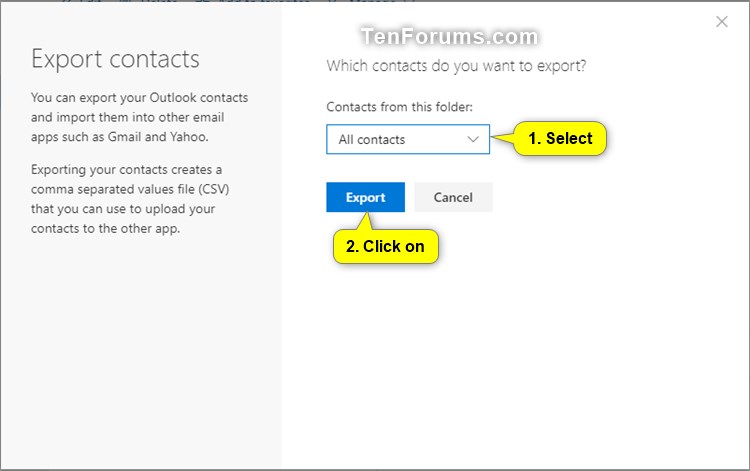
3 Choose to export All contacts or only contacts from a specific folder in the Contacts from this folder drop menu for what you want, and click/tap on Export. (see screenshot below)
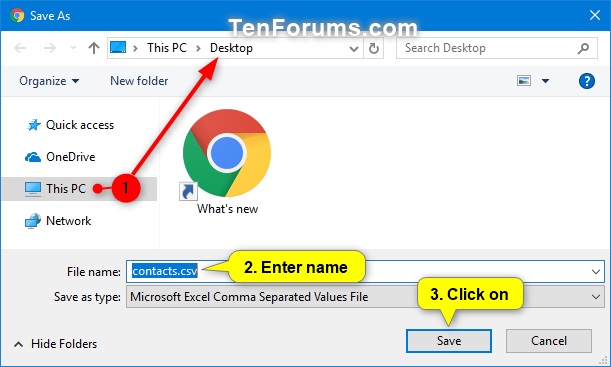
4 Navigate to where you want to export your contacts to as a .csv file, type a file name (ex: "contacts.csv") you want, and click/tap on Save. (see screenshot below)
1 Go to the Outlook.com People webpage, and sign in with your Outlook.com account if not already.
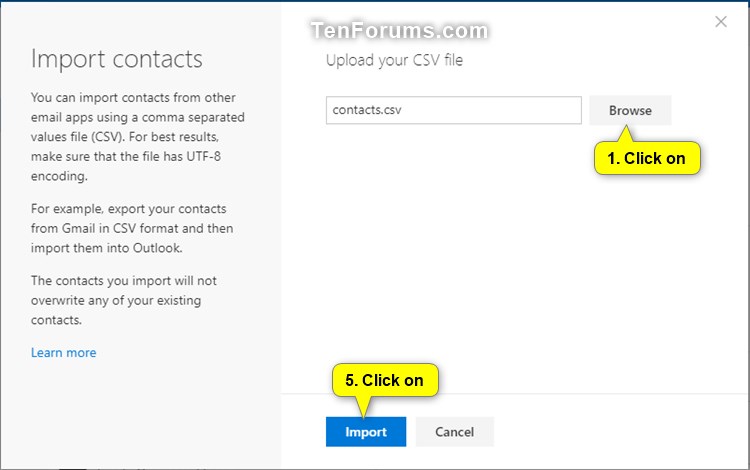
2 Click/tap on Manage on the toolbar, and click/tap on Import contacts. (see screenshot below)
3 Perform the following actions: (see screenshots below)
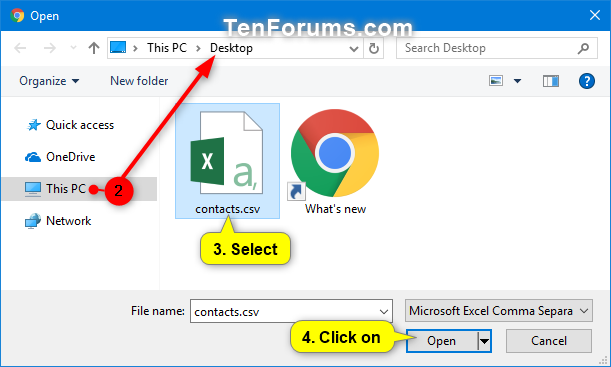
A) Click/tap on the Browse button.
B) Navigate to and select the CSV file from Option One, and then click/tap on Open.
C) Click/tap on Import.
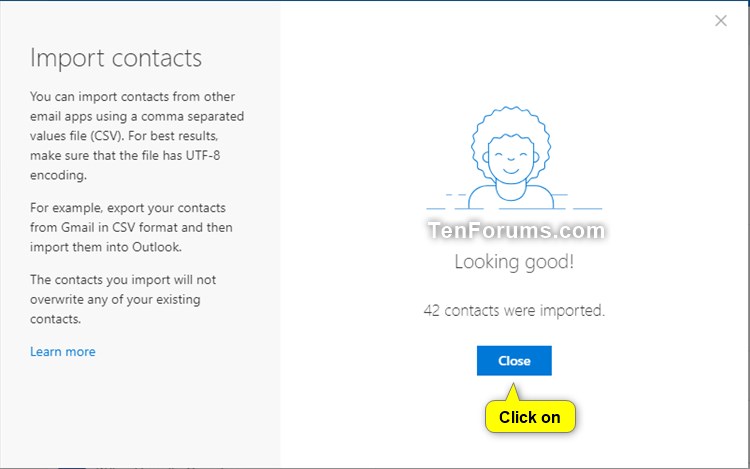
4 Click/tap on Close when importing the CSV file to your Outlook.com has finished. (see screenshot below)
That's it,
Shawn
Related Tutorials
- How to Allow or Deny OS and Apps Access to Contacts in Windows 10
- How to Export Outlook Email, Contacts, and Calendar to PST file
- How to Import Outlook Email, Contacts, and Calendar from PST file
- How to Add or Remove People Button from Taskbar in Windows 10
- How to Enable or Disable People Bar on Taskbar in Windows 10
- How to Pin and Unpin People Contacts on Taskbar in Windows 10
- How to Change how many People Contacts can be Pinned to Taskbar in Windows 10
Export and Import Contacts for People app in Windows 10
-
New #1
I have 2 accounts in Windows mail each with their own gmail account and contacts. How do I import the contacts for one person and then the contacts for the other person? Even combining the cvs files would be ok.
Window 11 Pro 23H2 Desktop Computer
(Sorry this should be in Windows 11 forum but I found this tutorial in Windows 10 Forum.

Export and Import Contacts for People app in Windows 10
How to Export and Import Contacts for People app in Windows 10Published by Shawn BrinkCategory: Backup & Restore
27 Apr 2020


 Quote
QuoteTutorial Categories

Related Discussions
