

How Turn On or Off Use Print Screen Key to Launch Screen Snipping in Windows 10
Starting with Windows 10 build 17661, a new Screen Snip feature has been added to Windows 10 to be able to quickly snip and share a screenshot.
You can snip a rectangle, something a bit more freeform, or full screen and it will go straight to your clipboard. If thats all you need, you can take it from there. Want more, though? Immediately after taking a snip youll now get a notification that will take you and your snip to the Screen Sketch app where you can annotate and share away.
If you like, you can use the Print Screen key to launch screen snipping.
Starting with Windows 10 build 18219, Screen Sketch app has been updated to version 10.1807.2286.0 and renamed to Snip & Sketch.
This tutorial will show you how to turn on or off to use the Print Screen key to launch screen snipping for your account in Windows 10.
Contents
- Option One: Turn On or Off Use Print Screen Key to Launch Screen Snipping in Settings
- Option Two: Turn On or Off Use Print Screen Key to Launch Screen Snipping using a REG file
1 Open Settings, and click/tap on the Ease of Access icon.
Starting with Windows 10 build 21359, the Ease of Access category in Settings has been renamed to Accessibility.
2 Click/tap on Keyboard on the left side, and turn on or off (default) Use the PrtScn button to open screen snipping for what you want under Print Screen shortcut on the right side. (see screenshot below)
3 You can now close Settings if you like.
The downloadable .reg files below will modify the DWORD value in the registry key below.
HKEY_CURRENT_USER\Control Panel\Keyboard
PrintScreenKeyForSnippingEnabled DWORD
0 = Off
1 = On
1 Do step 2 (on) or step 3 (off) below for what you would like to do.
A) Click/tap on the Download button below to download the file below, and go to step 4 below.
Turn_ON_use_Print_Screen_key_to_launch_screen_snipping.reg
Download
This is the default setting.
A) Click/tap on the Download button below to download the file below, and go to step 4 below.
Turn_OFF_use_Print_Screen_key_to_launch_screen_snipping.reg
Download
4 Save the .reg file to your desktop.
5 Double click/tap on the downloaded .reg file to merge it.
6 When prompted, click/tap on Run, Yes (UAC), Yes, and OK to approve the merge.
7 You can now delete the downloaded .reg file if you like.
That's it,
Shawn
Related Tutorials
- How to Take a Screenshot with Screen Snip in Windows 10
- How to Create Screen Snip Shortcut in Windows 10
- How to Add or Remove Screen Snip Context Menu in Windows 10
- How to Turn On or Off Snip Outline in Snip & Sketch app in Windows 10
- How to Turn On or Off Ask to Save Snip before Closing Snip & Sketch app in Windows 10
- How to Turn On or Off Auto Copy to Clipboard for Snip & Sketch app in Windows 10
- How to Backup and Restore Snip & Sketch app Settings in Windows 10
- How to Turn On or Off Single Window Mode in Snip & Sketch app in Windows 10
Turn On Use Print Screen Key to Launch Screen Snipping in Windows 10
-
-
-
New #3
-
-
New #5
Hi Brink,
I don't have this setting in option #1 and option #2 doesn't work for me. Do you think it's the version of windows that I'm running "Enterprise"? Do you know of a work around?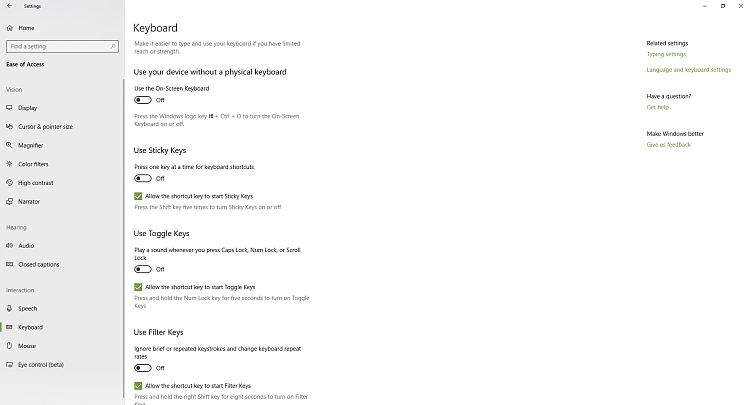
-
New #6
Hello gbansen, and welcome to Ten Forums.
What build number do you have installed?
Find Windows 10 Build Number | Windows 10 Tutorials
-
New #7
It's the latest from October version 1803. Build number 17134.320.
Thanks
-
-
-
New #9
Okay thanks for the reply I thought I had the lasted build. That must be a beta build then. Thanks again for getting back to me so quickly. I guess I will have to wait.

Turn On Use Print Screen Key to Launch Screen Snipping in Windows 10
How Turn On or Off Use Print Screen Key to Launch Screen Snipping in Windows 10Published by Shawn BrinkCategory: General Tips
17 Apr 2021


 Quote
Quote

Tutorial Categories

Related Discussions
