

How to Set Preferred GPU for Apps in Windows 10
Starting with Windows 10 build 17093, Microsoft is introducing a new Graphics settings page for Multi-GPU systems that allows you to manage the graphics performance preference of your apps. You may be familiar with similar graphics control panels from AMD and Nvidia, and you can continue to use those control panels. When you set an application preference in the Windows Graphics settings, that will take precedence over the other control panel settings.
This new setting allows you to specify which GPU you prefer to use by default for specific Store (universal) and Desktop (classic) apps. Preferences may provide better app performance or save battery life. Choices may not take effect until the next time the app launches.
Generally, the power saving GPU is the integrated GPU on a system, and the high performance GPU is the discrete GPU or external GPU. If you have both a discrete GPU and an external GPU on a system, the external GPU is considered the high performance GPU.
Applications are always allowed to have the ultimate choice of which GPU to use, so you may see additional applications that do not follow the preferences you set. In that case, look for a setting within the application itself to choose a preference.
Starting with Windows 10 build 19564, Microsoft updated the Graphics settings page (Settings > System > Display > Graphics settings), allowing for better control over designating which GPU your apps run on. With this update, the app list and GPU preference are pre-populated on a best effort basis to improve the default preference management experience. If your desired app isnt pre-populated, you can still add it by using the app selection drop-down. Youll notice alongside this, Microsoft also added a search box and a filter for the list of apps.
Starting with Windows 10 build 20190, Microsoft has made the following improvements:
- Updated the Graphics Settings to allow users to specify a default high performance GPU.
- Updated the Graphics Settings to allow users to pick a specific GPU on a per application basis.
This tutorial will show you how to set a preferred GPU to use for specific apps for your account in Windows 10.
Contents
- Option One: Add Apps to Set Preferred GPU for in Settings
- Option Two: Set Preferred GPU for Apps in Settings
- Option Three: Remove Apps from Preferred GPU List in Settings
1 Open Settings, and click/tap on the System icon.
2 Click/tap on Display on the left side, and click/tap on the Graphics settings link on the right side. (see screenshot below)
3 Do step 4 (Desktop apps) or step 5 (Microsoft Store apps) below for which type of app you want to add.
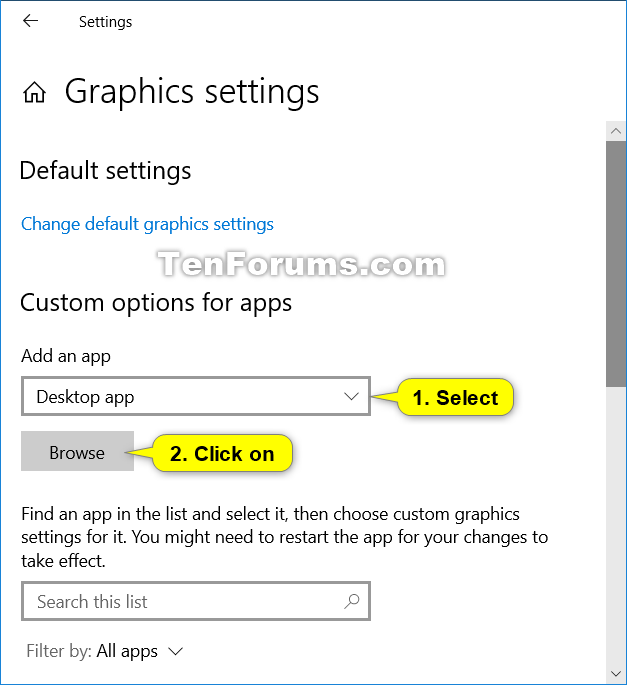
A) Select Desktop app in the "Add an app" drop menu, and click/tap on the Browse button. (see screenshot below)
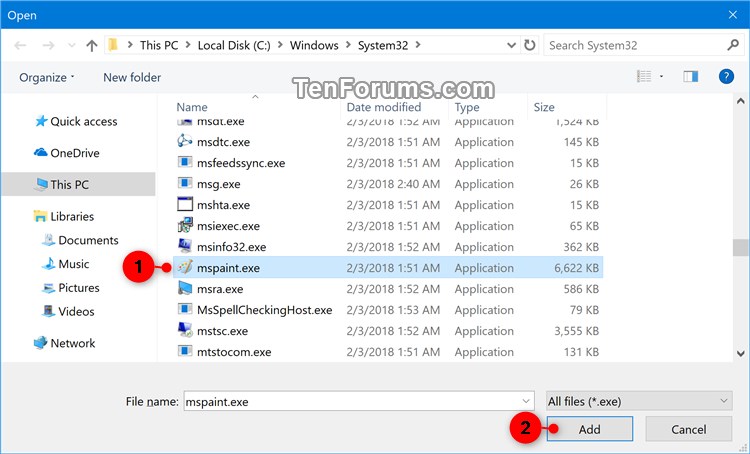
B) Navigate to and select the .exe file (ex: "mspaint.exe") you want to add, click/tap on Add, and go to step 6 below. (see screenshot below)
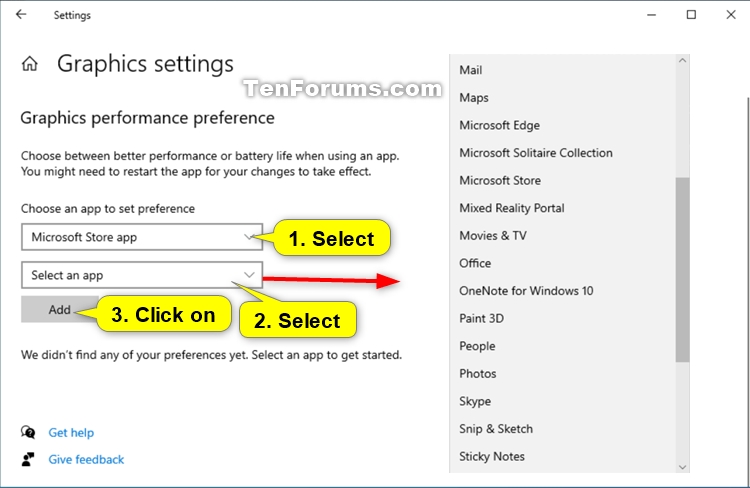
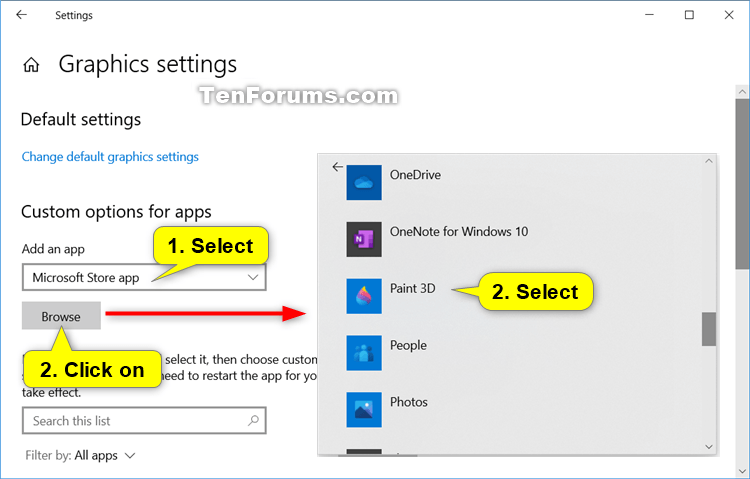
A) Select Microsoft Store app in the "Choose an app to set preference" or "Add an app" drop menu. (see screenshots below)
B) Perform one of the following actions depending on which build of Windows 10 you currently have installed, and go to step 6 below.
- Select an app (ex: "Paint 3D") in the drop menu you want to add, and click/tap on the Add button.
- Click/tap on the Browse button, and select an app you want to add.
6 When finished adding apps, go to step 3 in Option Two below to set the preferred GPU you want for these apps.
1 Open Settings, and click/tap on the System icon.
2 Click/tap on Display on the left side, and click/tap on the Graphics settings link on the right side. (see screenshot below)
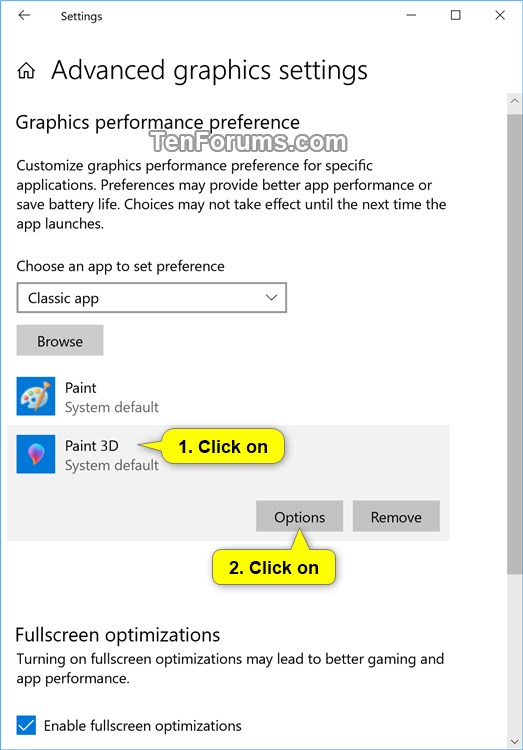
3 Click/tap on an added app (ex: "Paint 3D") in the list you want to set or change the GPU preference for, and click/tap on the Options button. (see screenshot below)
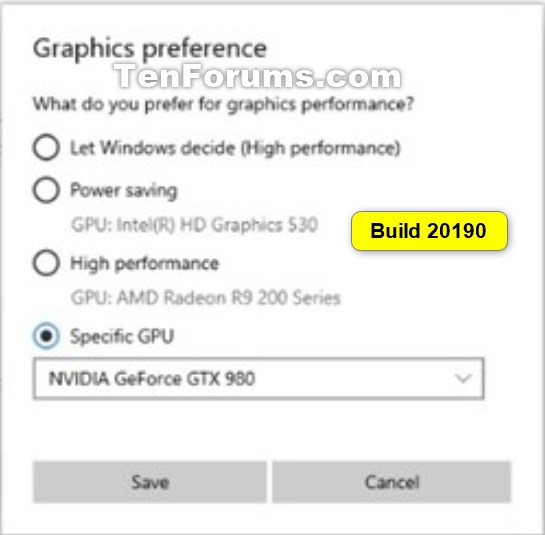
4 Select (dot) System default (default), Power saving, or High performance for the GPU preference you want for this app, and click/tap on Save. (see screenshots below)
GPU Preference Description System default To let Windows decide the best GPU for your application. Power saving A request to run the application on the most power saving GPU available. High performance A request to run the application on the most high performance GPU available.
Generally, the power saving GPU is the integrated GPU on a system, and the high performance GPU is the discrete GPU or external GPU. If you have both a discrete GPU and an external GPU on a system, the external GPU is considered the high performance GPU.
Starting with Windows 10 20190, Microsoft has added the ability for you to specify exactly which GPU you want an app to run on using the new Specific GPU option.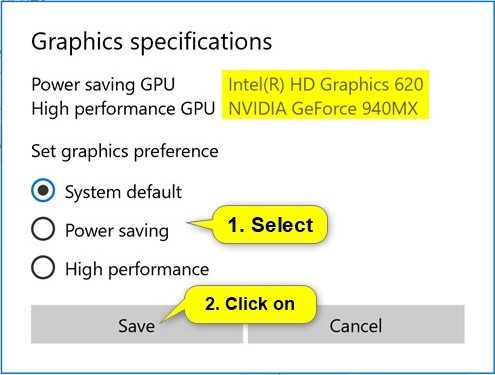
5 When finished, you can close Settings if you like.
Removing an added app from your preferred GPU list will have the app use the system default preferences.
1 Open Settings, and click/tap on the System icon.
2 Click/tap on Display on the left side, and click/tap on the Graphics settings link on the right side. (see screenshot below)
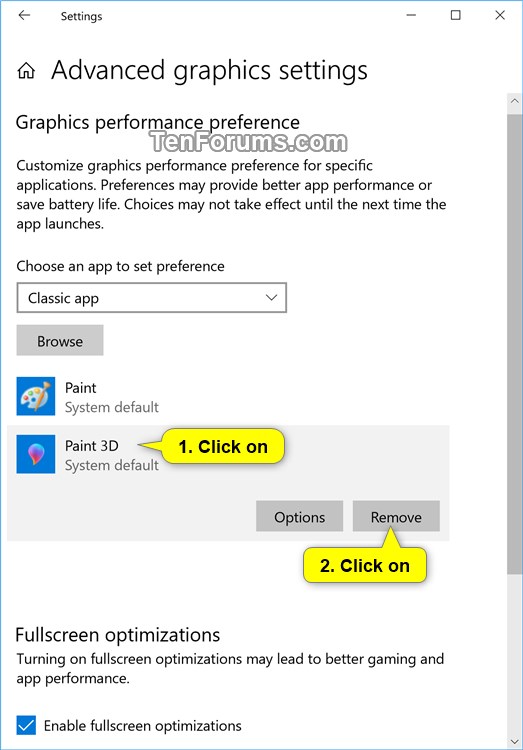
3 Click/tap on an added app (ex: "Paint 3D") in the list you want to remove, and click/tap on the Remove button. (see screenshot below)
4 When finished, you can close Settings if you like.
That's it,
Shawn
Related Tutorials
- How to Backup and Restore GPU Preferences for Apps in Windows 10
- How to Reset GPU Preferences for Apps to Default in Windows 10
- How to Turn On or Off Hardware Accelerated GPU Scheduling in Windows 10
- How to Enable or Disable Fullscreen Optimizations for Apps and Games in Windows 10
- How to Check What Graphics Card or GPU is in Windows PC
- How to Turn On or Off Variable Refresh Rate for Games in Windows 10
- How to Add or Remove NVIDIA GPU Activity Notification Area Icon on Taskbar in Windows
- How to Monitor GPU Temperature from Task Manager in Windows 10
- How to Enable or Disable Hardware Acceleration in Microsoft Edge Chromium
Set Preferred GPU for Apps in Windows 10
-
New #1
The so called "Gaming Mode" within windows10.
Has been shown to not offer any real advantage and in some instances, this setting has degraded gaming performance.
With that said...
Does adding a app, such as a game.
To the Graphics Performance Preference setting, really make any difference in it's performance?
Has anyone bench-marked this, or are there any available bench-marks.
That show any advantage or disadvantage, to applications/games that have been added to this setting?
Personally,
I've added a game to this setting and have noticed adverse in-game effects,
which are not present, when the game is removed form this setting.
I'm wondering if others have experienced this same issue, when adding a game to this setting?
-
New #2
Hello George,
I suppose it depends on how graphic intense the app is.
You could test it both ways to see if you notice any difference in performance between them.
-
New #3
@Brink
I'm running pretty good hardware and have already noticed performance degradation.
When this setting is utilized.
There's also very little information, about what's actually happening.
When an app or game is added to this setting.
My experience seems to be, that adding an app to this setting makes things worse.
Of course I've only tested with one particular game, (World of Tanks) which isn't a very graphically intensive game.
Even so,
I've been testing this game, along with the Graphics Performance Preference settings for almost a month now.
There is noticeable performance loss in this game.
-
-
New #5
Hi Mr @Brink
Why Windows is unable to force "Start" process (Start menu app) to use integrated GPU (here is Intel HD)? I have this big problem since Win 1809 update (Start menu has a lag when I click on to open it, when I disable AMD GPU from "Device Manager" it opens as a thunder!)
My all drivers are up to date, and you can see GPU number in task manager (SS below):
Win 10 2004 (latest updates)
GPU 0 = Intel HD (latest update)
GPU 1 = AMD Radeon (latest update)

-
New #6
Hello atinfo, ;-)
After changing this setting for "Start", you might see if it changes in Task Manager after restarting the computer.
-
New #7
Thanks @Brink
I had restart "Windows Explorer" & "Start" processes then restart Windows, but no difference!
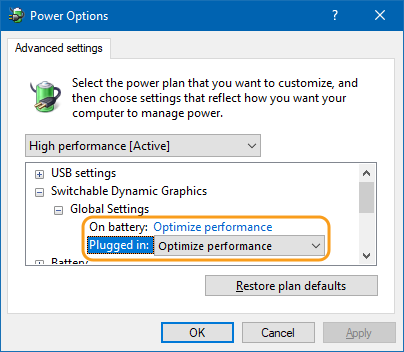
I find out the solution! The problem is "Switchable Dynamic Graphics" in "Advanced Power Settings". The "Global Settings" for both "On battery" and "Plugged in" should not be in "Maximize performance" mode, because it does not let Windows to dedicate integrated graphic card (on board graphic= power saving graphic card) to a specific app. It overrides settings on Windows "Graphic settings" and "AMD Radeon Driver Settings". When I change it to "Optimize performance" it allows "Graphic settings" to dedicate either integrated graphic card or discrete graphic card to an app.I hope Microsoft move these old "Control Panel" settings (Power Options) to the new modern "Settings" and we set all graphic settings in a one place.
-
-
-

Set Preferred GPU for Apps in Windows 10
How to Set Preferred GPU for Apps in Windows 10Published by Shawn BrinkCategory: Hardware & Drivers
09 Sep 2020


 Quote
Quote

Tutorial Categories

Related Discussions
