

How to Enable or Disable AutoPlay for All Drives in Windows
AutoPlay lets you choose an action for different kinds of media when you plug in a device or insert media. You can set AutoPlay to open different kinds of content, such as photos, music, and video on different kinds of media, such as drives, CDs, DVDs, cameras, and phones. For example, you can use AutoPlay to select an app that will automatically open photos on a removable drive when you plug it into your PC. With AutoPlay, you don't have to open the same app or reselect preferences every time you plug in a certain device.
This tutorial will show you how to enable or disable AutoPlay for all drives for all users in Windows 7, Windows 8, and Windows 10.
You must be signed in as an administrator to enable or disable AutoPlay for all drives.
This will not affect AutoPlay for non-volume devices like cameras or phones.
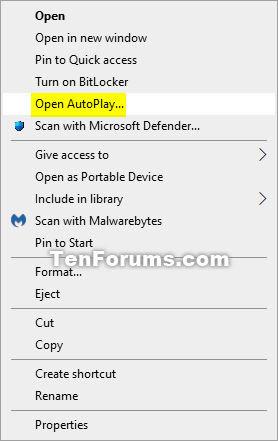
Disabling AutoPlay for all drives will remove the Open AutoPlay context menu for removable drives.
Contents
- Option One: Enable or Disable AutoPlay for All Drives in Local Group Policy Editor
- Option Two: Enable or Disable AutoPlay for All Drives using a REG file
EXAMPLE: "Ask me every time" AutoPlay notification for USB Flash Drive
In Windows 7, the Local Group Policy Editor is only available in the Professional, Ultimate, and Enterprise editions.
In Windows 8, the Local Group Policy Editor is only available in the Pro and Enterprise editions.
In Windows 10, the Local Group Policy Editor is only available in the Pro, Enterprise, and Education editions.
All editions can use Option Two below.
1 Open the Local Group Policy Editor.
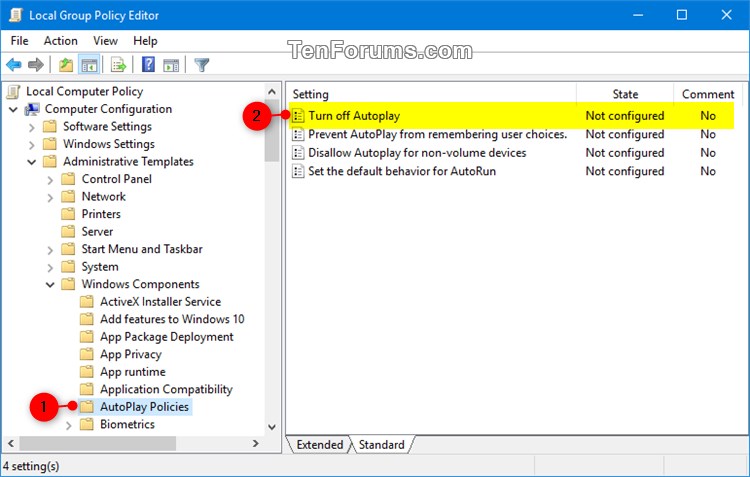
2 Navigate to the location below in the left pane of Local Group Policy Editor. (see screenshot below)
Computer Configuration\Administrative Templates\Windows Components\AutoPlay Policies
3 In the right pane of AutoPlay Policies in Local Group Policy Editor, double click/tap on the Turn off AutoPlay policy to edit it. (see screenshot above)
4 Do step 5 (enable) or step 6 (disable) below for what you would like to do.
A) Select (dot) Not Configured or Disabled, click/tap on OK, and go to step 7 below. (see screenshot below)
Not Configured is the default setting.
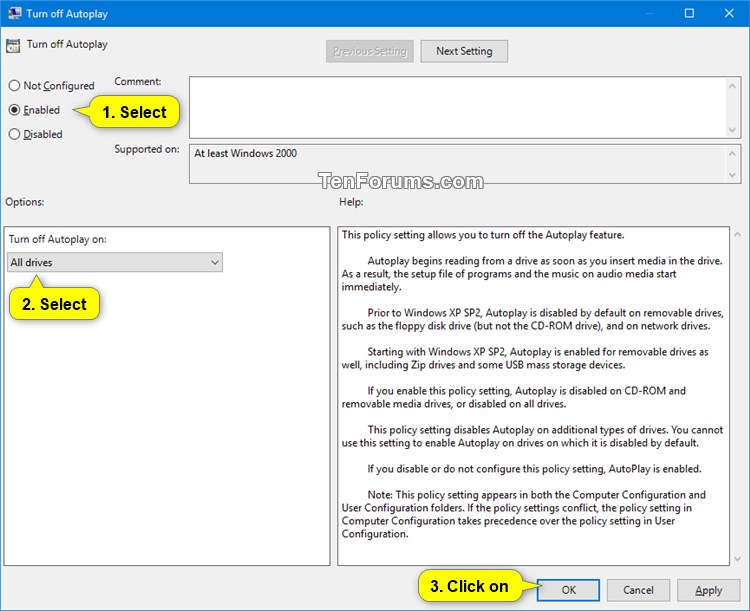
A) Select (dot) Enabled, select All drives in the drop menu under Options, click/tap on OK, and go to step 7 below. (see screenshot below)
7 You can now close the Local Group Policy Editor if you like.
The downloadable .reg files below will modify the DWORD values in the registry keys below.
HKEY_LOCAL_MACHINE\SOFTWARE\Microsoft\Windows\CurrentVersion\Policies\Explorer
NoDriveTypeAutoRun DWORD
(delete) = Enable
ff (hex) = Disable
HKEY_CURRENT_USER\Software\Microsoft\Windows\CurrentVersion\Policies\Explorer
NoDriveTypeAutoRun DWORD
(delete) = default
1 Do step 2 (enable) or step 3 (disable) below for what you would like to do.
This is the default setting.
A) Click/tap on the Download button below to download the file below, and go to step 4 below.
Enable_AutoPlay_for_all_drives.reg
Download
A) Click/tap on the Download button below to download the file below, and go to step 4 below.
Disable_AutoPlay_for_all_drives.reg
Download
4 Save the .reg file to your desktop.
5 Double click/tap on the downloaded .reg file to merge it.
6 When prompted, click/tap on Run, Yes (UAC), Yes, and OK to approve the merge.
7 Restart the computer to apply.
8 You can now delete the downloaded .reg file if you like.
That's it,
Shawn Brink
Related Tutorials
- How to Turn On or Off AutoPlay in Windows 10
- How to Backup and Restore AutoPlay Settings in Windows 10
- How to Reset AutoPlay Settings to Default in Windows 10
- How to Enable or Disable AutoPlay for Non-volume Devices in Windows
- How to Add AutoPlay to Context Menu of Drives in Windows 10
- How to Enable or Disable AutoPlay page in Settings in Windows 10
Enable or Disable AutoPlay for All Drives in Windows
-
-
New #2
-
New #3
Ok, so it works for regular drives, but not MTP devices.
Looks like we need to find a way to flip this switch:

-
New #4
The policy below should include MTP devices.
Enable or Disable AutoPlay for Non-volume Devices in Windows
-
New #5
I assume its not just me as i've found other mentions surrounding this policy specifically but it appears broken? it wont apply at all as per Windows 10 Autoplay setting and GPO (ironically not the first i found, smartscreen for edge gpo wont apply either so i assume theres even more but i digress)
I imagine/also assume the reg key will in fact work, but at that point id just flip the switch. trying to set up policy i can export/import to check all the major boxes for fresh installs.

Enable or Disable AutoPlay for All Drives in Windows
How to Enable or Disable AutoPlay for All Drives in WindowsPublished by Shawn BrinkCategory: Hardware & Drivers
11 Jan 2022


 Quote
QuoteTutorial Categories

Related Discussions
