New
#11
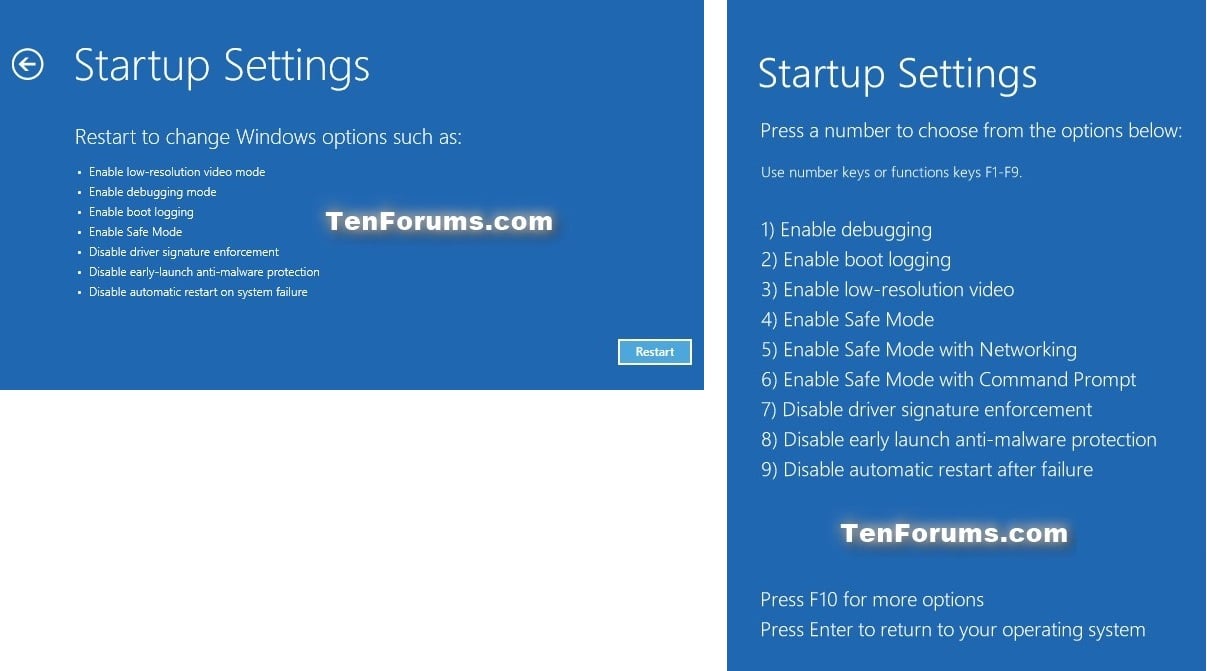
I'm probably reading the F/numbered menu part wrong but that suggests the prompt of pressing the F2, F12, Del or Esc key to enter BIOS Setup or Boot choices which appear after maker's logo appears and are not strictly a Windows issue. The BIOS loads followed by the OS/Operating System reading the settings in it so the OS knows what resources are available and sets the machine up as it needs. Sometimes a reboot won't show those while a full shutdown then startup will show them.

 Quote
Quote