

How to Enable or Disable Delete Confirmation Dialog in Windows 10 Photos app
The Photos app is included in Windows 10 by default. You can use the Photos app to view and edit your photos and videos, make movies, and create albums. You can use video remix to instantly create a video from photos and videos you select. Use the video editor for fine-tuned adjustments change filters, text, camera motion, music, and more. You can even add 3D effects like butterflies, lasers, or explosions that magically appear in your video.
When you delete a file from within the Photos app, you will see a delete confirmation dialog by default before the file and all exact duplicates are moved to the Recycle Bin in Windows 10.
This tutorial will show you how to enable or disable to show a delete confirmation dialog when requesting to delete a file in the Photos apps for your account in Windows 10.
Contents
- Option One: Disable Delete Confirmation Dialog in Photos app from Delete Confirmation Dialog
- Option Two: Enable or Disable Delete Confirmation Dialog in Photos app from Photos app Settings
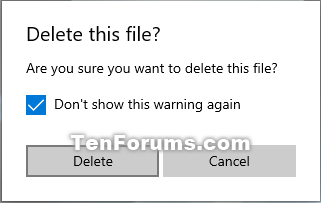
EXAMPLE: Delete confirmation dialog when deleting a file in Photos app
1 Open the Photos app.
2 Delete a file in the Photos app you no longer want. (see screenshot below)
3 Check the Don't show this warning again box in the delete confirmation dialog, and click/tap on Delete. (see screenshot below)
4 You can now close the Photos app if you like.
1 Open the Photos app.
2 Click/tap on the See more (3 dots) button, and click/tap on Settings. (see screenshot below)
3 Under the Viewing and editing settings, turn on (default) or off Display delete confirmation dialog for what you want. (see screenshot below)
4 You can now close the Photos app if you like.
That's it,
Shawn
Related Tutorials
- How to Set Recycle Bin to Permanently Delete Files Immediately in Windows 10
- How to Turn On or Off Recycle Bin Delete Confirmation in Windows 10
Enable or Disable Delete Confirmation Dialog in Windows 10 Photos app

Enable or Disable Delete Confirmation Dialog in Windows 10 Photos app
Published by Shawn BrinkCategory: Apps & Features29 Mar 2020


Tutorial Categories

Related Discussions
