
New
#11
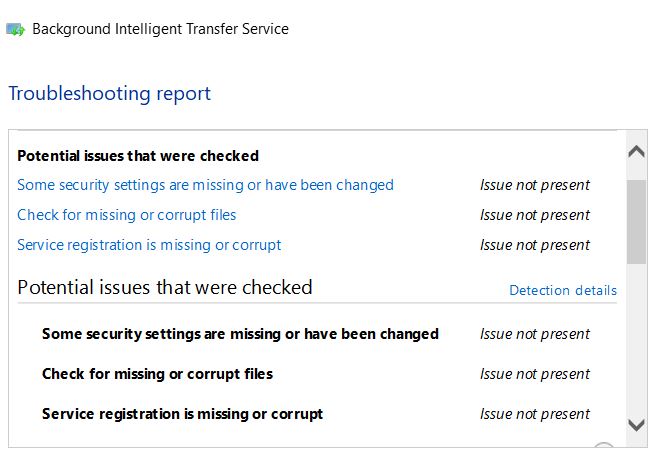
Cannot install updates or Store apps, error code 0x80072F8F
-
-
New #12
Perhaps researching the report
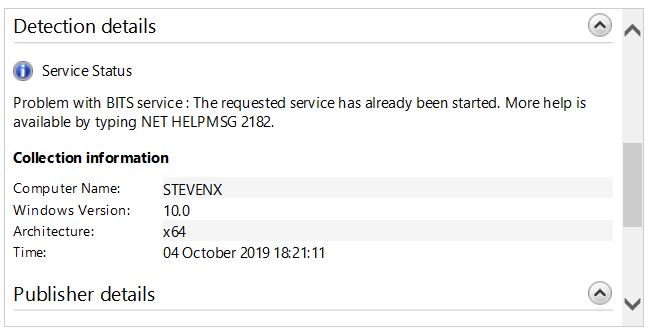
Lots of results.Problem with BITS service : The requested service has already been started. More help is
available by typing NET HELPMSG 2182. may help.
How to fix the NET HELPMSG 2182 error
- see (2) - BITS troubleshooter
Just to check- have you restarted after running the various repairs?
Do you have any other Windows PC on your network that does update successfully?
This is a little strange- unless these are due to the Defender-related problems resolved about a month ago with a particular build of Defender.the SFC /SCANNOW command returned a note about there being some corrupt files
You can check whether this is what you are seeing:
Windows 10 SFC /scannow Can't Fix Corrupted Files After Update
-
New #13
BITS troubleshooter gave the below results:
I have restarted after trying the various repairs. No other computers on the laptop, so not sure if others would update successfully.
Seems the SFC/SCANNOW problem is that one noted in your post. I tried to fix it using the commands given in the post you linked, but didn't seem to work as I still get the same error.
-
New #14
If you haven't already- but do it again anyway.. unset and set time to synch automatically.

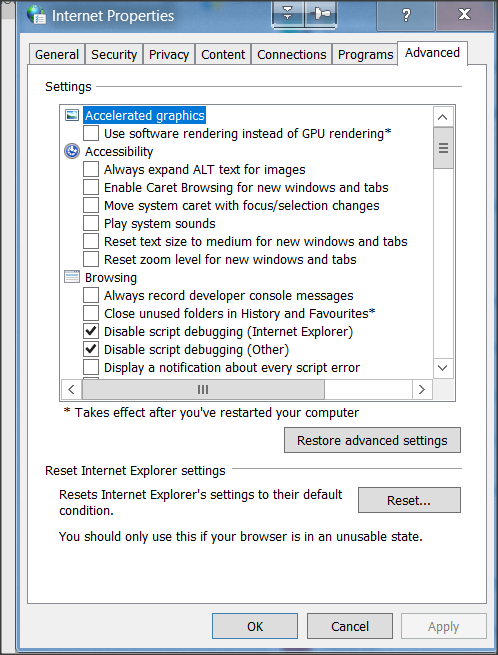
Reset Advanced Settings:
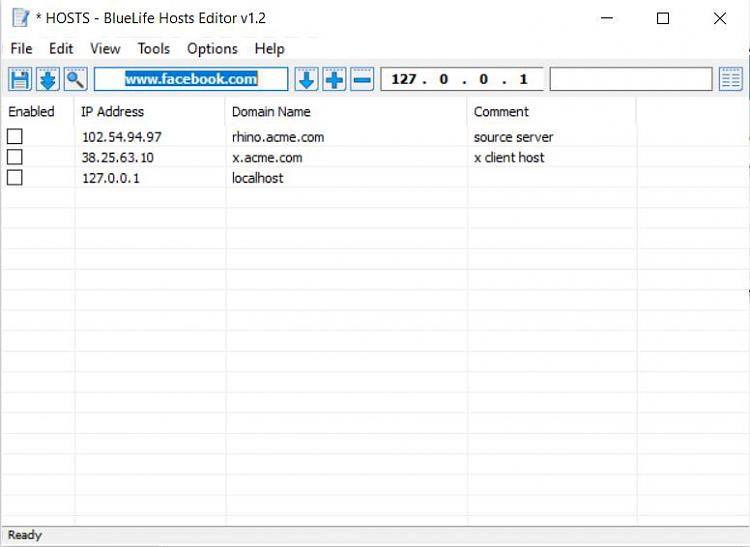
Have you ever modified your HOSTS file or run any 3rd party utilty that may have done so?
By default it looks like this:

Check UAC is enabled
and try
Re-register Microsoft Store app in Windows 10
Then try the Store download and updates again.
-
New #15
All Time and Advanced Internet Options settings look normal. UAC is enabled and HOSTS file looks normal. Re-registered the Store app, but still no luck.
-
New #16
Have you tried resetting Advanced Internet Options settings anyway?
Is this the same on ethernet and wifi?
Try creating a new admin user for test purposes.
Log in as that user, see if the Store works.
-
New #17
Just tried the above (resetting Advanced Internet Options and signing in as a new Admin user whilst using ethernet instead of WiFi) - sadly still no success!
-
-
-
New #19
-
New #20
Google is great at answering questions like that: I searched for
enable disable ipv6
Windows 10:- In the Search bar at the bottom of your screen, type in "Network and Sharing Center", and choose the option that comes up.
- In the Network and Sharing Center, click the option Change Adapter Settings, on the left-hand side of the window.
- Right-click on the first Local Area Connection you see listed there, and go to Properties.
- Under the General tab, uncheck the option "Internet Protocol version 6 (IPv6)".
- Apply the changes by clicking OK out of all available configuration windows.
- Repeat steps 3-5 for any remaining network connections present on this screen.
- Reboot your computer for all the changes to fully take effect.
Google
What is ipv6
E.g.
What Is IPv6 Address & Why Average User Should Know About It - PureVPN Blog
(technical)

 Quote
Quote


Related Discussions
