
New
#170
New Windows 10 Insider Preview Slow Build 17713.1002 - July 26 Insider
-
-
New #171
Been noticing my comp waking from sleep with this version. The hard disk light ticks away but Task Manager doesn't seem to show disk activity. There is low level CPU activity and often it seems it is the Windows Shell Experience Host causing it.
This comp has been a good reliable sleeper so it seems this build is at fault.
-
New #172
The irony here is Fast Ring users cannot officially test a clean install sequence as we only ever officially get upgraded, and the Insider Programme does not recognise our self made isos.
Worse still, MS have not even released a Slow Ring iso which is rather baffling as that seems to be a policy shift - in the past an iso always followed a Slow Ring release within a week or so.
So how does MS expect us to (officially) test the installer if the iso is only released when RTM?
-
-
New #174
Because it's a waste of time at early stages of new feature development. They focus on the bare minimum configurations for the setup/upgrade part and the rest is only adding new features and fixing bugs on the main system image. If they'd rebuild and re-configure every single build for all environment changes they make, it would not be that cost effective and we would not be this far with Windows 10 as we are right now.
-
New #175
In another comment I had talked about "Windows Timeline Support", it is now officially available: Chrome web store.

-
New #176
But we are not at an early stage! MS have signaled they are not going to develop it significantly now until release. Insiders should test all phases including clean install now. The pin bug I mentioned is a good example - we should be able to detect such bugs asap so MS can remedy.
I am not saying all releases should have an iso, but we are long overdue a slow ring iso.
-
New #177
@badrobot @kado897 & Co.:
Sysprep comes to rescue! Doing the following adds two three minutes to your clean install time but is worth of it, you gain it back by completely bypassing OOBE with all "Choose this, click that".
Quick Start instructions to A) completely bypass OOBE asking this and that, and B) always keep an upgraded "clean install" media in case you need to clean install for any reason.
1.) Copy the below code to a new Notepad text file, save it as unattend.xml (remember to select Save as type: All files in Notepad Save dialog!):
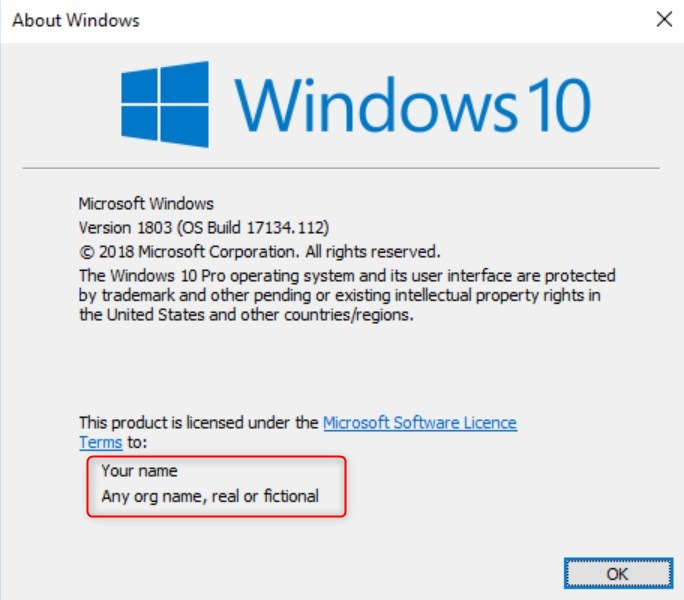
Change following before saving:Code:<?xml version="1.0" encoding="utf-8"?> <unattend xmlns="urn:schemas-microsoft-com:unattend"> <settings pass="oobeSystem"> <component name="Microsoft-Windows-International-Core" processorArchitecture="amd64" publicKeyToken="31bf3856ad364e35" language="neutral" versionScope="nonSxS" xmlns:wcm="http://schemas.microsoft.com/WMIConfig/2002/State" xmlns:xsi="http://www.w3.org/2001/XMLSchema-instance"> <InputLocale>0809:00000809</InputLocale> <SystemLocale>EN-GB</SystemLocale> <UILanguage>EN-GB</UILanguage> <UILanguageFallback>EN-GB</UILanguageFallback> <UserLocale>EN-GB</UserLocale> </component> <component name="Microsoft-Windows-Shell-Setup" processorArchitecture="amd64" publicKeyToken="31bf3856ad364e35" language="neutral" versionScope="nonSxS" xmlns:wcm="http://schemas.microsoft.com/WMIConfig/2002/State" xmlns:xsi="http://www.w3.org/2001/XMLSchema-instance"> <OOBE> <VMModeOptimizations> <SkipAdministratorProfileRemoval>false</SkipAdministratorProfileRemoval> </VMModeOptimizations> <HideEULAPage>true</HideEULAPage> <HideLocalAccountScreen>true</HideLocalAccountScreen> <HideOnlineAccountScreens>true</HideOnlineAccountScreens> <HideOEMRegistrationScreen>true</HideOEMRegistrationScreen> <HideWirelessSetupInOOBE>true</HideWirelessSetupInOOBE> <ProtectYourPC>1</ProtectYourPC> <UnattendEnableRetailDemo>false</UnattendEnableRetailDemo> </OOBE> <UserAccounts> <LocalAccounts> <LocalAccount wcm:action="add"> <Description>Local admin account</Description> <DisplayName>Your Name</DisplayName> <Group>Administrators</Group> <Name>Your Name</Name> </LocalAccount> </LocalAccounts> </UserAccounts> <RegisteredOrganization>Any org name, real or fictional</RegisteredOrganization> <RegisteredOwner>Your name</RegisteredOwner> </component> </settings> </unattend>
- processorArchitecture="amd64" is for 64 bit Windows, change adm64 to x86 in 32 bit Windows. This setting appears twice in the code.
- InputLocale and other region and keyboard settings, change as follows:
- Brazil - Portuguese > 0416:00000416, pt-BR
- Canada - English > 1009:00000409, en-CA
- Canada - French > 0c0c:00011009, fr-CA
- France - French > 040c:0000040c, fr-FR
- Germany - German > 0407:00000407, de-DE
- UK - English > 0809:00000809, en-GB
- USA - English > 0409:00000409, en-US
- For other locales, see complete list: Default Input Profiles (Input Locales) in Windows | Microsoft Docs
- Your name, appears three times. Change to username you want to use for your account
- RegisteredOrganization, change to any real or fictional org name you want to use
2.) Copy the unattend.xml file to your Windows 10 install media.
3.) Disconnect computer from Internet (remove Ethernet cable). Clean install Windows normally until OOBE starts and you are shown the region and keyboard selection screen. Do not select region, instead press SHIFT + F10 to open Command Prompt. Close it as soon as it has opened, we only needed open it once to activate WIN-key shortcuts.
4.) Press WIN + E to open File Explorer, copy unattend.xml from install media to C:\Windows\System32\Sysprep folder:
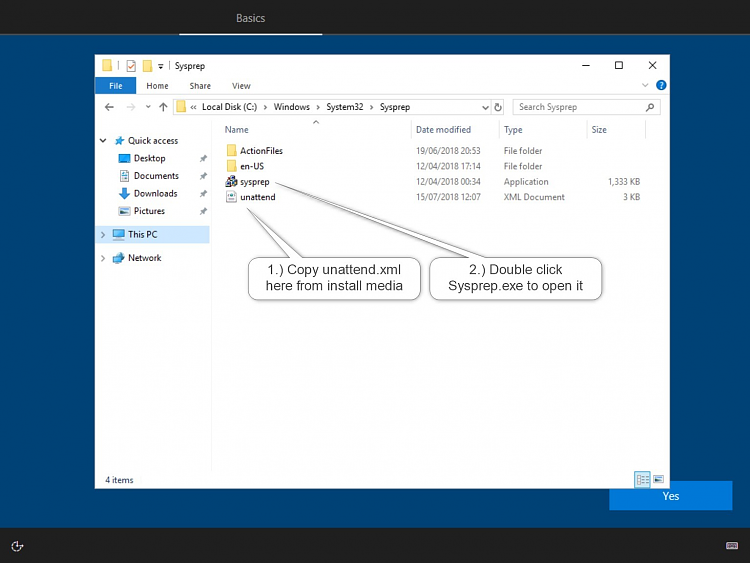
5.) Click OK to run Sysprep with default settings:

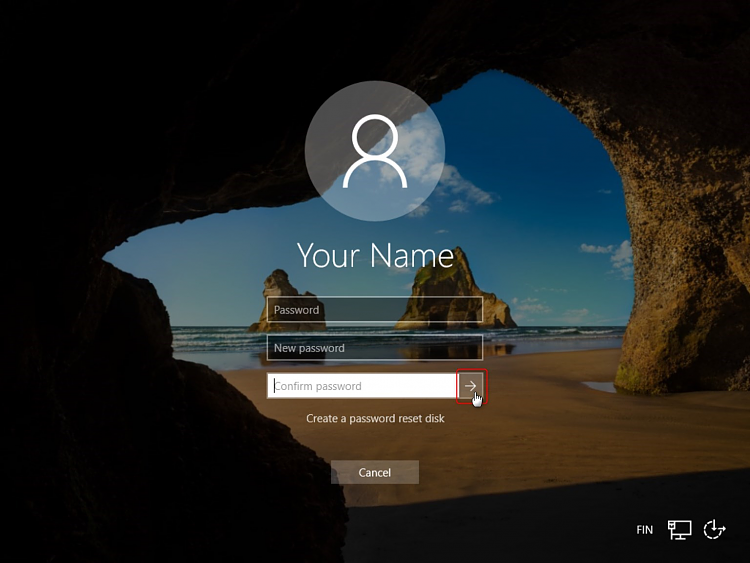
6.) Windows will restart and run a completely automated OOBE. It stops first on sign in screen, where you can set the account password. If you prefer not to use a password, simply click the Submit button:
7.) When on desktop, connect to Internet and install Macrium Reflect. Install the basic software you want to be included in image, customize Start and Desktop. Create full system image with Reflect.
8.) When new feature upgrade will be released, create an ISO of it.
9.) Open the Macrium system image in Macrium viBoot (tutorial), selecting network: Not connected
10.) Upgrade viBoot VM from ISO
11.) Save viBoot image as new full image.
That's it. Next time you need to clean install, simply restore the latest viBoot image.
Kari
-
-
-

 Quote
Quote


Related Discussions
