

How to Add or Remove Resume BitLocker Protection Context Menu in Windows 10
Information
BitLocker Drive Encryption is a data protection feature that integrates with the operating system and addresses the threats of data theft or exposure from lost, stolen, or inappropriately decommissioned computers.
BitLocker can encrypt the drive Windows is installed on (the operating system drive) as well as fixed data drives (such as internal hard drives). You can also use BitLocker To Go to help protect all files stored on a removable data drive (such as an external hard drive or USB flash drive).
You can temporarily suspend (pause) BitLocker protection whenever you like for an unlocked drive encrypted by BitLockerfor example, if you need to install new software that BitLocker might otherwise blockand then resume BitLocker protection on the drive again when you're ready.
When you suspend BitLocker protection for an OS drive, it will remain unlocked and unprotected until you either manually resume BitLocker protection for the drive, or have it resume BitLocker protection automatically the next time you restart the PC.
When you suspend BitLocker protection for a fixed data drive, it will remain unlocked and unprotected until you manually resume BitLocker protection for the drive. This is even after you restart the PC.
When you suspend BitLocker protection for a removable data drive, it will remain unlocked and unprotected until you manually resume BitLocker protection for the drive. This is even after you restart the PC, or disconnect and reconnect the drive.
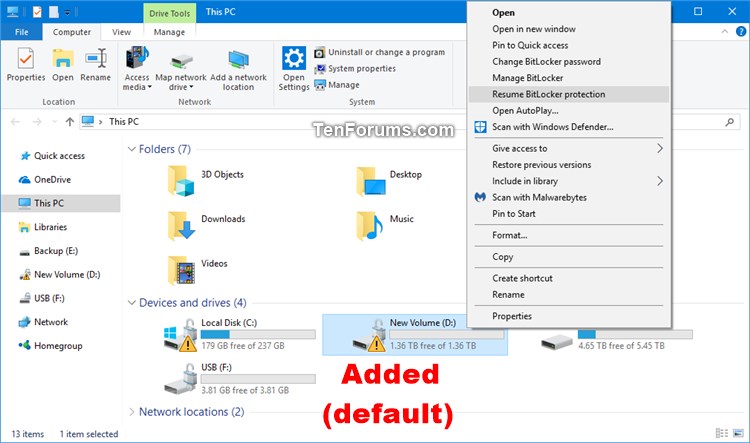
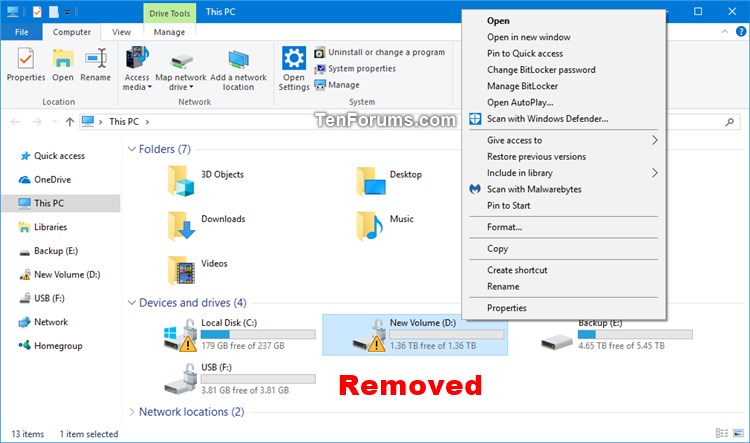
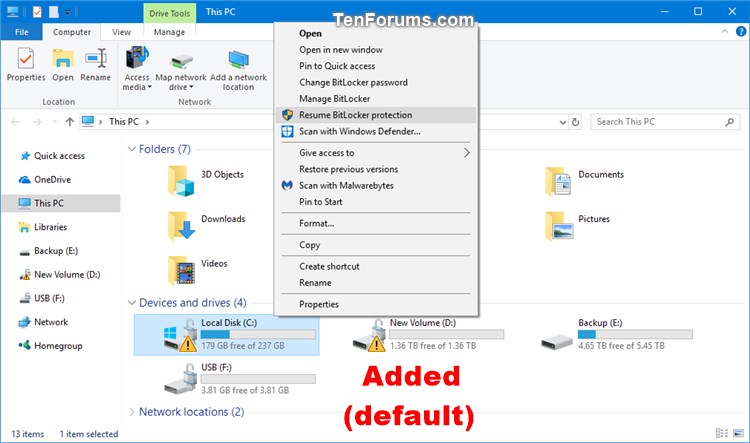
This tutorial will show you how to add or remove the Resume BitLocker protection context menu from all suspended drives encrypted by BitLocker for all users in Windows 10.
You must be signed in as an administrator to add or remove the "Resume BitLocker protection" context menu.
Note
You will still be able to resume BitLocker protection for a drive from the Control Panel or other methods.
BitLocker Drive Encryption is only available in the Windows 10 Pro, Enterprise, and Education editions.
EXAMPLE: Add or Remove "Resume BitLocker protection" context menu
Here's How:
1. Do step 2 (add) or step 3 (remove) below for what you would like to do.
NOTE: This is the default setting.
A) Click/tap on the Download button below to download the file below, and go to step 4 below.
Add_Resume_BitLocker_protection_to_context_menu.reg
Download
A) Click/tap on the Download button below to download the file below, and go to step 4 below.
Remove_Resume_BitLocker_protection_from_context_menu.reg
Download
4. Save the .reg file to your desktop.
5. Double click/tap on the downloaded .reg file to merge it.
6. When prompted, click/tap on Run, Yes (UAC), Yes, and OK to approve the merge.
7. You can now delete the downloaded .reg file if you like.
That's it,
Shawn
Related Tutorials
- How to Turn On or Off BitLocker for Fixed Data Drives in Windows 10
- How to Turn On or Off BitLocker for Removable Data Drives in Windows 10
- How to Turn On or Off BitLocker for Operating System Drive in Windows 10
- How to Suspend or Resume BitLocker Protection for Drive in Windows 10
- How to Add or Remove Change BitLocker Password Context Menu in Windows 10
- How to Add or Remove Change BitLocker PIN Context Menu in Windows 10
- How to Add 'Lock Drive' to Context Menu of BitLocker Encrypted Drives in Windows 10
- How to Add or Remove 'Manage BitLocker' Context Menu from Drives in Windows
- How to Add 'Suspend BitLocker protection' to Context Menu of Drives in Windows
- How to Add or Remove 'Turn off BitLocker' Context Menu from Drives in Windows
- How to Add or Remove 'Turn on BitLocker' Context Menu from Drives in Windows 10
- How to Add or Remove Unlock Drive Context Menu in Windows
Add or Remove Resume BitLocker Protection Context Menu in Windows 10
Add or Remove Resume BitLocker Protection Context Menu in Windows 10
How to Add or Remove Resume BitLocker Protection Context Menu in Windows 10Published by Shawn BrinkCategory: Security System
03 Nov 2017

Tutorial Categories

Related Discussions
