

Information
A few weeks after release of Windows 10 version 1703 (Creators Update), Microsoft in April 2017 officially announced that Windows in the future will get biannual feature upgrades:
Read more: Windows and Office align feature release schedules to benefit customers - Windows BlogsWindows is committing to a predictable twice-per-year feature release schedule, targeting September and March of each year, aligning with Office 365 ProPlus. The next Windows 10 feature update will be targeted for September 2017.
Each Windows 10 feature release will be serviced and supported for 18 months.
Half a year later we got the first of these biannual feature upgrades, current Windows 10 version 1709 Fall Creators Update. Next will be still unnamed version 1803 late March or early April 2018. Until version1803 will be released we will see several cumulative updates, version 1709 has already been updated from build 16299.15 to 16299.19.
What this means for us Windows users is that when we create install media for a new version, it will be to at least some extent outdated quite some time before the next version is released. This tutorial will show how to keep your USB install media up to date by applying cumulative, critical and security updates to it to assure that Windows 10 when installed from the media is always up to date.
To start with, create a USB install media for current version of Windows 10. Here on Ten Forums we have several tutorials to show you how:
- Create Bootable USB Flash Drive to Install Windows 10 Installation Upgrade Tutorials
- PowerShell Scripting - Create USB Install Media for Windows 10 Installation Upgrade Tutorials
- Create media for automated unattended install of Windows 10 Installation Upgrade Tutorials
Please notice, that this script does not work with install media created with Microsoft's Media Creation Tool. If your install media is created with MCT, you must first replace the install.esd file in its Sources folder with install.wim file. This tutorial will show you how to do that: Convert ESD file to WIM using DISM in Windows 10
Part One: Windows Update Download Windows Update packages Part Two: Run the Script Apply updates to Windows install media Part Three: What does Script do? Script explained step by step
Note
Do parts One & Two to update your Windows 10 install media. Part Three is optional, for those interested in how the script was built. It is not required for the USB update process.
1.1) Go to Microsoft Update Catalog: https://www.catalog.update.microsoft.com/
1.2) Search updates for Windows 10 version of your install media you want to update. I have created a USB install media for unattended hands-free install of Windows 10 version 1709 (tutorial), I will search updates for version 1709:
(Click screenshots to enlarge.)
Search found a cumulative update and a security update for Flash Player for both 64 bit systems (highlighted blue) and 32 bit systems (yellow), and cumulative update for systems with ARM64 processor (green). Some device specific updates for Windows 10 S version 1709 were also found (red), I'm not interest in them because I do not have Windows 10 S installed nor do I have install media for it
Sometimes, depending on Windows version and how long since it was released, Update Catalog finds more than one cumulative update. In this case it is enough to download the most recent cumulative update and all critical updates and security updates released after it.
1.3) In my case, wanting to update 64 bit install media, I will download both x64 updates:
Be sure to download Windows Updates for correct bit version, x64 if you will update a 64 bit Windows install media and x86 if updating 32 bit install media.
1.4) I saved the updates in folder H:\WindowsUpdate which I created specifically to store Windows Update files:
2.1) Plug in your Windows 10 install USB flash drive. Check that install.wim file in Sources folder is not write protected (Read Only) in file properties. If Read Only is selected, unselect it to disable write protection.
2.2) Download USBUpdate.ps1 script from OneDrive, save it to local PC selecting Save or Save As. Do not select Open or Run:
Download
2.3) Right click downloaded file, select Properties:
2.4) Select Unblock (tick the box), click OK:
2.5) Open Settings app, select Update & Security, select For developers, click Apply under PowerShell to allow local unblocked scripts to be run:
The Apply button will be greyed out if this setting is already applied:
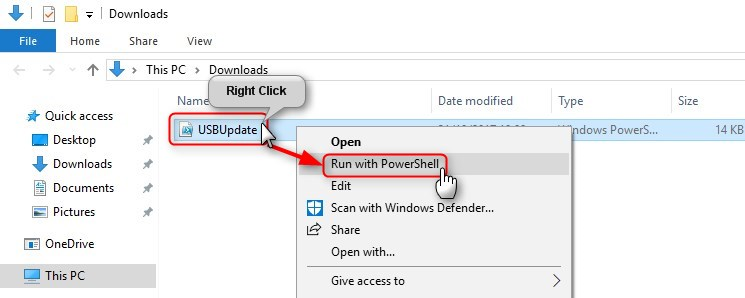
2.6) Run USBUpdate.ps1 script by right clicking it and selecting Run with PowerShell:
You can of course run script if you so prefer manually from PowerShell or from PowerShell ISE using both normal user mode or elevated PowerShell, script will be automatically elevated if started from user mode.
To run script from PS, enter following command, replacing path X:\Scripts with actual path to folder where script is stored:
& "X:\Scripts\USBUpdate.ps1"
If script is in current PS working folder, use following command:
.\"USBUpdate.ps1"
2.7) Depending on your current execution policy level (read more) you might get a notification as shown in screenshot. Press Y and Enter to accept:
If you will get an error message in red telling running scripts is disabled, you've forgot either step 2.4 or step 2.5:
2.8) Script will be run:
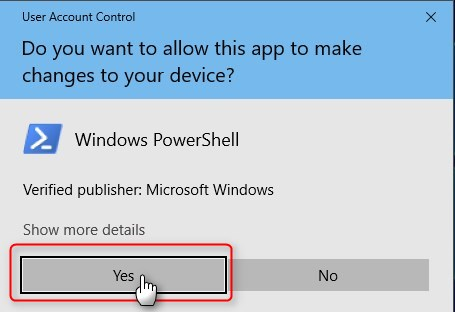
2.9 ) If script was started with right click > Run in PowerShell, or if it was started manually from a normal user mode PS, a new elevated "Run as administrator" PS process will be started.
In this case, depending on your UAC settings, you will be asked to allow PS to be elevated. Click Yes:
2.10) Follow on-screen instructions to update Windows install media, a USB flash drive or an ISO image
3.1) OK, let's go shortly through the modules in this script. In this part we'll look at each screen user will see and the code for it.
I have used a lot of remarks to make script more readable. Lines starting with a hash sign are ignored when script is run and can be used for remarks and notes.
Here's the script to start with, all almost 400 lines of it, including remarks and empty lines to separate modules:
Code:########################################################## # # USBUpdate.ps1 # # A PS Script to update Windows 10 install USB. # # You are free to edit & share this script as long as # source TenForums.com is mentioned. # # *** Twitter.com/TenForums *** Facebook.com/TenForums *** # # Script by Kari # - TenForums.com/members/kari.html # - Twitter.com/KariTheFinn # - YouTube.com/KariTheFinn # # 'Use-RunAs' function to check if script was launched # in normal user mode and elevating it if necessary by # Matt Painter (Microsoft TechNet Script Center) # https://gallery.technet.microsoft.com/scriptcenter/ # ########################################################## ########################################################## # Checking if PS is running elevated. If not, elevating it ########################################################## function Use-RunAs { # Check if script is running as Administrator and if not elevate it # Use Check Switch to check if admin param([Switch]$Check) $IsAdmin = ([Security.Principal.WindowsPrincipal] [Security.Principal.WindowsIdentity]::GetCurrent()` ).IsInRole([Security.Principal.WindowsBuiltInRole] "Administrator") if ($Check) { return $IsAdmin } if ($MyInvocation.ScriptName -ne "") { if (-not $IsAdmin) { try { $arg = "-file `"$($MyInvocation.ScriptName)`"" Start-Process "$psHome\powershell.exe" -Verb Runas -ArgumentList $arg -ErrorAction 'stop' } catch { Write-Warning "Error - Failed to restart script elevated" break } exit } } } Use-RunAs ########################################################## # Show short instructions to user ########################################################## cls Write-Host Write-Host ' This script will update Windows 10 install media with updates ' Write-Host ' downloaded from http://www.catalog.update.microsoft.com' Write-Host Write-Host ' Please notice that the process will take quite some time, depending' Write-Host ' on amount and size of updates being applied to Windows image. ' Write-Host Write-Host ' If you already have a bootable Windows 10 install media on USB ' Write-Host ' flash drive, plug it in now.' Write-Host Write-Host ' If you want to upgrade an ISO instead, mount (double click) a Windows' Write-Host ' ISO image and copy its content to a folder on local PC, for instance' Write-Host ' "D:\ISO_Files". Make sure the folder has no other content.' Write-Host Write-Host ' When ISO files have been copied to a hard disk folder, or USB drive' Write-Host ' has been plugged in, press Enter to start.' Write-Host Write-Host ' ' -ForegroundColor DarkBlue -BackgroundColor White Write-Host ' Notice that you cannot use this script to update an ESD based install' -ForegroundColor DarkBlue -BackgroundColor White Write-Host ' media like for instance ISO / USB made with Media Creation Tool. ' -ForegroundColor DarkBlue -BackgroundColor White Write-Host ' You must first convert "install.esd" file to "install.wim". See ' -ForegroundColor DarkBlue -BackgroundColor White Write-Host ' TenForums tutorial "Convert ESD to WIM":' -ForegroundColor DarkBlue -BackgroundColor White -NoNewline Write-Host ' http://w10g.eu/esd2wim ' -ForegroundColor DarkCyan -BackgroundColor White Write-Host ' ' -ForegroundColor DarkBlue -BackgroundColor White Write-Host Write-Host ' ' -NoNewline pause ########################################################## # Delete possible old log files from previous runs ########################################################## if (Test-Path C:\WUSuccess.log) {Remove-Item C:\WUSuccess.log} if (Test-Path C:\WUFail.log) {Remove-Item C:\WUFail.log} ########################################################## # Prompt user for path to install media (USB drive) or # folder where ISO content was copied to. # # Using 'while' loop to check that source given by user # contains a Windows image, if not user is asked to chek # path and try again ########################################################## $WimCount = 0 while ($WimCount -eq 0) { cls Write-Host Write-Host ' Enter source path. In case you are using a plugged in USB flash' Write-Host ' drive, simply enter its drive letter followed by : (colon).' Write-Host Write-Host ' If the source you are using is a Windows 10 ISO or DVD, enter.' Write-Host ' path to folder where you copied ISO / DVD content.' Write-Host Write-Host ' Notice please: If your source contains both 32 (x86) and 64 (x64)' Write-Host ' bit versions, add \x86 or \x64 to source depending on which' Write-Host ' bit version you want to update.' Write-Host Write-Host ' Examples:' Write-Host ' - A USB drive, enter its drive letter with colon (D: or F:)' Write-Host ' - A USB drive with both bit versions, enter D:\x86 or D:\x64' Write-Host ' - ISO files copied to folder, enter path (D:\ISO_Files)' Write-Host ' - Dual bit version ISO copied to folder, enter path with bit version' Write-Host ' (W:\MyISOFolder\x86 or W:\MyISOFolder\x64)' Write-Host $ISOFolder = Read-Host -Prompt ' Enter source, press Enter' $WimFolder = $ISOFolder if (Test-Path $WimFolder\Sources\install.wim) { $WimCount = 1 if (($WIMFolder -match "x86") -or ($WIMFolder -match "x64")) { $ISOFolder = $ISOFolder -replace "....$" } } elseif (Test-Path $WimFolder) { $WimCount = 0 cls Write-Host Write-Host ' No Windows image (install.wim file) found' Write-Host ' Please check path and try again.' Write-Host Pause } else { $FileCount = 0 cls Write-Host Write-Host ' Path'$ISOFolder 'does not exist.' Write-Host Write-Host ' ' -NoNewline Pause } } $WimFile = Join-Path $WimFolder '\Sources\install.wim' ########################################################## # List Windows editions on image, prompt user for # edition to be updated ########################################################## cls Get-WindowsImage -ImagePath $WimFile | Format-Table ImageIndex, ImageName Write-Host Write-Host ' The install.wim file contains above listed Windows editions.' Write-Host ' Which edition should be updated?' Write-Host Write-Host ' Enter the ImageIndex number of correct edition and press Enter.' Write-Host ' If this is a single edition Windows image, enter 1.' Write-Host $Index = Read-Host -Prompt ' Select edition (ImageIndex)' ########################################################## # Prompt user for folder containing downloaded WU files # (*.cab and / or *.msu). Again, a 'while' loop is used to # check folder contains Windows Update files, if not user # is asked to check path and try again ########################################################## $FileCount = 0 while ($FileCount -eq 0) { cls Write-Host Write-Host ' Enter path to folder containing downloaded Windows Update' Write-Host ' *.cab and / or *.msu files.' Write-Host Write-Host ' Be sure to enter correct path / folder!' Write-Host $WUFolder = Read-Host -Prompt ' Path to folder containing downloaded Windows Update files' if (Test-Path $WUFolder) { $FileCount = (Get-ChildItem $WUFolder\* -Include *.msu,*.cab).Count if ($FileCount -eq 0) { Write-Host Write-Host ' No Windows Update files found in given folder.' Write-Host ' Check the path and try again.' Write-Host Write-Host ' ' -NoNewline pause } } else { $FileCount = 0 cls Write-Host Write-Host ' Path'$WUFolder 'does not exist.' Write-Host Write-Host ' ' -NoNewline Pause } } $WUFiles = Get-ChildItem -Path "$WUFolder" -Recurse -Include *.cab, *.msu | Sort LastWriteTime Write-Host Write-Host ' Found following' $FileCount 'Windows Update files:' Write-Host ForEach ($File in $WUFiles) {Write-Host ' '$File} Write-Host Write-Host ' ' -NoNewline pause ########################################################## # Ask user which drive should be used for temporary # working folder 'Mount'. If 'Mount' exists on selected # drive, delete and recreate it. ########################################################## cls Write-Host [System.IO.DriveInfo]::GetDrives() | Where-Object {$_.DriveType -eq 'Fixed'} | Format-Table @{n='Drive ID';e={($_.Name)}}, @{n='Label';e={($_.VolumeLabel)}}, @{n='Free (GB)';e={[int]($_.AvailableFreeSpace/1GB)}} Write-Host Write-Host ' Above is a list of all hard disk partitions showing available' Write-Host ' free space on each of them. Select a partition for temporary' Write-Host ' folder to mount Windows image. Selected partition must have at' Write-Host ' least 15 GB available free space. Folder will be removed when' Write-Host ' image has been updated.' Write-Host $Drive = Read-Host -Prompt ' Enter drive letter and press Enter' $Mount = $Drive.SubString(0,1) + ':\Mount' if (Test-Path $Mount) {Remove-Item $Mount} $Mount = New-Item -ItemType Directory -Path $Mount ########################################################## # Mount Windows image in temporary mount folder. # # Adding eight empty lines to $EmptySpace variable to be # used as placeholder to push output below PowerShell # progressbar which is shown on top. Five empty lines would # be enough for PowerShell ISE but standard PowerShell will # need eight lines, otherwise output remains hidden ########################################################## cls $EmptySpace = @" "@ Write-Host $EmptySpace Write-Host ' Mounting Windows image. This will take a few minutes.' Mount-WindowsImage -ImagePath $WimFolder\Sources\install.wim -Index $Index -Path $Mount | Out-Null Write-Host Write-Host ' Image mounted, applying updates.' Write-Host ########################################################## # Write updates one by one to Windows image. If OK, add # update name including KB number to 'WUSuccess.log' file, # if failed add to 'WUFail.log' ########################################################## ForEach ($File in $WUFiles) { Write-Host ' Applying'$File Add-WindowsPackage -Path $Mount -PackagePath $File.FullName | Out-Null if ($? -eq $TRUE) {$File.Name | Out-File -FilePath C:\WUSuccess.log -Append} else {$File.Name | Out-File -FilePath C:\WUFail.log -Append} } ########################################################## # Dismount Windows image saving updated install.wim. Using # $EmptySpace variable again to push output from under # PowerShell progressbar to visible area under it ########################################################## cls Write-Host $EmptySpace Write-Host ' Dismounting Windows image, saving updated install.wim.' Write-Host ' This will take a minute or two.' Dismount-WindowsImage -Path $Mount -Save | Out-Null cls ########################################################## # Show updates added to Windows image ########################################################## if (Test-Path C:\WUSuccess.log) { Write-Host Write-Host ' Following updates successfully added to Windows image: ' Write-Host $LogContent = Get-Content 'C:\WUSuccess.log' foreach ($Line in $LogContent) {Write-Host ' - '$Line} } else { Write-Host Write-Host ' All updates failed, nothing added to Windows image.' Write-Host Write-Host ' ' -NoNewline pause exit } ########################################################## # Show failed updates ########################################################## if (Test-Path C:\WUFail.log) { Write-Host Write-Host ' Following updates could not be added to Windows image: ' $LogContent = Get-Content 'C:\WUfail.log' foreach ($Line in $LogContent) {Write-Host ' - '$Line} } else { Write-Host Write-Host ' No failed updates.'} ########################################################## # Delete temporary mount folder ########################################################## if (Test-Path $Mount) {Remove-Item $Mount} ########################################################## # End credits ########################################################## Write-Host Write-Host ' Windows image (install.wim) has been updated.' Write-Host Write-Host ' If your source was a bootable USB drive, it is now updated.' Write-Host Write-Host ' If you started this script by copying Windows install files' Write-Host ' from an ISO or DVD to a folder on hard disk, it now contains.' Write-Host ' everything required to create updated ISO image.' Write-Host Write-Host ' Creating ISO tutorial on TenForums:' Write-Host ' w10g.eu/iso' -ForegroundColor Yellow Write-Host Write-Host ' More Windows 10 tips, tricks, videos & tutorials at' Write-Host ' TenForums.com' -ForegroundColor Yellow Write-Host Write-Host ' * Twitter.com/TenForums * Facebook.com/TenForums * ' -ForegroundColor Yellow Write-Host Write-Host ' Script by Kari' Write-Host ' - TenForums.com/members/kari.html' Write-Host ' - Twitter.com/KariTheFinn' Write-Host ' - YouTube.com/KariTheFinn' Write-Host Write-Host ' Logs were saved on C: drive. They can be opened with Notepad:' Write-Host ' - C:\WUSuccess.log > lists applied updates' Write-Host ' - C:\WUFail.log > lists failed updates' Write-Host Write-Host ' Press Enter to exit.' $Quit = Read-Host ########################################################## # End of script ##########################################################
3.2) In my opinion one of the characteristics of good code, be it a batch file or script or an application is clear and precise on-screen instructions to end user. I recommend both adding enough remarks for those reading the source code, and really doing your best to make output clear, understandable and readable.
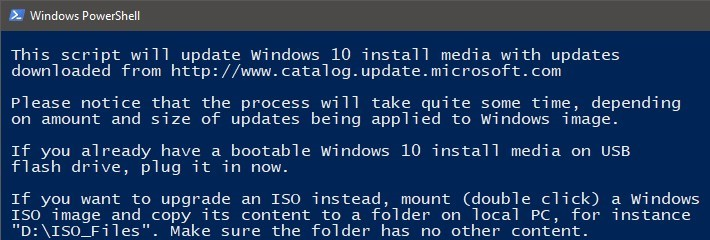
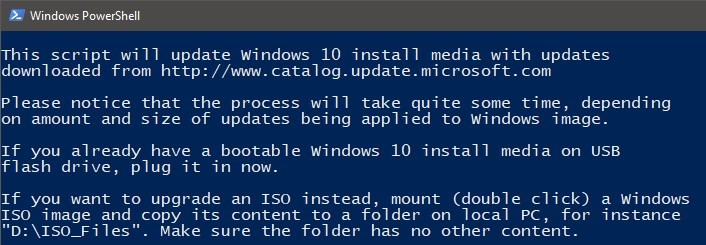
To increase readability I add a leading space to any text output line because PS has this annoying non-existing left margin. Two screenshots to show what I mean:
With a leading space in every line of output:
Without leading space:
Notice that command PAUSE which I use to give user time to read instructions will automatically output text string Press Enter to continue... which will by default have no leading space. To add one, I'll write a line only containing a single space with -NoNewline switch at the end of the command line which tells PS not to start new line after string (single space in this case) has been written (highlighted in code extract):
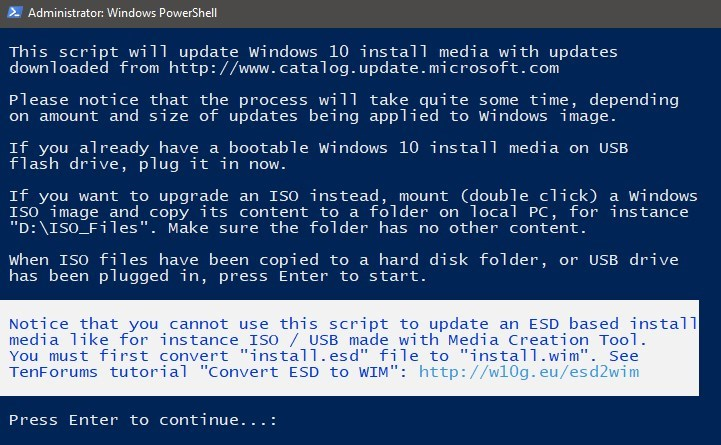
Code:Write-Host ' Notice that you cannot use this script to update an ESD based install' -ForegroundColor DarkBlue -BackgroundColor White Write-Host ' media like for instance ISO / USB made with Media Creation Tool. ' -ForegroundColor DarkBlue -BackgroundColor White Write-Host ' You must first convert "install.esd" file to "install.wim". See ' -ForegroundColor DarkBlue -BackgroundColor White Write-Host ' TenForums tutorial "Convert ESD to WIM":' -ForegroundColor DarkBlue -BackgroundColor White -NoNewline Write-Host ' http://w10g.eu/esd2wim ' -ForegroundColor DarkCyan -BackgroundColor White Write-Host ' ' -ForegroundColor DarkBlue -BackgroundColor White Write-Host Write-Host ' Notice please: If this script was not started from elevated PowerShell,' Write-Host ' PowerShell process will be closed and restarted in elevated mode.' Write-Host ' If restarted, this screen will be shown again and you must press Enter' Write-Host ' one more time to start.' Write-Host Write-Host ' ' -NoNewline pause
Now the next line, command PAUSE will not write its output to a new line without leading space but will instead continue on previous line after that single space.
Also notice in above code extract how warning about ESD file is shown using other colors, inverting them with -ForegroundColor DarkBluesetting the text color to blue and -BackgroundColor White as the name says setting the background color to white. To make it look better, character count (including spaces) in each line is the same to show white background exactly as long in each line.
Opening screen looks like this:
3.3) Already before showing opening screen, we have checked if script has been started elevated and if not, we will start a new elevated PS process.
Beauty of modular structure of a PS script is in how easy it is to reuse parts of it, even borrow code from other geeks. In this case I use a function by Matt Painter I found on TechNet Script Center:
Code:function Use-RunAs { # Check if script is running as Administrator and if not elevate it # Use Check Switch to check if admin param([Switch]$Check) $IsAdmin = ([Security.Principal.WindowsPrincipal] [Security.Principal.WindowsIdentity]::GetCurrent()` ).IsInRole([Security.Principal.WindowsBuiltInRole] "Administrator") if ($Check) { return $IsAdmin } if ($MyInvocation.ScriptName -ne "") { if (-not $IsAdmin) { try { $arg = "-file `"$($MyInvocation.ScriptName)`"" Start-Process "$psHome\powershell.exe" -Verb Runas -ArgumentList $arg -ErrorAction 'stop' } catch { Write-Warning "Error - Failed to restart script elevated" break } exit } } } Use-RunAs
Microsoft TechNet Script Center: Powershell, VB Script, SQL and JavaScript - TechNet IT Pros and Scripting Guys
"Use-RunAs" function: Re-launch Powershell Script Elevated
3.4) After opening screen we will check if old log files from previous runs of this script exist, if yes we will remove them, then ask user path to source which can be either a USB drive or a folder where ISO content has been copied:
Code:########################################################## # Delete possible old log files from previous runs ########################################################## if (Test-Path C:\WUSuccess.log) {Remove-Item C:\WUSuccess.log} if (Test-Path C:\WUFail.log) {Remove-Item C:\WUFail.log} ########################################################## # Prompt user for path to install media (USB drive) or # folder where ISO content was copied to. # # Using 'while' loop to check that source given by user # contains a Windows image, if not user is asked to chek # path and try again ########################################################## $WimCount = 0 while ($WimCount -eq 0) { cls Write-Host Write-Host ' Enter source path. In case you are using a plugged in USB flash' Write-Host ' drive, simply enter its drive letter followed by : (colon).' Write-Host Write-Host ' If the source you are using is a Windows 10 ISO or DVD, enter.' Write-Host ' path to folder where you copied ISO / DVD content.' Write-Host Write-Host ' Notice please: If your source contains both 32 (x86) and 64 (x64)' Write-Host ' bit versions, add \x86 or \x64 to source depending on which' Write-Host ' bit version you want to update.' Write-Host Write-Host ' Examples:' Write-Host ' - A USB drive, enter its drive letter with colon (D: or F:)' Write-Host ' - A USB drive with both bit versions, enter D:\x86 or D:\x64' Write-Host ' - ISO files copied to folder, enter path (D:\ISO_Files)' Write-Host ' - Dual bit version ISO copied to folder, enter path with bit version' Write-Host ' (W:\MyISOFolder\x86 or W:\MyISOFolder\x64)' Write-Host $ISOFolder = Read-Host -Prompt ' Enter source, press Enter' $WimFolder = $ISOFolder if (Test-Path $WimFolder\Sources\install.wim) { $WimCount = 1 if (($WIMFolder -match "x86") -or ($WIMFolder -match "x64")) { $ISOFolder = $ISOFolder -replace "....$" } } elseif (Test-Path $WimFolder) { $WimCount = 0 cls Write-Host Write-Host ' No Windows image (install.wim file) found' Write-Host ' Please check path and try again.' Write-Host Pause } else { $FileCount = 0 cls Write-Host Write-Host ' Path'$ISOFolder 'does not exist.' Write-Host Write-Host ' ' -NoNewline Pause } } $WimFile = Join-Path $WimFolder '\Sources\install.wim'
What user will see:
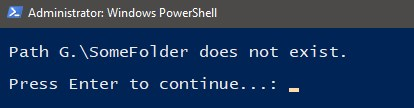
Alternatively, if source path does not contain valid Windows image:
Or, if given source path does not exist:
3.5) Next step is to check install.wim, show user which editions it contains and ask which edition should be updated:
Code:########################################################## # List Windows editions on image, prompt user for # edition to be updated ########################################################## cls Get-WindowsImage -ImagePath $WimFile | Format-Table ImageIndex, ImageName Write-Host Write-Host ' The install.wim file contains above listed Windows editions.' Write-Host ' Which edition should be updated?' Write-Host Write-Host ' Enter the ImageIndex number of correct edition and press Enter.' Write-Host ' If this is a single edition Windows image, enter 1.' Write-Host $Index = Read-Host -Prompt ' Select edition (ImageIndex)'
What user will see:
3.6) Time to prompt user for path to folder containing downloaded Windows update .msu and / or .cab files:
Code:########################################################## # Prompt user for folder containing downloaded WU files # (*.cab and / or *.msu). Again, a 'while' loop is used to # check folder contains Windows Update files, if not user # is asked to check path and try again ########################################################## $FileCount = 0 while ($FileCount -eq 0) { cls Write-Host Write-Host ' Enter path to folder containing downloaded Windows Update' Write-Host ' *.cab and / or *.msu files.' Write-Host Write-Host ' Be sure to enter correct path / folder!' Write-Host $WUFolder = Read-Host -Prompt ' Path to folder containing downloaded Windows Update files' if (Test-Path $WUFolder) { $FileCount = (Get-ChildItem $WUFolder\* -Include *.msu,*.cab).Count if ($FileCount -eq 0) { Write-Host Write-Host ' No Windows Update files found in given folder.' Write-Host ' Check the path and try again.' Write-Host Write-Host ' ' -NoNewline pause } } $FileCount = 0 cls Write-Host Write-Host ' Path'$WUFolder 'does not exist.' Write-Host Write-Host ' ' -NoNewline Pause } $WUFiles = Get-ChildItem -Path "$WUFolder" -Recurse -Include *.cab, *.msu | Sort LastWriteTime Write-Host Write-Host ' Found following' $FileCount 'Windows Update files:' Write-Host ForEach ($File in $WUFiles) {Write-Host ' '$File} Write-Host Write-Host ' ' -NoNewline pause
User will see this:
Again, we are prepared for two possible errors:
3.7) To mount a Windows image we need some space. A compressed image (install.wim) is under 4 GB but needs over triple that space when mounted. Mounting a standard v. 1709 W10 PRO install.wim takes over 12 GB
We will now check all hard disk partitions and list them to user showing how much free space each of them has available and let user to pick drive where temporary mount folder will be created:
Code:########################################################## # Ask user which drive should be used for temporary # working folder 'Mount'. If 'Mount' exists on selected # drive, delete and recreate it. ########################################################## cls Write-Host [System.IO.DriveInfo]::GetDrives() | Where-Object {$_.DriveType -eq 'Fixed'} | Format-Table @{n='Drive ID';e={($_.Name)}}, @{n='Label';e={($_.VolumeLabel)}}, @{n='Free (GB)';e={[int]($_.AvailableFreeSpace/1GB)}} Write-Host Write-Host ' Above is a list of all hard disk partitions showing available' Write-Host ' free space on each of them. Select a partition for temporary' Write-Host ' folder to mount Windows image. Selected partition must have at' Write-Host ' least 15 GB available free space. Folder will be removed when' Write-Host ' image has been updated.' Write-Host $Drive = Read-Host -Prompt ' Enter drive letter and press Enter' $Mount = $Drive.SubString(0,1) + ':\Mount' if (Test-Path $Mount) {Remove-Item $Mount} $Mount = New-Item -ItemType Directory -Path $Mount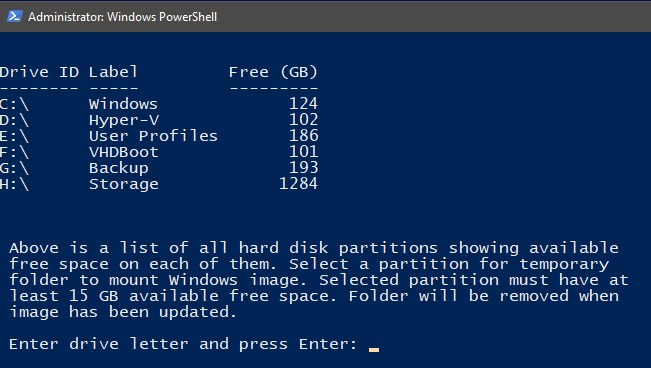
3.8) That's it, we have collected all required information. Script starts working.
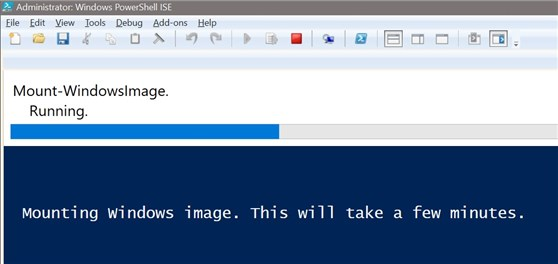
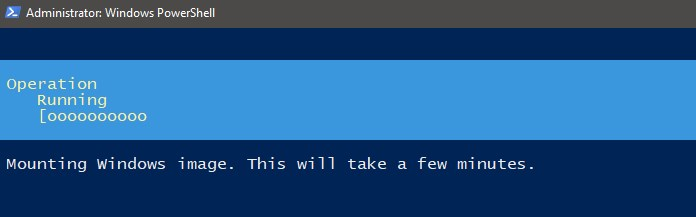
Image will be mounted:
Code:########################################################## # Mount Windows image in temporary mount folder. # # Adding eight empty lines to $EmptySpace variable to be # used as placeholder to push output below PowerShell # progressbar which is shown on top. Five empty lines would # be enough for PowerShell ISE but standard PowerShell will # need eight lines, otherwise output remains hidden ########################################################## cls $EmptySpace = @" "@ Write-Host $EmptySpace Write-Host ' Mounting Windows image. This will take a few minutes.' Mount-WindowsImage -ImagePath $WimFolder\Sources\install.wim -Index $Index -Path $Mount | Out-Null Write-Host Write-Host ' Image mounted, applying updates.' Write-Host
3.9) Updates will be written (applied) to image:
Code:########################################################## # Write updates one by one to Windows image. If OK, add # update name including KB number to 'WUSuccess.log' file, # if failed add to 'WUFail.log' ########################################################## ForEach ($File in $WUFiles) { Write-Host ' Applying'$File Add-WindowsPackage -Path $Mount -PackagePath $File.FullName | Out-Null if ($? -eq $TRUE) {$File.Name | Out-File -FilePath C:\WUSuccess.log -Append} else {$File.Name | Out-File -FilePath C:\WUFail.log -Append} }
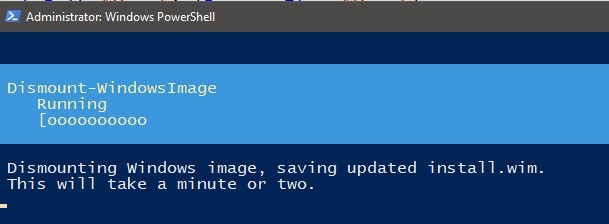
3.10) Dismounting the image, saving changes to install.wim (applied updates):
Code:########################################################## # Dismount Windows image saving updated install.wim. Using # $EmptySpace variable again to push output from under # PowerShell progressbar to visible area under it ########################################################## cls Write-Host $EmptySpace Write-Host ' Dismounting Windows image, saving updated install.wim.' Write-Host ' This will take a minute or two.' Dismount-WindowsImage -Path $Mount -Save | Out-Null cls
3.11) Show user which updates were applied, delete temporary mount folder, show end credits:
Code:########################################################## # Show updates added to Windows image ########################################################## if (Test-Path C:\WUSuccess.log) { Write-Host Write-Host ' Following updates successfully added to Windows image: ' Write-Host $LogContent = Get-Content 'C:\WUSuccess.log' foreach ($Line in $LogContent) {Write-Host ' - '$Line} } else { Write-Host Write-Host ' All updates failed, nothing added to Windows image.' Write-Host Write-Host ' ' -NoNewline pause exit } ########################################################## # Show failed updates ########################################################## if (Test-Path C:\WUFail.log) { Write-Host Write-Host ' Following updates could not be added to Windows image: ' $LogContent = Get-Content 'C:\WUfail.log' foreach ($Line in $LogContent) {Write-Host ' - '$Line} } else { Write-Host Write-Host ' No failed updates.'} ########################################################## # Delete temporary mount folder ########################################################## if (Test-Path $Mount) {Remove-Item $Mount} ########################################################## # End credits ########################################################## Write-Host Write-Host ' Windows image (install.wim) has been updated.' Write-Host Write-Host ' If your source was a bootable USB drive, it is now updated.' Write-Host Write-Host ' If you started this script by copying Windows install files' Write-Host ' from an ISO or DVD to a folder on hard disk, it now contains.' Write-Host ' everything required to create updated ISO image.' Write-Host Write-Host ' Creating ISO tutorial on TenForums:' Write-Host ' w10g.eu/iso' -ForegroundColor Yellow Write-Host Write-Host ' More Windows 10 tips, tricks, videos & tutorials at' Write-Host ' TenForums.com' -ForegroundColor Yellow Write-Host Write-Host ' * Twitter.com/TenForums * Facebook.com/TenForums * ' -ForegroundColor Yellow Write-Host Write-Host ' Script by Kari' Write-Host ' - TenForums.com/members/kari.html' Write-Host ' - Twitter.com/KariTheFinn' Write-Host ' - YouTube.com/KariTheFinn' Write-Host Write-Host ' Logs were saved on C: drive. They can be opened with Notepad:' Write-Host ' - C:\WUSuccess.log > lists applied updates' Write-Host ' - C:\WUFail.log > lists failed updates' Write-Host Write-Host ' Press Enter to exit.' $Quit = Read-Host ########################################################## # End of script ##########################################################
That's it this time!
Kari
PowerShell Scripting - Update Windows 10 USB install media
-
New #1
Another great method, PS script, and tutorial Kari.
What is it? Are you taking a break?That's it this time!
-
New #2
Thanks Tony.
Especially if you clean install every now and then or have multiple machines to install, it's quite practical to keep install media up to date, not having to run Windows Update every time on newly installed Windows. When those updates have been "injected" to install media, your clean install is up to date as soon as it enters desktop.
-
New #3
Kari, first thank you for so much work on this, really appreciated. I have a question about the correct way to enter the selected partition for temporary folder to mount windows image. I've tried entering the correct partition, but it keeps failing. I have an "E" drive with only one partition with plenty of space, but I must be entering it wrong. My "E" drive is one partition named "Data" I've tried the following; E, E:, E:\, E:\Data. None have worked. Feel like a numbskull!
-
New #4
I just tested this once again. Just to be sure, I did not use script I have saved in my PS Scripts folder, but instead downloaded the one in tutorial. If the selected drive has enough space to mount Windows image, script works exactly as told in tutorial. Here I have selected to mount image on drive E:
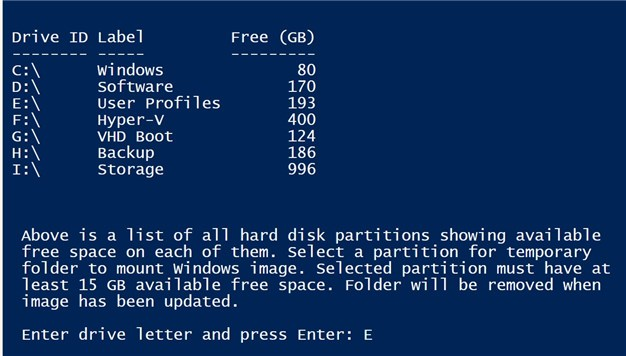
Script was run without issues, image mounted and updated.

I cannot think any reason why it wouldn't work for you, if you have a valid Windows 10 install media USB, or have copied ISO content to a folder on hard disk.
KariLast edited by Kari; 20 Jul 2018 at 13:32.
-
New #5
I got this when clicking on the attachment; "Invalid Attachment specified. If you followed a valid link, please notify the administrator"
-
New #6
I have over 175 GBs on drive E so there is room. To clarify, I enter E: for the temporary drive? Much thanks for your time. Just tried it again and it fails at the point of entering the temporary drive. I wish I could get it to pause on the error, then I could see why.
-
New #7
Screenshots in my previous post fixed.
You enter just the plain drive letter, no colon, no backslash, no path.
Referring to line numbers in original script downloaded in step 2.2 and opened in elevated PS ISE script editor, delete CLS command in line 269, and add PAUSE command after line 286:

Script should now pause after erroring out, and you should be able to take a screenshot of the error message and post it here.
Kari
-
New #8
Fantastic! It reported;
"You do not have permissions to mount and modify this image."
My question is if you are mounting the downloaded Windows Ten .iso and copying all folders and files to D:\ISO_Files, what image needs Read/Write permissions?
I have Read/Write permissions on the .iso, and it lets me mount and copy to D:\ISO_Files.
I have Read/Write permissions on the install.wim file and the cumulative update.
I have the script running to modify the image on a USB stick, but I was hoping to do it the other way and save to a hard drive.Last edited by Barefoot; 20 Jul 2018 at 16:19.
-
-

PowerShell Scripting - Update Windows 10 USB install media
How to keep Windows 10 USB install media up to date using a PowerShell scriptPublished by Kari "Kalsarikänni" FinnCategory: Installation & Upgrade
27 Sep 2022


 Quote
Quote


Tutorial Categories

Related Discussions
