

How to Export and Import Microsoft Defender Exploit Protection Settings in Windows 10
Starting with Windows 10 build 16232, you can now audit, configure, and manage Windows system and application exploit mitigation settings (EMET EOL) right from Windows Security.
Exploit protection is built into Windows 10 to help protect your device against attacks. Out of the box, your device is already set up with the protection settings that work best for most people.
Exploit protection helps protect devices from malware that use exploits to spread and infect. It consists of a number of mitigations that can be applied at either the operating system level, or at the individual app level.
You configure these settings using Windows Security on an individual machine, and then export the configuration as an XML file as a backup and that you can deploy to other machines. When you export the settings, all settings for both app-level and system-level mitigations are saved. This means you don't need to export a file from both the System settings and Program settings sections - either section will export all settings.
For more information, see also:
- Protect devices from exploits | Microsoft Docs
- Import, export, and deploy exploit protection configurations | Microsoft Docs
This tutorial will show you how to export (backup) and import (restore) your Microsoft Defender Exploit protection settings in Windows 10.
You must be signed in as an administrator to export and import Exploit protection settings.
Contents
- Option One: Export Microsoft Defender Exploit Protection Settings in Windows Security
- Option Two: Export Microsoft Defender Exploit Protection Settings in PowerShell
- Option Three: Import Microsoft Defender Exploit Protection Settings in PowerShell
1 Open Windows Security, and click/tap on the App & browser control icon. (see screenshot below)
2 Click/tap on the Exploit protection settings link at the bottom. (see screenshot below)
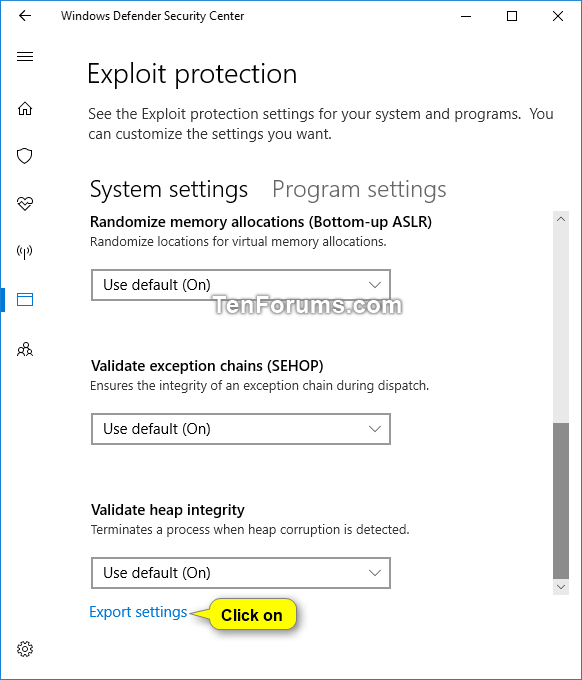
3 Make any changes you want to the Microsoft Defender Exploit settings.
4 Click/tap on the Export settings link at the bottom. (see screenshot below)
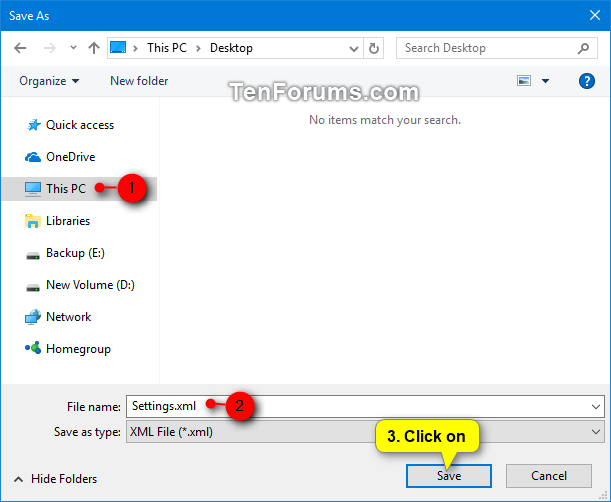
5 Navigate to where you want to save the XML file to, type a File name you want for the XML file, and click/tap on Save. (see screenshot below)
6 When finished, you can close the Windows Defender Security Center if you like.
1 Make any changes you want to the Windows Defender Exploit settings.
2 Open an elevated PowerShell.
3 Copy and paste the command below into the elevated PowerShell, and press Enter. (see screenshot below)
Get-ProcessMitigation -RegistryConfigFilePath "$env:UserProfile\Desktop\ExploitProtectionSettings.xml"
4 When finished, you can close the elevated PowerShell if you like.
5 You can now move the ExploitProtectionSettings.xml file exported on your desktop to where you like to keep it saved at.
1 Open an elevated PowerShell.
2 Type the command below into the elevated PowerShell, and press Enter. (see screenshot below)
Set-ProcessMitigation -PolicyFilePath "Full path of XML file"
Substitute Full path of XML file in the command above with the actual full path of the XML file that you exported using Option One or Option Two above.
For example:Set-ProcessMitigation -PolicyFilePath "C:\Users\Brink\Desktop\ExploitProtectionSettings.xml"
3 When finished, you can close the elevated PowerShell if you like.
That's it,
Shawn Brink
Related Tutorials
- How to Open Windows Defender Security Center in Windows 10
- How to Change Windows Defender Exploit Protection Settings in Windows 10
- Hide or Show App and Browser Control in Windows Defender Security Center in Windows 10
- How to Enable or Disable Windows Defender Exploit Protection Settings in Windows 10
Export and Import Exploit Protection Settings in Windows 10
-
New #1
Hi Shawn,
Any idea why I get this "A positional parameter cannot be found that accepts the argument" error when I run the import command?

-
-
-
-
New #5
Is there a way to restore the default Program Settings for Exploit Protection without resorting to extreme methods like Resetting Windows or System Restore? Maybe someone with a fresh Windows can upload their Settings.xml here?
-
New #6
Hello mate,
Here's an export attached in a ZIP below from a fresh W10 VM to help.
Default_ExploitProtectionSettings.zip
-
New #7
Thank you kindly!
-
-
-
New #9
Hello @Brink,
In a Script that I am writing, I would like to check the existence of the file [ <if> <then> <else> scenario ] that is exported as per the Tutorial above, but I am having a real problem locating it anywhere on my system [Group Policy/Registry] !
Have you any ideas please ?
Thanks.

Export and Import Exploit Protection Settings in Windows 10
How to Export and Import Microsoft Defender Exploit Protection Settings in Windows 10Published by Shawn BrinkCategory: Security System
01 Nov 2022


 Quote
Quote

Tutorial Categories

Related Discussions
