

Information
Servicing an offline image, mounting an image, committing changes, it all sounds a bit complicated to an average Windows user. However, it's just geek speak meaning modifying default Windows install image, the install.wim file. It is a straight forward procedure. When changes have been committed (written, saved) to image, the modified install.wim can be used to deploy Windows or to replace original install.wim on existing install media.
Servicing an offline image is done with DISM (Deployment Image Servicing and Management), a native Windows tool. DISM command options allow all kind of changes, changing the way Windows will be installed. Drivers can be added or removed, language packs applied to create a multilingual Windows install media, Windows Updates applied to get a new Windows installation to be up to date straight after installation, and so on.
A default Windows install media created with Windows Media Creation Tool (from here on MCT) contains an encrypted and compressed install.esd file instead of install.wim file. An MCT ISO is fully functional, the official way chosen by Microsoft to deliver Windows 10 install media. Windows has no issues in installing from an ESD file, but to service it offline the ESD file needs to be decrypted and converted to WIM format. If you try to mount an ESD file as offline image, you will get an error:
This tutorial will show how to use DISM to convert an ESD based MCT install media to WIM format. The same method can of course be used to convert any other ESD file to WIM, too
Step One: Preparations Step Two: Convert ESD to WIM Step Three: Create updated ISO
1.1) Create a folder on hard disk, name it as you wish. In this example I use folder D:\ISO_Files. From here on D:\ISO_Files folder refers to whatever folder you set up for this
1.2) If you have MCT install media already on USB flash drive, copy \Sources\install.esd to D:\ISO_Files folder.
1.3) If you have a dual architecture USB install media, copy the install.esd file for correct bitversion to D:\ISO_Files. It is located in \x86\Sources folder for 32 bit Windows, and in \x64\Sources folder for 64 bit Windows
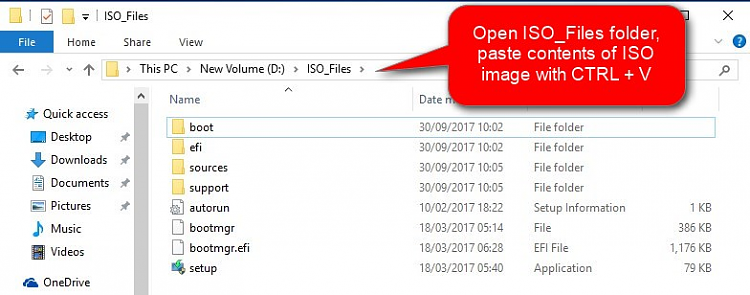
1.4) If you have MCT install media as an ISO image, mount the ISO as virtual DVD (right click ISO > select Mount) and copy its content (all files and folders from ISO) to D:\ISO_Files folder
2.1) Open an elevated PowerShell (tutorial)
2.2) Check which Windows editions the install.esd image contains with one of the following commands:
- If you copied an ESD file from USB to D:\ISO_Files as told in steps 1.2 or 1.3:
dism /Get-WimInfo /WimFile:D:\ISO_Files\install.esd
- If you copied ISO contents to D:\ISO_Files as told in step 1.4:
dism /Get-WimInfo /WimFile:D:\ISO_Files\Sources\install.esd
Note
In case that your MCT ISO is dual architecture, the ISO contents you copied to D:\ISO_Files contains both 32 bit and 64 bit Windows images. In that case you need to change the above command accordingly:
To check editions in 32 bit install.esd:
dism /Get-WimInfo /WimFile:D:\ISO_Files\x86\Sources\install.esd
To check editions in 64 bit install.esd:
dism /Get-WimInfo /WimFile:D:\ISO_Files\x64\Sources\install.esd
2.3) Note the index number for your preferred edition. In this example I want to use PRO edition, noting its index number 1:
2.3) Enter following command to convert ESD to WIM:
Code:dism /Export-Image /SourceImageFile:D:\ISO_Files\Sources\install.esd /SourceIndex:1 /DestinationImageFile:D:\ISO_Files\Sources\install.wim /Compress:Max /CheckIntegrity
2.4) Be sure to use correct SourceIndex number (green highlight in sample command in step 2.3 above)
2.5) Command sample in step 2.3 is valid only if you copied ISO contents from a single architecture (32 or 64 bit) MCT ISO image to D:\ISO_Files folder as told in step 1.4.
If you instead copied an ESD file alone from USB as told in steps 1.2 and 1.3, or if you copied contents of dual architecture ISO image in step 1.4, change SourceImageFile and DestinationImageFile paths (red highlight in sample command in step 2.3 above) accordingly:
- If you copied an ESD file from USB to D:\ISO_Files as told in steps 1.2 or 1.3, both paths should be D:\ISO_Files\install.esd
- If you copied dual architecture ISO contents to D:\ISO_Files as told in step 1.4, both paths should be
D:\ISO_Files\x86\Sources\install.esd to convert 32 bit install.esd, or D:\ISO_Files\x64\Sources\install.esd to convert 64 bit install.esd.
2.6) Convertion will take a few minutes. When done, you'll find both original install.esd and new install.wim file in D:\ISO_Files\Sources folder:
2.7) If you were working with MCT single bit architecture ISO content copied to D:\ISO_Files, continue from step 3.1
2.8) If you were working with MCT dual bit architecture ISO content copied to D:\ISO_Files, you should now repeat the process for the other not yet converted bit version. For instance if you have now converted the 64 bit install.esd, do the same for 32 bit version
2.9) If you were working with install.esd file copied from USB to D:\ISO_Files, delete the ESD file on USB Sources folder and replace it with new install.wim file
2.10) Before creating new ISO from ISO_Files folder, delete the install.esd file in Sources folder (or x86\Sources / x64\Sources)
3.1) The D:\ISO_Files folder on HDD now contains all files needed to create an updated ISO image. See Part Five in following tutorial for instructions in creating the ISO: Create Windows 10 ISO image from Existing Installation Installation Upgrade Tutorials
That's it! If you have any issues with this, do not hesitate to post in this thread.
Kari
Related Tutorials
- How to add or remove hardware device drives on an Offline Image with DISM
- How to Backup and Restore Device Drivers in Windows 10
- How to use DISM to Edit Registry in Offline Windows 10 WIM (Image) File
Convert ESD file to WIM using DISM in Windows 10
-
New #1
This bit (Section 3.1) is deserving a tutorial all of its own - it is that useful.It is very useful indeed - I spent ages trying to figure out Oscdimg before stumbling across it (just yesterday in fact) as all searches for "Make ISO from USB" seem to take you to "Make USB from ISO".See Part Five in following tutorial for instructions in creating the ISO: Create Windows 10 ISO image from Existing Installation Installation Upgrade Tutorials in following tutorial for instructions in creating the ISO: Create Windows 10 ISO image from Existing Installation Installation Upgrade Tutorials
Thanks.
-
New #2
Yes, OSCDIMG as told Part Five in the tutorial in question can be used not only to make custom ISO but also to make ISO from any USB flash drive or DVD containing any version and edition of Windows. It can sometimes be a useful feature.
-
New #3
Hello
thanks for the tuto
typo mistake here : dism /Get-WimInfo /WinFile: => dism /Get-WimInfo /WimFile:
-
-
New #5
Great tutorial, but it is worth noting if you spoof your browser to be an android device or use an android device, and go to
Download Windows 10
you can download the iso direct, and this has install.wim built in, not install.esd.
-
New #6
I needed to recreate one today, and the tutorial worked great @Kari!!!(as usual)
I know how important it is to follow your steps exactly, one recommendation, highlight:
As it took me a couple of tries to get it to work, as I somehow had eye to brain problems, catching those important steps for an ISO1.4) If you have MCT install media as an ISO image, mount the ISO as virtual DVD (right click ISO > select Mount) and copy its content (all files and folders from ISO) to D:\ISO_Files folder
Anyhow it works perfect:
Code:Good morning Cliff S. The time is 09:25 (9:25 AM) 33 days to go until your Birthday! PS D:\ISO_Files> >> dism /Get-WimInfo /WimFile:D:\ISO_Files\Sources\install.esd >> Deployment Image Servicing and Management tool Version: 10.0.16299.15 Details for image : D:\ISO_Files\Sources\install.esd Index : 1 Name : Windows 10 S Description : Windows 10 S Size : 15,748,508,043 bytes Index : 2 Name : Windows 10 S N Description : Windows 10 S N Size : 14,682,635,068 bytes Index : 3 Name : Windows 10 Home Description : Windows 10 Home Size : 15,567,580,753 bytes Index : 4 Name : Windows 10 Home N Description : Windows 10 Home N Size : 14,496,690,559 bytes Index : 5 Name : Windows 10 Home Single Language Description : Windows 10 Home Single Language Size : 15,569,063,438 bytes Index : 6 Name : Windows 10 Education Description : Windows 10 Education Size : 15,746,024,004 bytes Index : 7 Name : Windows 10 Education N Description : Windows 10 Education N Size : 14,680,122,009 bytes Index : 8 Name : Windows 10 Pro Description : Windows 10 Pro Size : 15,746,775,851 bytes Index : 9 Name : Windows 10 Pro N Description : Windows 10 Pro N Size : 14,680,828,085 bytes The operation completed successfully. PS D:\ISO_Files> dism /Export-Image /SourceImageFile:D:\ISO_Files\Sources\install.esd /SourceIndex:8 /DestinationImageFile:D:\ISO_Files\Sources\install.wim /Compress:Max /CheckIntegrity Deployment Image Servicing and Management tool Version: 10.0.16299.15 Exporting image [==========================100.0%==========================] The operation completed successfully. PS D:\ISO_Files>

-
New #7
In all its simplicity, here's that step in two screenshots:

BTW, I edited step 2.9 and added step 2.10 just now. Here's how 2.9 it was before edits:
And here 2.9 and 2.10 after edits:2.9) If you were working with install.esd file copied from USB to D:\ISO_Files, you are done!. You can now delete the install.esd file in Sources folder (or x86\Sources / x64\Sources) on USB replacing it with new install.wim file
Also worth to remember is that after ESD to WIM conversion, new ISO only contains a single edition which always has index number 1. Using your CODE sample as an example, you made W10 PRO single edition WIM from W10 multi edition ESD. In original ESD the PRO edition is / was index 8, in new WIM file it's index 1.2.9) If you were working with install.esd file copied from USB to D:\ISO_Files, delete the ESD file on USB Sources folder and replace it with new install.wim file
2.10) Before creating new ISO from ISO_Files folder, delete the install.esd file in Sources folder (or x86\Sources / x64\Sources)
Kari
-
New #8
I just needed to do it to grab the Winre from a newer ESD ISO(the official one from the release date, instead of the one I had the Friday before).
Just so others know, you need to do these steps if you wish to replace missing or corrupt Windows system files and libraries(.dll)(not so sure about replacing folders though).
 It must come from a Install .wim and not .esd
-
-
New #9
It might just be worth noting here that it's super easy to convert ALL editions of Windows in an image to WIM format by just adding one simple step:
Simply repeat the same export command noted in the tutorial with the index number changed and repeat for all remaining indices.
For example, the dual architecture image from Microsoft has 7 x64 editions and 7 x86 editions.
After running the export command for the first x64 edition, simply repeat the export command with index number 2, then 3, etc. for all 7 indices. You will find that the export for indecies 2 to 7 will go very quickly since only the minor changes need to be converted.
Likewise for the x86 exports. Only the first export will take some time, the subsequent exports will proceed far quicker.
As quick as this process is, I find it worth the time to simply convert them all.
When done, your install.wim file(s) will have all of the editions found in the original install.esd.

Convert ESD file to WIM using DISM in Windows 10
How to Convert ESD file to WIM using DISM in Windows 10Published by Kari "Kalsarikänni" Finn
21 Oct 2017


 Quote
Quote


Tutorial Categories

Related Discussions
