

Information
Servicing an offline image, mounting an image, committing changes, it all sounds a bit complicated to an average Windows user. However, it's just geek speak meaning modifying default Windows install image, the install.wim file. It is a straight forward procedure. When changes have been committed (written, saved) to image, the modified install.wim can be used to deploy Windows or to replace original install.wim on existing install media.
Servicing an offline image is done with DISM (Deployment Image Servicing and Management), a native Windows tool. DISM command options allow all kind of changes, changing the way Windows will be installed. Drivers can be added or removed, language packs applied to create a multilingual Windows install media, Windows Updates applied to get a new Windows installation to be up to date straight after installation, and so on.
A default Windows install media is hardware independent, meaning that it can be used to install Windows on any hardware capable of running Windows. Windows will be installed with default drivers, then after the installation Windows Update searches for correct drivers installing them or the user installs drivers manually using ones provided by manufacturer.
If the install media will be used on specific hardware, you can shorten the time required to install Windows, as well as time required for post install update by adding hardware specific drivers to install media.
This tutorial will show how to use DISM to add or remove drivers on an offline image of Windows.
Step One: Get drivers: Download Step Two: Get drivers: Export Step Three: Mount offline image
Step Four: Add drivers to image
Step Five: Unmount offline image
Step Six: Create updated ISO
Note
Steps One & Two will show both available methods to get drivers to be added to image. Usually you would need to use one of the methods to get correct drivers, download drivers from manufacturer's site or export drivers from an existing Windows 10 installation on exactly the same hardware. However, there's nothing to prevent using both methods; you could for instance export drivers from an existing Windows installation on similar but not exactly the same hardware setup, then remove drivers that are different on hardware where your install media will be used and download those drivers from manufacturer's site.
Exporting drivers from an existing installation on same hardware is my preferred method. Exporting the full set of drivers and adding them to offline image is very practical especially for private users who want to make an install media for their own hardware. A reinstall using such media is as easy as it can be, providing a complete Out-of-Box Windows installation without any need to start installing hardware drivers after the installation.
1.1) Download required drivers from manufacturer's site
1.2) Most often the drivers come as a self-extracting executable (.exe) or archived (.zip) file. You must extract drivers first, an archive file can't be used. To be able to add an individual driver, you will need its .inf file
2.1) Create a new folder for exported drivers, in this example I'll make it as D:\Drivers
2.2) To export all hardware drivers from an existing Windows 10 installation, use following command in elevated PowerShell (tutorial), replacing path D:\Drivers with your actual path:
dism /Online /Export-Driver /Destination:D:\Drivers
Drivers will be exported to your chosen folder:
3.1) Create a new folder to temporarily store the contents of Windows 10 ISO image, name it as you want to. In this example I create the folder on drive D: naming it ISO_Files.
3.2) Mount a Windows 10 ISO image as virtual DVD by double clicking it, alternatively right clicking it and selecting Mount. Open mounted ISO in Explorer, select all files and folders with CTRL + A and copy them with CTRL + C, paste the ISO content to ISO_Files folder with CTRL + V:
If you have Windows 10 install media on a USB flash drive, you can skip steps 3.1 & 3.2 and use it instead.
3.3) Create a folder to mount offline image. In this example I use folder C:\Mount.
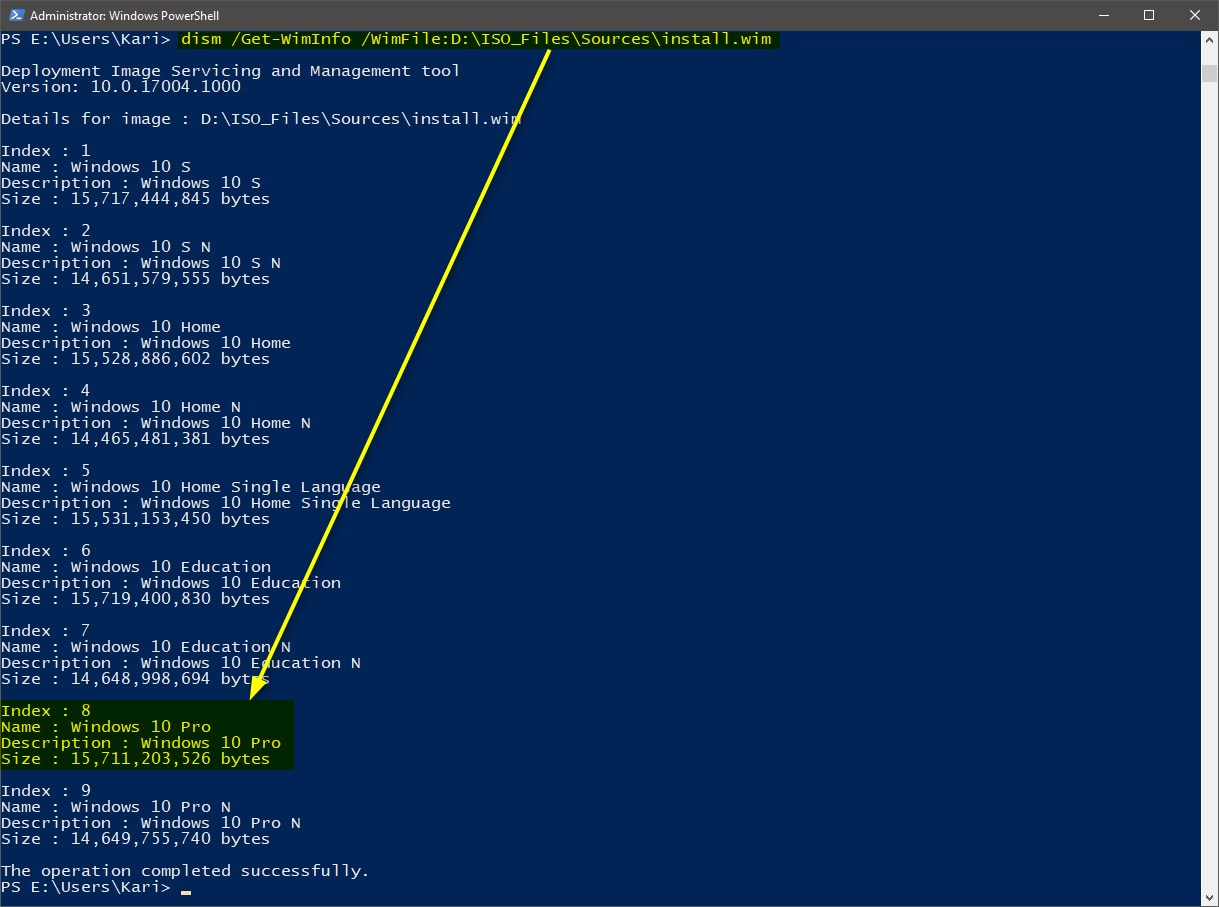
3.4) Open elevated PowerShell (tutorial). Enter following command to check what editions are included in image:
Dism /Get-WimInfo /WimFile:D:\ISO_Files\Sources\install.wim
Note the index number of your selected edition. In this example I have copied all content of Windows 10 Fall Creators Update version 1709 to ISO_Files folder. I want to use PRO edition to add drivers to it, noting its index number 8:
3.5) Mount the image of your preferred Windows 10 edition using it's index number, index 8 in this example:
Dism /Mount-Image /ImageFile:D:\ISO_Files\Sources\install.wim /Index:8 /MountDir:C:\Mount
Notice please: you can also mount and service a virtual hard disk (VHD or VHDX file). When mounting a VHD file, index number is always 1. Set /ImageFile as path to virtual hard disk file, for instance mounting a VHDX file named W10PROx64.vhdx which is stored in folder F:\VHD_Files, you would use the following mount command:
Dism /Mount-Image /ImageFile:F:\VHD_Files\W10PROx64.vhdx /Index:1 /MountDir:C:\Mount
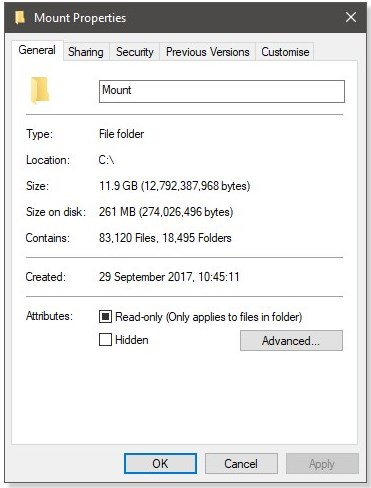
This will take some time. Please notice, the drive where the Mount folder is located needs some free space. I do not recommend mounting a WIM image to a folder on a drive with less than 15 GB free space. For instance, mounting the multi edition build 16299.15 image requires almost 12 GB, in addition to space required to work with the image:
Mounting a VHD / VHDX file requires at least as much free space on drive where Mount folder is located as is the size of the virtual hard disk. If you mount a dynamically expanding 64 GB virtual hard disk to be serviced, you need at least 70 GB free space.
You can always check which drivers are already present in offline image with following command:
Dism /Image:C:\Mount /Get-Drivers4,1) If you downloaded individual drivers, you can add them now to offline mounted image with following command:
dism /Image:C:\Mount /Add-Driver /Driver:X:\Drivers\DriverName.inf
Replace mount folder path C:\Mount in above sample command with actual path to your mount folder, and driver path and name X:\Drivers\DriverName.inf with actual path to downloaded driver
4.2) If the driver is unsigned, use the following command:
dism /Image:C:\Mount /Add-Driver /Driver:X:\Drivers\DriverName.inf /ForceUnsigned
4.3) If you want to remove a driver from offline image, use the following command:
dism /Image:C:\Mount /Remove-Driver /Driver:X:\Drivers\DriverName.inf
4.4) With /Add-Driver and /Remove-Driver you can add or remove multiple drivers:
dism /Image:C:\Mount /Add-Driver /Driver:X:\Drivers\DriverName.inf /Driver:X:\Drivers\Driver2Name.inf
4.5) If you have drivers on one folder and its subfolders, like for instance when exported from an existing installation, you can add all drivers with one simple command, replacing mount folder and drivers folder paths with your actual paths:
dism /Image:C:\Mount /Add-Driver /Driver:D:\Drivers /Recurse
/Recurse switch will tell PowerShell to go through the main folder and its subfolders, adding all drivers it finds:
(Click to enlarge.)
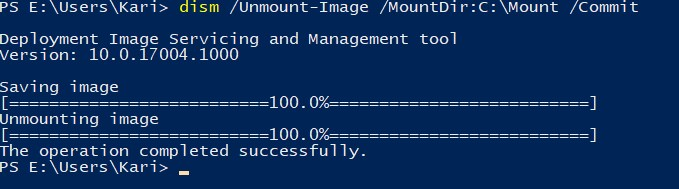
5.1) All done, you can save changes and unmount offline image with following command:
dism /Unmount-Image /MountDir:C:\Mount /Commit
The /Commit switch is the important one, it commits (saves) all changes to the image.
6.1) If you were using install.wim from a USB flash drive, you are ready. It now contains an updated Windows install image
6.2) If you were using ISO_Files folder on HDD, it now contains all files needed to create an updated ISO image. See Part Five in following tutorial for instructions in creating the ISO: Create Windows 10 ISO image from Existing Installation Installation Upgrade Tutorials
That's it! If you have any issues with this, do not hesitate to post in this thread.
Kari
Related Tutorials
- How to Backup and Restore Device Drivers in Windows 10
- How to use DISM to Edit Registry in Offline Windows 10 WIM (Image) File
DISM - Add or Remove Drivers on an Offline Image
-
New #1
Question, does PersistAllDeviceInstalls need to be in Sysprep?
Also should there be a second reminder that adding drivers to a DISM image is hardware dependent
-
New #2
Yes, in answer file.
That is so obvious, who on earth would think that adding for instance NVidia GPU drivers to media used to install on system with AMD GPU would work?
Anyway, that is mentioned at the beginning of the tutorial:
InformationA default Windows install media is hardware independent, meaning that it can be used to install Windows on any hardware capable of running Windows. Windows will be installed with default drivers, then after the installation Windows Update searches for correct drivers installing them or the user installs drivers manually using ones provided by manufacturer.
If the install media will be used on specific hardware, you can shorten the time required to install Windows, as well as time required for post install update by adding hardware specific drivers to install media.
Kari
-
New #3
Thanks. Sorry about the second part with the reminder suggestion.
-
New #4
Ah I thought you might be doing the DISM/drivers one.
It is good info and I use parts of this frequently when I'm reinstalling on my old hardware and need to manually add drivers.
I would suggest DISM /Get-Drivers as an alternate to the Powershell step in 2.2 - the table format is quite useful I find.
One method of applying the drivers I tried which seems to work (not sure how valid it is) when clean-installing a machine as a one-off:
- Export drivers as per Step 2
- Use DISM /Get-Drivers to show which driver is which, and copy only the ones I know are problematic to a subfolder, and add this subfolder to a bootable Windows 10 Setup USB
- Boot Windows 10 Setup from the USB
- Open a command prompt with Shift F10, type command 'wpeutil shutdown' but don't press enter. Instead, Alt-Tab back to Setup
- Follow the normal clean install process, delete partitions and let it install the relevant edition
- When it says Restarting in a few seconds, quickly Alt-Tab to the command prompt and press enter, to stop it restarting but shut down instead
- Boot again from the USB, go straight into Shift-F10, and use DISM /add-driver to add relevant drivers to the offline Windows drive as per Step 4
- wpeutil shutdown again, and let it restart this time, so that Windows boots and finishes configuring itself with the new drivers available to it.
I found it easier than Mounting the image and also means I don't change the .WIM so I can use that on other hardware without fear of non-standard (and probably quite old) drivers getting in the way .
Although in some cases I could install and change it once Windows is up and running , one of 1709's default drivers causes a BSOD during installation itself, if I don't add the alternative manually using the above technique before it gets to that point.
But it's not a technique I've seen anywhere else so I'm probably bending the rules somewhere.
-
New #5
Well my gast is flabbered. I have had a long standing issue clean installing windows 10 since 1803 came out, including all Insider versions as they do not boot - just endless spinning circles.
I know the reason - I have a second SSD installed in a DVD caddy, and it is only recognised if the Sata Controller is set to the AMD Sata Controller rather than the standard Windows SATA Controller.
I tried using the dism method to install the OS and still, it fails to boot upon restart.
I have always had to physically remove the DVD caddy to install via a usb installer, install it, change the SATA Controller driver, then put DVD caddy back. Whilst not difficult, it is a PITA on my laptop as I have to remove my back cover to be able to remove the DVD caddy.
So I thought - what if I inject my existing drivers into the install.wim using this tutorial.
I followed tutorial, and then hit issue that install.wim was now over 4GB - easy enough to solve creating USB drive with a fat32 and NTFS partition.
However, it still would not boot - the injected drivers only get recognised once windows functions of course.
So I then used the dism method to install the install.wim (with drivers added), and BINGO - upon boot, it recognised all my hardware and went through oobe.
So:
1) export drivers
2) inject drivers into install.wim as per this tutorial
3) use dism to clean install custom install.wim
4) Reboot and go though OOBE
Actually, there was one minor issue - my wifi network card driver does not get installed as windows do not find a signed certificate so I have to go to advanced restart, set it so unsigned drivers can be installed, then update the driver. I did use the forced unsigned driver switch during step 2 but it did not seem to help. No big deal now - just a minor irritation.
-
-
-
New #8
Well, I have gone one stage further.
I identified I need the amd sata controller driver, the lenovo acpi power driver and the usb2 sd card reader driver. The amd sata controller is critical as I cannot boot my pc as I said above without that driver present. The other two are less critical but I have to set them up every time.
I wanted to have a bootable usb drive to do a clean install, but yesterday, I tried to inject those drivers into boot.wim as well as install.wim but it did not work.
After googling, I discovered boot.wim has two images in it and you need to select index 2.
So basically, I mounted boot.wim as per this tutorial selecting index 2, injecting drivers, then followed this tutorial injecting the same drivers into install.wim using index 6 (Pro SKU).
I then copied the boot.win and the install.wim file to sources folder on the usb installation drive, and BINGO - it booted fine, and I could install 1803 from a flash drive.
Not only that the two drivers I had to manually install were automatically resolved!
So @Kari, this could be a useful extension to your tutorial, or If you like I will write a companion tutorial (referring to this one of course)?
As an aside, I initially injected all drivers into the image and it was very very slow and it bombed out during installation saying it could not find the terms and conditions. After googling this, it seems the issue is you run out of allocated memory for boot.wim and the installer falls over. It does not matter how much real RAM you have.
So instead of injecting 38 drivers, I only injected the three above, then it worked.
I also had to add ei.cfg to sources folder with two lines
[Channel]
OEM
so I could select Pro, or else it defaults to Home as I have an 8.1 core bios embedded key.
-
-
New #9
In the initial information for this tutorial it was noted that this process adds hardware specific drivers to the install media. So does that imply that Windows will not automatically detect what drivers to imply if I use this image in an unattended install and only use these drivers?
In other words, here is what I was hoping to do:
1) Prep an image for unattended install.
2) Use this tutorial to export all the drivers from my laptop and add these to my image.
3) Repeat step 2 adding the drivers from my desktop computer TO THE SAME IMAGE.
The hope was that I could use this same image on either the laptop or desktop system and that Windows would detect the correct drivers to apply to the system during the unattended install.
Am I wrong in hoping that this might work?

DISM - Add or Remove Drivers on an Offline Image
How to add or remove hardware device drives on an Offline Image with DISMPublished by Kari "Kalsarikänni" Finn
27 Feb 2022


 Quote
Quote
Related Discussions
