

How to See Applied Group Policies in Windows 10
The Local Group Policy Editor (gpedit.msc) is a Microsoft Management Console (MMC) snap-in that provides a single user interface through which all the the Computer Configuration and User Configuration settings of Local Group Policy objects can be managed.
The Local Group Policy Editor is only available in the Windows 10 Pro, Enterprise, and Education editions.
This tutorial will show you how to see which Group Policy settings have been configured (enabled and disabled) from the Local Group Policy Editor on your Windows 10 PC.
You must be signed in as an administrator to see all applied group policies.
Contents
- Option One: To See Applied Group Policies in Local Group Policy Editor (gpedit.msc)
- Option Two: To See Applied Group Policies in Resultant Set of Policy (rsop.msc)
- Option Three: To See Applied Group Policies using Filter Options in Local Group Policy Editor (gpedit.msc)
1 Press the Win + R keys to open Run, type gpedit.msc into Run, and click/tap on OK to open Local Group Policy Editor.
A) Navigate to Computer Configuration\Administrative Templates\All Settings in the left pane of Local Group Policy Editor. (see screenshot below)
B) In the right pane of All Settings, click/tap on the State column title bar to have its arrow pointing upward to sort policy settings by state in ascending order.
C) You will now see any Enabled and Disabled policy settings sorted in ascending order above any Not configured.
A) Navigate to User Configuration\Administrative Templates\All Settings in the left pane of Local Group Policy Editor. (see screenshot below)
B) In the right pane of All Settings, click/tap on the State column title bar to have its arrow pointing upward to sort by State in ascending order.
C) You will now see any Enabled and Disabled policy settings sorted in ascending order above any Not configured.
1 Press the Win + R keys to open Run, type rsop.msc into Run, and click/tap on OK to open Resultant Set of Policy.
2 You will now see Resultant Set of Policy is being processed for a moment. (see screenshot below)
3 Only any Enabled and Disabled policy settings will be listed under Computer Configuration and User Configuration in Resultant Set of Policy. (see screenshot below)
1 Press the Win + R keys to open Run, type gpedit.msc into Run, and click/tap on OK to open Local Group Policy Editor.
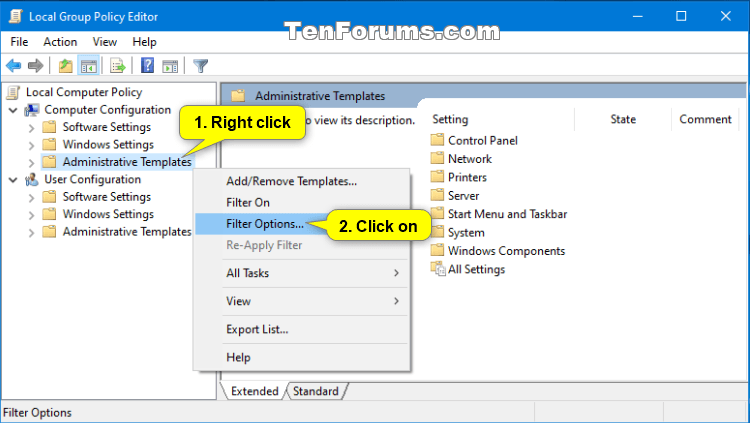
2 Right click or press and hold on Administrative Templates under Computer Configuration or User Configuration in the left pane of the Local Group Policy Editor, and click/tap on Filter Options. (see screenshot below)
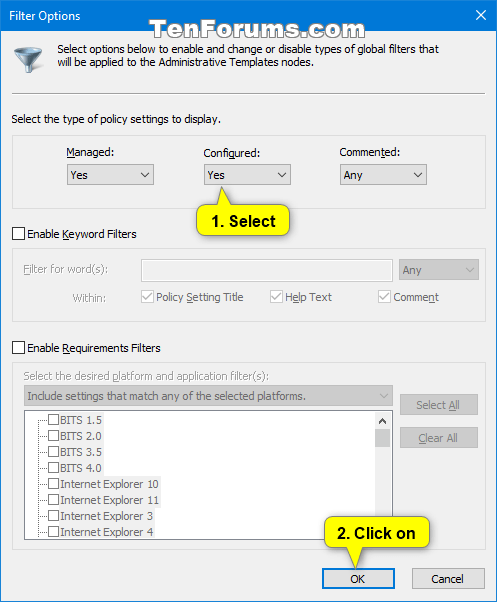
3 Under the top Select the type of policy settings to display section of Filter Options, select Yes in the Configured drop menu, and click/tap on OK. (see screenshot below)
4 Only any Enabled and Disabled policy settings will now be listed under Computer Configuration and User Configuration in the Local Group Policy Editor while the filter set in step 3 is turned on. (see screenshot below)
5 To toggle on and off the filter, right click or press and hold on Administrative Templates under Computer Configuration or User Configuration in the left pane of the Local Group Policy Editor, and click/tap on Filter On to check (on) or uncheck (off) it. (see screenshot below)
If you close the Local Group Policy Editor, the filter will automatically be turned off.
That's it,
Shawn
Related Tutorials
- How to Open the Local Group Policy Editor in Windows 10
- How to Manually Update Group Policy Settings in Windows 10
- How to Backup and Restore Local Group Policy Objects in Windows 10
- How to Apply Local Group Policies to Specific User in Windows 10
- How to Apply Local Group Policy to Non-Administrators in Windows 10
- How to Apply Local Group Policy to Administrators in Windows 10
- How to Reset All Local Group Policy Editor Settings to Default in Windows 10
- How to View Configured Update Policies in Windows 10
- How to Add Local Group Policy Editor to Control Panel in Windows
See Applied Group Policies in Windows 10
-
New #1
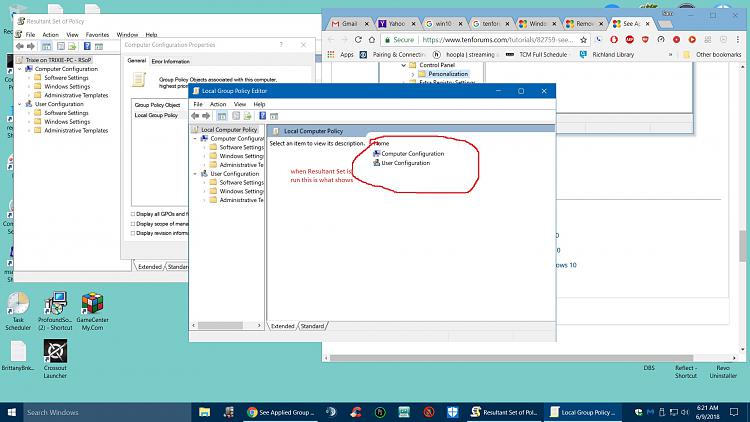
After an In-Place upgrade/refresh am getting all sorts of 'managed by' indicators....when I run RSoP.msc this is what shows (rather than individual listings):
realize this is an older thread but it is still relevant.....fyi am still running 1709 have yet to go with the 1803 version...one reason for the holding off is I prefer Classic Shell an it has been discontinued for builds after 1709.....anyway...
my biggest issue at the moment is my Start has the 'managed by' deal and am unable to set anything there nor does any of my 'startup' selections 'take'...i.e. have to manually start them...
an yes this is a privately owned standalone desktop...don't use Network of any sort nor Remote anything but we won't go into the all the DCOM errors which has been a headache since day one.....
-
New #2
Hello Sam,
Your screenshot of the Local Group Policy Editor is normal when you have "Local Computer Policy" selected in the left pane.
You'll need to do the rest of the steps in Option One to see if you have any policies configured.
-
New #3
 For some reason I just couldn't get the RSoP to work...meaning getting it to show me what was enabled or disabled....so....I just went in manually and went through each an every setting...whew. Found a few 'culprits' that were either Enabled or Disabled and more or less set everything back to Not Configured...this removed those 'managed by' deals.
All is good in pc-ville again....thanks Brink.....
-
-
New #5
Hello Brink. This "Some settings are managed by your organization" is driving me mad and happens on both my laptops every time there is a WU. But I have a Windows 10 Home edition and so shouldn't be able to access theLocal Group Policy Editor.
I know I shouldn't double-post but I first posted this in the Microsoft Community and the first expert there said the message "is a leftover from Windows Insider Build, intended for testing purposes only". (I'm not an Insider by the way.) Others have different opinions including that the problem has been raised in dozens of threads but an answer has never been found! What would you suggest please?
https://answers.microsoft.com/en-us/...1-ad836decfb41
-
New #6
Hello Taffy,
This has been a known issue in Windows Update, and is usually nothing to worry about.
Does the View configured update policies link in Windows Update report any configured policies?
 View Configured Update Policies in Windows 10 | Windows 10 Tutorials
-
New #7
thanls for this Brink. My problem now is that the red warning message doesn't appear after a WU has been successfully installed so I can't replicate this. I checked for an up date just now and it says I'm up-to-date (even though my KB4052623 Defender Antivirus antimalware platform update failed - 0x8024000b, which I'm looking into). Does this mean I'll have to put on ice until the next WU checking for any configured policies?
-
New #8
That's ok. It sounds like you had the bug as well. If the red message shows up again, then yeah we can take a look at the View configured update policies to see if it may show anything.
-
-
New #9
I've just updated my spare laptop, Brink, and got this blasted "Some settings are managed by your organization" message on that one. I clicked 'View configured update policies' and there are two entries: 'Set Active Hours Start' and 'Set Active Hours End'. My hours on both laptops are 10:00 to 18:00. So do I have the bug please?

See Applied Group Policies in Windows 10
How to See Applied Group Policies in Windows 10Published by Shawn BrinkCategory: General Tips
16 Apr 2020


 Quote
Quote
Tutorial Categories

Related Discussions
