
New
#690
Use DISM to Repair Windows 10 Image
-
-
New #691
Using a WIM file as a DISM repair source can be tricky. For it to work, the WIM file can only have "max" compression at most. You could instead apply the install.wim to your USB stick (which would take quite a while, even if you have a fast USB 3.0 device). This would create a full Windows folder there and you could then point to the Windows folder as the repair source. Below, /ImageFile path is wherever your updated install.wim is and ApplyDir:E:\ is wherever your USB stick is.
Personally, I never use the /LimitAccess switch on DISM, as this prevents it from checking Windows Update for files. If it can find what it needs online, then why not? The DISM help says, "Use /LimitAccess to prevent DISM from contacting WU/WSUS." I also will first try without any /Source, to see if it works.Code:DISM /Apply-Image /ImageFile:F:\sources\install.wim /Index:1 /ApplyDir:E:\ /CheckIntegrity /Verify
Assuming your USB with the expanded Windows folder is on drive E:, this command should then work:
Another method, is to do repairs while the problem Windows is offline. Boot from a Windows 10 install USB, even if you want to fix Windows 8. At the first screen, SHIFT-F10 will give you a Command Prompt. Once you figure out what drive letter now has the problem Windows on it, point to that with the DISM command. Replace your booted Win10 USB with the one with Windows 8 Source files then use this syntax:Code:DISM /Online /Cleanup-Image /RestoreHealth /Source:E:\Windows
Again, use the paths that are right. Drive letters sometimes change from what you expect (mostly on Legacy BIOS) in this mode.Code:DISM /Image:C:\ /CleanupImage /RestoreHealth /Source:E:\Windows
-
New #692
-
-
New #694
I kept trying to do theflag for dism, and I either got the 0x800f081f error code, or an error code: 87 when dism straight up refused to work like I wanted it toCode:/restorehealth /source:WIM:(insert install.wim dir here)
this kept making me mad, so I gave in, and did a repair install with my updated windows8.1 iso, and of course, it fixed it; /scanhealth found no errors, sfc /verifyonly found no problems, and chkdsk /scan found no disk errors
weird enough, even though I made sure to integrate all applicable windows 8.1 updates into the windows8.1 iso file via ntlite, windows update wanted me to install some it thought I didnt have, so I just hid them
sorry I didnt get the other portion of the error results you wanted, but at least its all fixed now
-
New #695
PowerShell Repair: Restore failed
Good morning!
Trying to fix a Windows 10 Enterprise LTSC 2019 v. 1809 with Powershell and ISO streamlined with updates accordingly to the installed release (17763.805) and mounted:

following the instructions at page 1, here are the sequence of the Repair :
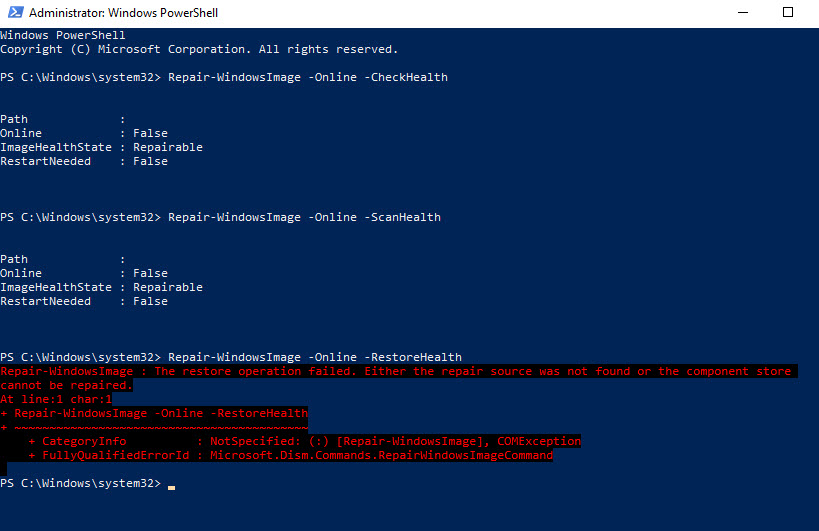
then adding the Limit Access:
 anonymous image hosting
Unfortunately I am stuck in this situation. I am sure the ISO is with install.wim and the Index 1 is correct:


Any idea, please? Thank you.Last edited by butterfly; 03 Nov 2019 at 06:41.
-
New #696
Hello @butterfly,
In this case, it may be easier and faster to do a repair install instead to fix it without losing anything.
Repair Install Windows 10 with an In-place Upgrade
-
New #697
Thank you Brink but... why we can't still understand the reason of a 'repair source' error not found? There could be any syntax error? After all the previous commands said the is 'repairable'.
-
-
-
New #699
So the internal self-diagnostics is not reliable: 'ImageHealthState: Repairable' and then actually the 'component store cannot be repaired'. Are there other commands that could be used to address component store issues, please?

 Quote
Quote
Tutorial Categories

Related Discussions
