

How to Rotate an Image in Windows 10
Windows 10 has a built-in feature to allow you to quickly rotate an image if needed.
You can rotate left to turn the selected image 90 degrees to the left.
You can rotate right to turn the selected image 90 degrees to the right.
This tutorial will show you different ways on how to rotate images in Windows 10.
- Option One: To Rotate Image(s) in File Explorer
- Option Two: To Rotate Image in Photos app
- Option Three: To Rotate Image in Windows Photo Viewer
EXAMPLE: "Rotate left" and "Rotate right" an image
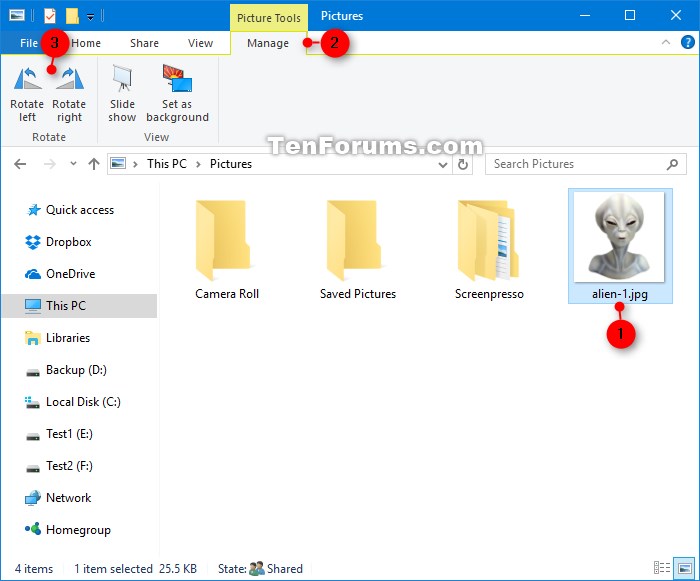
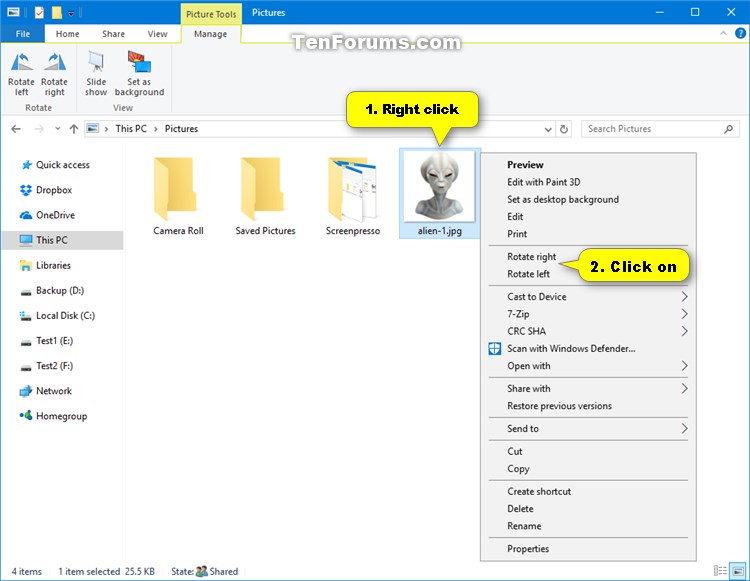
1. While in File Explorer, select one or more image files you want to rotate, and do step 2 (ribbon), step 3 (context menu), or step 4 (keyboard) below for how you want to rotate the image(s).
Rotation changes you make are automatically applied and saved to the image file.
A) Click/tap on the "Picture Tools" Manage tab, click/tap on the Rotate left or Rotate right buttons in the ribbon until the image(s) are rotated how you want, and go to step 5 below. (see screenshot below)
A) Right click or press and hold on the selected image(s), and click/tap on Rotate right or Rotate left until the image(s) are rotated how you want, and go to step 5 below. (see screenshot below)
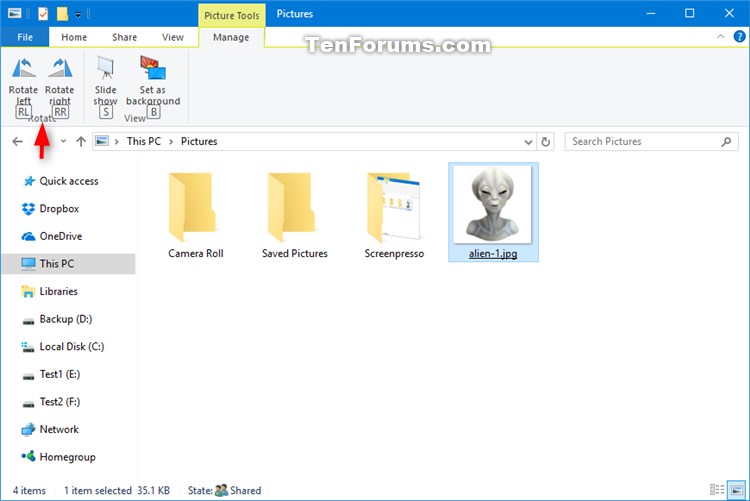
A) Press the Alt key to see the available keyboard shortcuts, and then press the J+P keys to open the "Picture Tools" Manage tab. (see screenshot below)
B) Press the R+L (rotate left) or R+R (rotate right) keys until the image(s) are rotated how you want, and go to step 5 below. (see screenshot below)
5. When finished rotating the image(s), you can close File Explorer if you like.
1. While you have an image opened in the Photos app, do step 2 (rotate button) or step 3 (keyboard) below for how you want to rotate the image.
A) Click/tap on the Rotate button in the Photos app toolbar to rotate the image 90 degrees to the right until the image is rotated how you want, and go to step 4 below. (see screenshot below)
A) Press the Ctrl + R keys in the Photos app to rotate the image 90 degrees to the right until the image is rotated how you want, and go to step 4 below.
4. The rotation changes you made to the image are automatically applied to image file by default. When finished, you can close the Photos app.
1. While you have an image opened in Windows Photo Viewer, do step 2 (rotate buttons), step 3 (context menu), or step 4 (keyboard) below for how you want to rotate the image.
A) Click/tap on the Rotate counterclockwise (left) or Rotate clockwise (right) buttons in Windows Photo Viewer until the image is rotated how you want, and go to step 5 below. (see screenshot below)
A) Right click or press and hold on the image in Windows Photo Viewer, and click/tap on Rotate right or Rotate left until the image is rotated how you want, and go to step 5 below. (see screenshot below)
A) Press the Ctrl + , (Rotate counterclockwise) or Ctrl + . (Rotate clockwise) keys until the image is rotated how you want, and go to step 5 below.
5. When finished rotating the image, close Windows Photo Viewer to apply your changes to the image file.
That's it,
Shawn
Rotate Image in Windows 10
-
New #1
Hi
In Windows XP, I get a warning message when rotating an image (using the OS context menu) that says I may lose image quality. There is no such message in Win 10. Does that mean that the 'problem' of quality loss was fixed in OS versions after XP (or have I (e.g.) just clicked a 'don't show me this message again' type warning in Win 10)? Thanks
Win 10 Home, 21H2 Build 19044.2006
-

Rotate Image in Windows 10
How to Rotate an Image in Windows 10Published by Shawn BrinkCategory: General Tips
30 Sep 2019


 Quote
Quote
Tutorial Categories

Related Discussions
