

How to Change Settings for Windows Backup in Windows 10
The Backup and Restore (Windows 7) feature (aka: Windows Backup) was originally included in Windows 7. It was deprecated in Windows 8 and removed in in Windows 8.1, but has been included in Windows 10.
While you can use Backup and Restore (Windows 7) to restore any Windows 7 backups on your Windows 10 PC, you can also use it to back up and restore files on your Windows 10 PC.
Windows Backup will backup all files in the libraries, folders, and drives you choose or let Windows choose. You will have a choice to include a system image in the backup. You can also choose to have these items be backed up on a regular schedule.
After you have set up Windows Backup, you can make changes to these settings as needed.
This tutorial will show you how to change settings for Windows Backup on your Windows 10 PC.
You must be signed in as an administrator to be able to change settings for Windows Backup.
Here's How:
1 Open Settings, click/tap on the Update & security icon, click/tap on Backup on the left side, and click/tap on the Go to Backup and Restore (Windows 7) link under Looking for and older backup on the right side. (see screenshot below)
You can also open Backup and Restore (Windows 7) by opening the Control Panel (icons view), and click/tap on the Backup and Restore (Windows 7) icon.
2 Click/tap on the Change settings link. (see screenshot below)
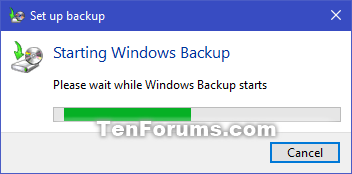
3 Windows Backup will now start. (see screenshot below)
4 Do step 5 (local drive) or step 6 (network location) below for where you want to save your backup.
A) Select a drive (ex:"Test1 (E:)" ), click/tap on Next, and go to step 7 below. (see screenshot below)
A) Click/tap on the Save on a network button. (see screenshot below)
B) Click/tap on Browse, browse to and select the network location (ex: "\\BRINK-ROUTER\MyBook"), and click/tap on OK. (see screenshot below)
If you like, you could manually enter the network location path instead of browsing to and selecting it.
C) Enter your username and password credentials for this network location, and click/tap on OK. (see screenshot below)
D) Select this network location (ex: "\\BRINK-ROUTER\MyBook"), click/tap on Next, and go to step 7 below. (see screenshot below)
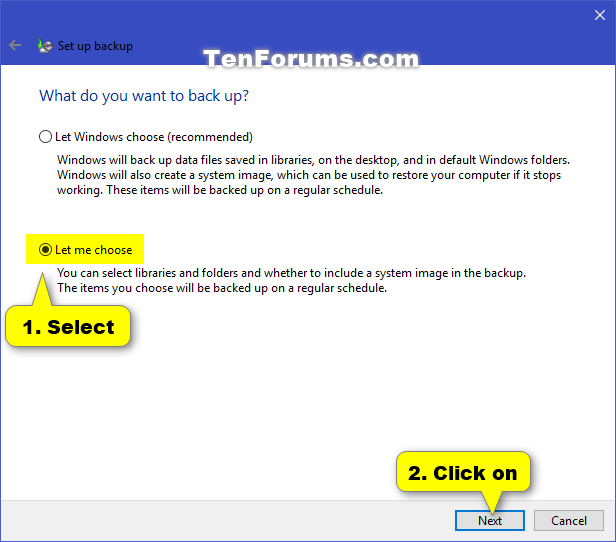
7 Select (dot) Let me choose, and click/tap on Next. (see screenshot below)
If you do not want to choose what to back up, then you could select (dot) Let Windows choose and go to step 9 below instead.
8 Select the check boxes of the items you want to include in the backup, select if you want to include a system image or not, and click/tap on Next. (see screenshot below)
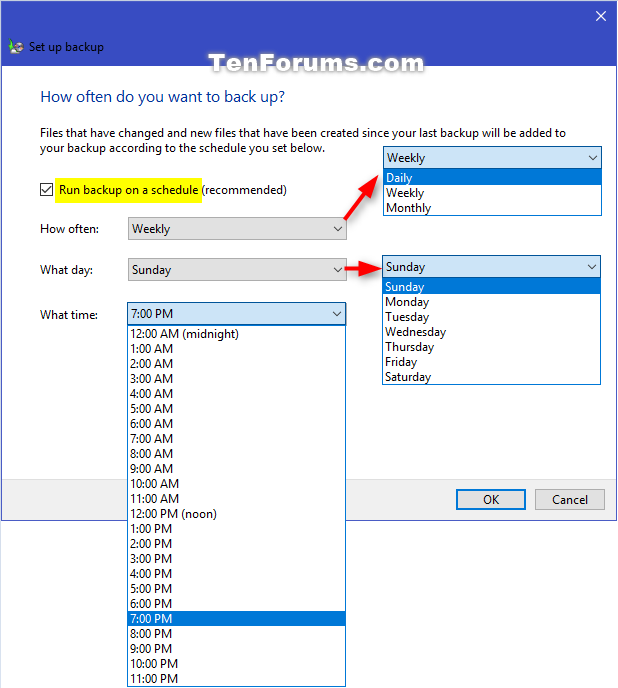
9 Click/tap on the Change schedule link. (see screenshot below)
10 Do step 11 (on) or step 12 (off) below for if you want to automatically run this backup on a schedule or not.
You will always be able to turn on or off the schedule as needed.
A) Check the Run backup on a schedule box. (see screenshot below)
B) Select How often, What day, and What time you want for the backup schedule.
C) Click/tap on OK, and go to step 13 below.
A) Uncheck the Run backup on a schedule box, click/tap on OK, and go to step 13 below. (see screenshot below)
13 Click/tap on the Save settings and exit button. (see screenshot below)
14 It is recommended to click/tap on the Back up now button to create a new backup with your changes. (see screenshot below)
15 When finished, you can now close Backup and Restore (Windows 7) if you like.
That's it,
Shawn
Related Tutorials
- How to Enable or Disable User Files Backup in Windows Backup in Windows 10
- How to Set Up Windows Backup in Windows 10
- How to Create a Windows Backup in Windows 10
- How to Add or Remove a Windows Backup and Restore context menu in Windows 10
- How to Turn On or Off Windows Backup Schedule in Windows 10
- How to Manage Windows Backup Disk Space in Windows 10
- How to Restore Files from Windows Backup in Windows 10
- How to Reset Windows Backup to Default in Windows 10
Change Windows Backup Settings in Window 10
-
New #1
Just upgraded Win 7 Pro to Win 10 Pro. "Backup and Restore(Windows 7) says "The disk that your backup is saved on is about to fail." I do not believe this is accurate, as the selected drive is on an NAS that is working perfectly.
I read that this can be caused by old backups from Win 7 in that location, so I tried to change the location but nothing in that window works. I click on "Change Location", "Back up now", "Manage space", or "Change settings" and the cursor briefly changes to an hour glass but nothing else happens.
-
New #2
Hello Ronzie, :)
To be safe, I would recommend to go the NAS manufacturer's site to see if they have a utility that you can use to test the health of the NAS's drives.
As a test, disconnect the NAS to see if you are able to change the backup drive afterwards.
-
New #3
I ran the quick test on the NAS utilities page of its web interface, and it found no problems. I deleted the old backups, they were system images, but that didn't help. I disconnected the pc from the network temporarily and that didn't work either.
I don't understand why Windows 10 won't let me change any of the backup settings. It doesn't even give an error when I try, it just doesn't work. Maybe there is a service that got disabled during the upgrade? I first tried upgrading this pc months ago, and went back to Windows 7 Pro for some reason that I can't recall, and now I'm wondering if I should go back again!
-
New #4
You can check to see if the Windows Backup service is still set to "Manual" (default), or "Automatic".
If you like, you could try the context menu below to test if it may work for your Windows Backup using commands instead of the UI.
Add Windows Backup and Restore context menu in Windows 10 Windows 10 Backup Restore Tutorials
-
New #5
-
New #6
That's great news.
If you like, you could look under Windows Logs > Application in the Event Viewer for events from Windows Backup and Restore. A failed backup will generally appear as an "Error" entry from "Windows Backup" source, and an event ID of 4106.
Hopefully, this may help reveal what caused it to fail last time.
-
New #7
What if I have both backup programs available and don't want to use the windows 7 version? I like the accessibility of the files in the new program. But it won't run on a schedule for some reason. I have to manually back it up from the Admin account.
-
-
-
New #9
Hi Sean. I'm using file history. I have the old Windows 7 backup one turned on but the schedule is turned off since I couldn't figure out to deactivate it. The File history only seems to work when logged on to Admin though I've included user files in the File History backup.

Change Windows Backup Settings in Window 10
How to Change Settings for Windows Backup in Windows 10Published by Shawn BrinkCategory: Backup & Restore
24 Feb 2020


 Quote
Quote
Tutorial Categories

Related Discussions
