

How to Add Cleanup to Context Menu of Drives in Windows 10
You can use Disk Cleanup to reduce the number of unnecessary files on your drives, which can help your PC run faster. It can delete temporary files and system files, empty the Recycle Bin, and remove a variety of other items that you might no longer need.
Starting with Windows 10 build 19018, Microsoft is removing the Downloads folder option from Disk Cleanup.
You can add Cleanup to the context menu of drives that will open Disk Cleanup to reduce the number of unnecessary files on the selected disk to free up disk space.
This tutorial will show you how to add Cleanup to the context menu of drives for all users in Windows 10.
While you must be signed in as an administrator to add or remove the context menu, all users will be able to use the context menu.
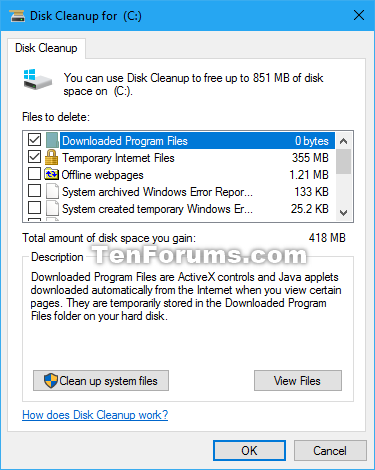
When you right click or press and hold on a drive (ex: "C") in This PC and click/tap on Cleanup, it will open Disk Cleanup for that specific drive.
EXAMPLE: "Cleanup" context menu
Here's How:
1 Do step 2 (add) or step 3 (remove) below for what you would like to do.
A) Click/tap on the Download button below to download the file below, and go to step 4 below.
Add_Cleanup_to_context_menu.reg
Download
This is the default setting.
A) Click/tap on the Download button below to download the file below, and go to step 4 below.
Remove_Cleanup_from_context_menu.reg
Download
4 Save the .reg file to your desktop.
5 Double click/tap on the downloaded .reg file to merge it.
6 When prompted, click/tap on Run, Yes (UAC), Yes, and OK to approve the merge.
7 You can now delete the downloaded .reg file if you like.
That's it,
Shawn Brink
Cleanup - Add to Context Menu in Windows 10
Cleanup - Add to Context Menu in Windows 10
How to Add Cleanup to Context Menu of Drives in Windows 10Published by Shawn BrinkCategory: Performance & Maintenance
26 Sep 2022


 Quote
QuoteTutorial Categories

Related Discussions
