

How to Restore Default Windows Defender Firewall Settings in Windows 10
Starting with Windows 10 build 16193, Windows Firewall has been renamed to Windows Defender Firewall.
Windows Firewall can help prevent hackers or malicious software from gaining access to your PC through the Internet or a network.
Over time of allowing apps through the firewall and setting rules, you may need or want to completely reset Windows Firewall to default. Restore defaults would include turning on Windows Firewall for all network profiles, reset notification settings to default, remove all added apps and features that you allowed and denied, and reset Windows Firewall with Advanced Security settings to default.
See also: Automatically diagnose and fix problems with Windows Firewall | Windows Support
This tutorial will show you how to completely reset and restore Windows Firewall settings to default in Windows 10.
You must be signed in as an administrator to restore default Windows Firewall settings.
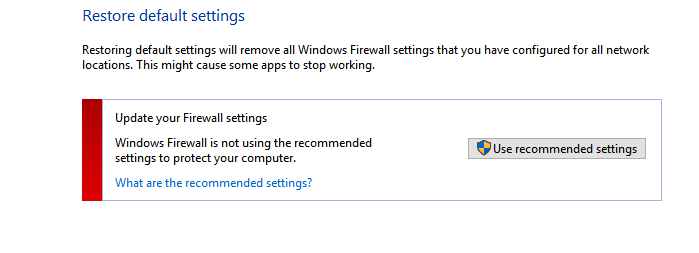
Restoring default settings will remove all Windows Firewall settings that you have configured for all network locations since Windows was installed. This might cause some apps to stop working until allowed through the firewall again.
This will not affect any configured group policies for Windows Firewall.
Contents
- Option One: To Restore Default Windows Defender Firewall Settings in Control Panel
- Option Two: To Restore Default Windows Defender Firewall Settings in Command Prompt
- Option Three: To Restore Default Windows Defender Firewall Settings in Windows Security
- Option Four: To Restore Default Windows Defender Firewall Settings in PowerShell
EXAMPLE: Windows Defender Firewall settings
1 Open the Control Panel (icons view), and click/tap on the Windows Firewall icon.
2 Click/tap on the Restore defaults link on the left side. (see screenshot below)
3 Click/tap on the Restore defaults button. (see screenshot below)
4 Click/tap on the Yes to confirm. (see screenshot below)
5 When finished, you can close the Windows Firewall control panel window if you like.
To see more usage options for the Netsh AdvFirewall Firewall command, see: Netsh AdvFirewall Firewall Commands - Microsoft Docs
1 Open an elevated command prompt.
2 Copy and paste thenetsh advfirewall resetcommand into the elevated command prompt, and press Enter. (see screenshots below)
3 When finished, you can close the elevated command prompt if you like.
1 Open Windows Security, and click/tap on the Firewall & network protection icon
2 Click/tap on the Restore firewalls to default link. (see screenshot below)
3 Click/tap on the Restore defaults button. (see screenshot below)
4 Click/tap on the Yes to confirm. (see screenshot below)
5 When finished, you can close Windows Security and Windows Firewall control panel window if you like.
1 Open an elevated PowerShell.
2 Copy and paste the command below into the elevated PowerShell, and press Enter. (see screenshots below)
(New-Object -ComObject HNetCfg.FwPolicy2).RestoreLocalFirewallDefaults()
3 When finished, you can close the elevated PowerShell if you like.
That's it,
Shawn
Related Tutorials
- How to Turn On or Off Windows Defender Firewall in Windows 10
- How to Backup and Restore Windows Defender Firewall Settings in Windows 10
- How to Add or Remove Allowed Apps through Windows Defender Firewall in Windows 10
- How to Turn On or Off Windows Defender Firewall Notifications in Windows 10
- How to Add or Remove Windows Defender Firewall context menu in Windows 10
Restore Default Windows Defender Firewall Settings in Windows 10
-
New #1
Tried all three restore options. (New-Object -ComObject HNetCfg.FwPolicy2).RestoreLocalFirewallDefaults() did not work in elevated PowerShell.
I've set all Group Policies to not-configured. After rebooting I still get message that Group Policy is preventing restoration:

I'd greatly appreciate any help on this, or on how to remove firewall altogether.
Steve
-
New #2
Hello Steve, :)
Double check to see if you may have any group policies enabled that could be preventing your from resetting Windows Firewall.
Group Policy Editor - Quickly View Enabled Policies in Windows - Windows 7 Help Forums
-
New #3
Thanks, Brink, but I've already twice set all policies to not-configured and rebooted.
-
New #4
Do you have any 3rd party Firewall or AV software installed that could have disabled Windows Firewall?
-
New #5
I'd disabled AV. No other firewall. Cannot disable Windows firewall.
-
New #6
Stopping and disabling the Windows Firewall service would be another effective way to disable it.
Services - Start, Stop, and Disable in Windows 10
-
New #7
Stopped firewall service, restarted, and firewall returned unchanged.
-
-
-
New #9
Thanks, Brink. Firewall's disabled. I get this, but none of the links work:

Restore Default Windows Defender Firewall Settings in Windows 10
How to Restore Default Windows Defender Firewall Settings in Windows 10Published by Shawn BrinkCategory: Security System
11 May 2020


 Quote
QuoteTutorial Categories

Related Discussions
