How to Change Display Scaling Zoom Level of Hyper-V Virtual Machine in Windows 10
The Windows 10 Pro, Enterprise, and Education editions include the Hyper-V virtualization technology. Hyper-V enables running virtualized computer systems on top of a physical host. These virtualized systems can be used and managed just as if they were physical computer systems, however they exist in virtualized and isolated environment. Special software called a hypervisor manages access between the virtual systems and the physical hardware resources. Virtualization enables quick deployment of computer systems, a way to quickly restore systems to a previously known good state, and the ability to migrate systems between physical hosts.
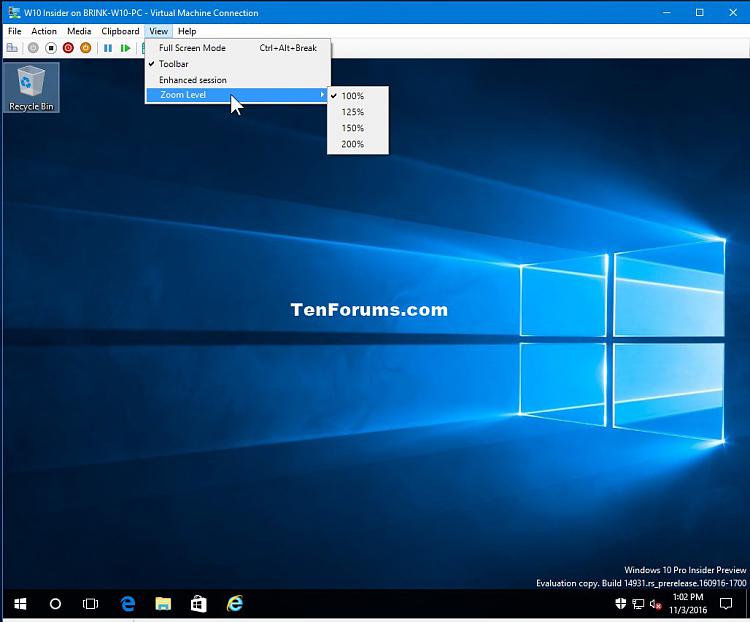
Starting with Windows 10 build 14959, Microsoft added a new Zoom Level option in the View menu, where you can override the default scaling and set it to 100, 125, 150 or 200 – whichever matches your preference.
This tutorial will show you how to change the Zoom Level of a Hyper-V virtual machine to override its default display scaling (DPI) in Windows 10.
Here's How:
1 While you have a Hyper-V virtual machine running, click/tap on View in the menu bar, click/tap on Zoom Level, and select 100%, 125%, 150%, or 200% for the display scaling you want for the virtual machine.
That's it,
Shawn
Related Tutorials
- How to Setup and Use Hyper-V in Windows 10 for OS Virtualization
- How to Change your DPI Scaling Level for Displays in Windows 10
- How to Add Hyper-V Manager to Control Panel in Windows 10
Change Display Scaling Zoom Level of Hyper-V Virtual Machine

Change Display Scaling Zoom Level of Hyper-V Virtual Machine
How to Change Display Scaling Zoom Level of Hyper-V Virtual Machine in Windows 10Published by Shawn BrinkCategory: Virtualization
19 Apr 2020
Tutorial Categories


Related Discussions


