

How to Find Private and Public IP Address of Your Windows 10 PC
An IP address (Internet Protocol address) is used to identify computers on the Internet and network. IP addresses can be either public or private.
A public IP address is a unique address provided by your ISP (Internet Service Provider) to identify your local network on the Internet. If your computer is connected directly to the Internet with no router sitting in between, your computers IP address is a public IP address.
A private IP address is assigned by your router to a PC or device on your local network. When a computer is assigned a private IP address, the other devices on the local network sees this computer via its private IP address. A private IP address can not be directly reached from the internet.
This tutorial will show you different ways on how to find the private and public IPv4 and IPv6 addresses of your Windows 10 PC.
Contents
- Option One: To Find Your IP Address in Settings
- Option Two: To Find Your IP Address in Network Connections
- Option Three: To Find Your IP Address in Task Manager
- Option Four: To Find Your IP Address in Command Prompt
- Option Five: To Find Your IP Address in PowerShell
- Option Six: To Find Your Public IP Address using Google
1 Open Settings, and click/tap on the Network & Internet icon.
2 Click/tap on Ethernet or Wi-Fi on the left side for the network connection you have, and click/tap on the your connected network on the right side. (see screenshots below)
3 You will now see the IPv4 and IPv6 addresses. (see screenshots below)
The IP addresses of an Ethernet connection will not be available if you have created a Hyper-V virtual switch with this Ethernet connection.
1 Open the Control Panel (icons view), and click/tap on the Network and Sharing Center icon.
2 Click/tap on the Change adapter settings link on the left side. (see screenshot below)
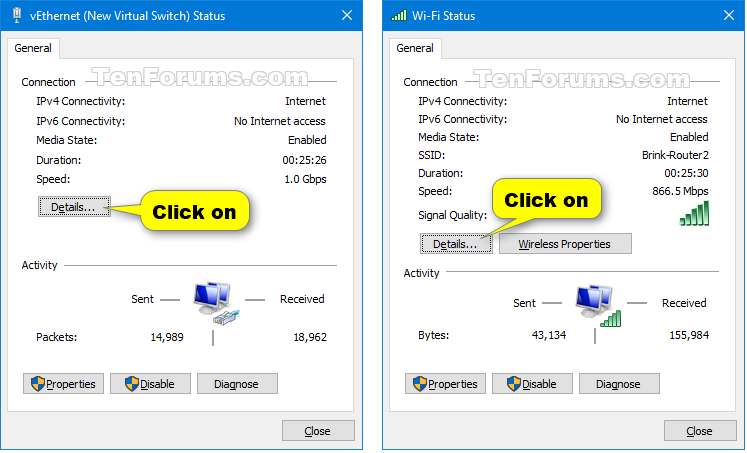
3 Click/tap on your current network connection. (see screenshot below)
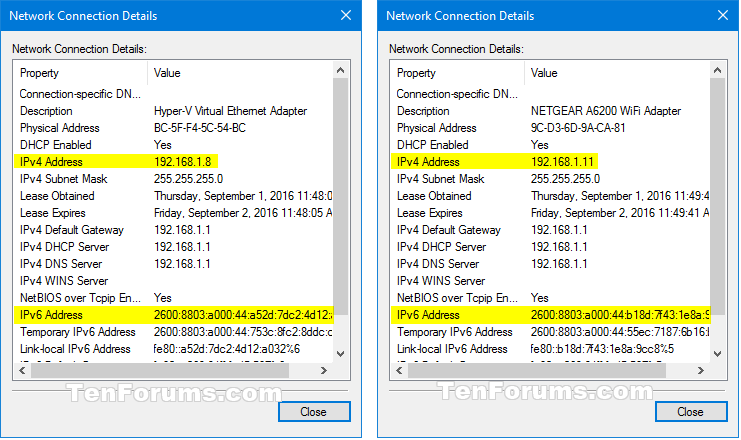
4 Click/tap on the Details button. (see screenshots below)
5 You will now see the IPv4 and IPv6 addresses. (see screenshots below)
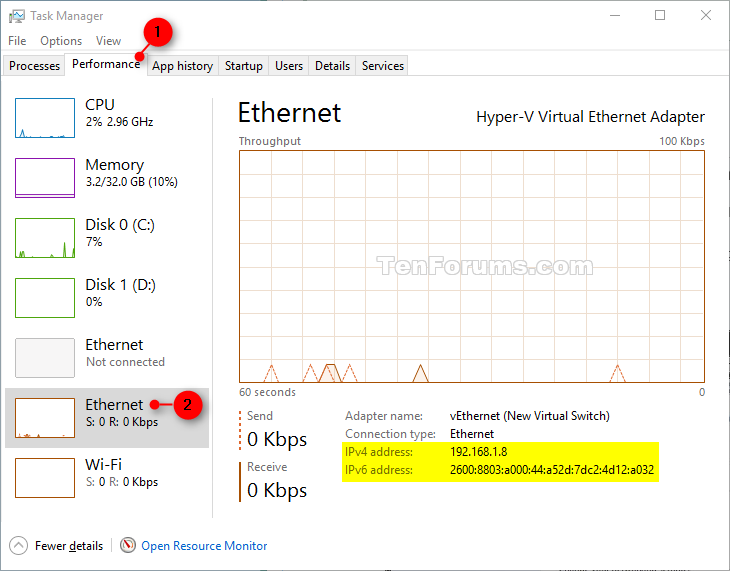
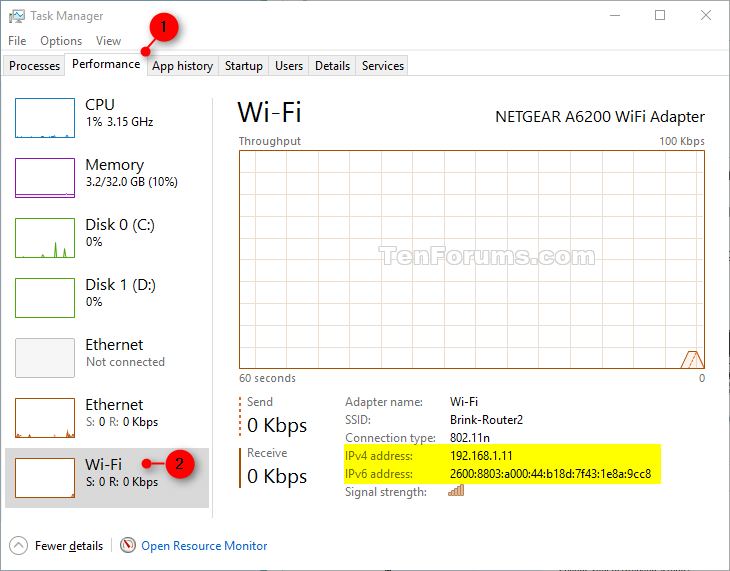
1 Open Task Manager.
2 Click/tap on the Performance tab, and click/tap on Ethernet or Wi-Fi on the left side for the network connection you have. (see screenshots below)
3 You will now see the IPv4 and IPv6 addresses. (see screenshots below)
1 Open a command prompt.
2 Copy and paste theipconfig /allcommand into the command prompt, and press Enter. (see screenshot below)
3 You will now see the IPv4 and IPv6 addresses of all network adapters on your PC. (see screenshots below)
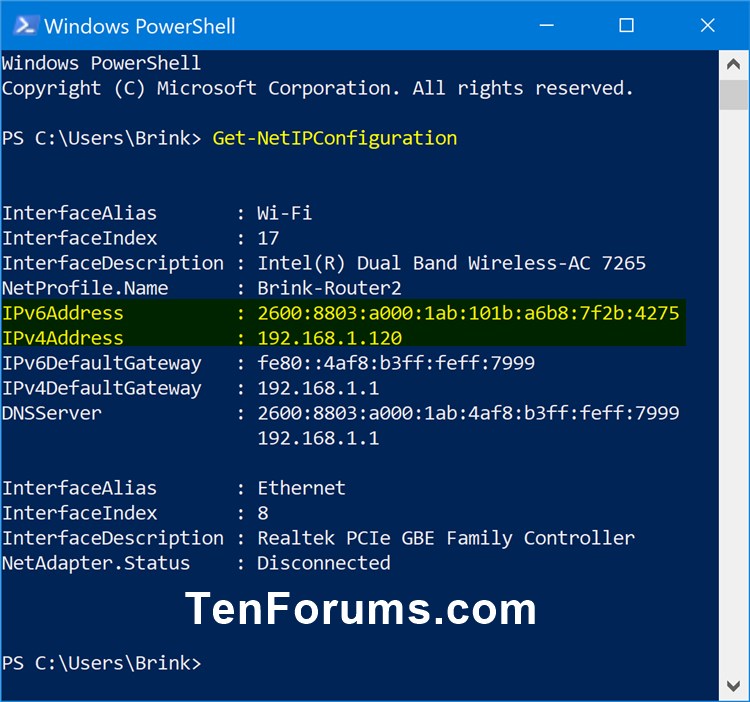
1 Open PowerShell.
2 Copy and paste either command below into PowerShell, and press Enter. (see screenshot below)
3 You will now see the IPv4 and IPv6 addresses of all network adapters on your PC. (see screenshots below)

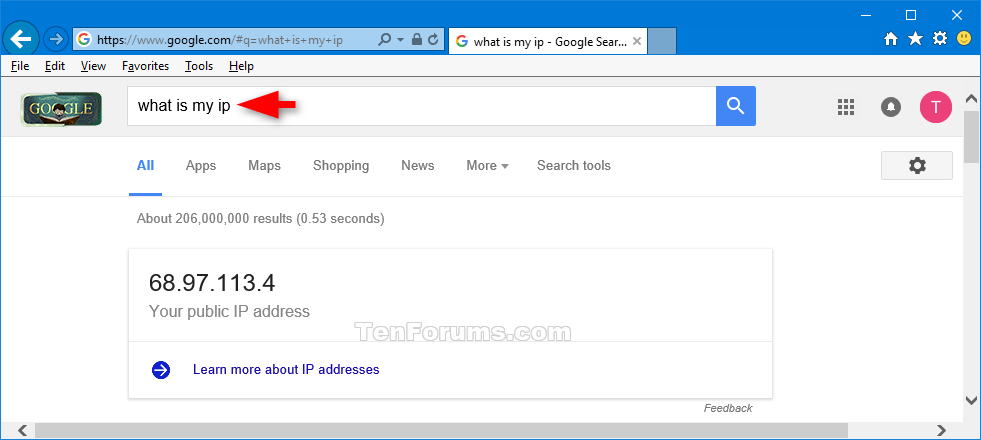
1 Go to www.google.com in your web browser.
2 Type what is my IP in the Google search bar, and press Enter.
3 You will now see your public IP address. (see screenshot below)
That's it,
Shawn
Related Tutorials
- How to Enable or Disable IPv6 in Windows 7, Windows 8, and Windows 10
- How to Find MAC Address on Your Windows 10 PC
- How to Change IPv4 and IPv6 DNS Server Address in Windows
Find IP Address of Windows 10 PC

Find IP Address of Windows 10 PC
How to Find Private and Public IP Address of Your Windows 10 PCPublished by Shawn BrinkCategory: Network & Sharing
18 Aug 2020


 Quote
Quote
Tutorial Categories

Related Discussions
