

How to Use Microsoft Surface Diagnostic Toolkit in Windows 10
The Microsoft Surface Diagnostic Toolkit is a small, portable diagnostic tool that runs through a suite of tests to diagnose the hardware of Surface devices. The Surface Diagnostic Toolkit executable file is less than 3 MB, which allows it to be distributed through email. It does not require installation, so it can be run directly from a USB stick or over the network. The Microsoft Surface Diagnostic Toolkit walks you through several tests of individual components including the touchscreen, cameras, and sensors.
The Microsoft Surface Diagnostic Toolkit runs several individual tests on a Surface device. Not all tests are applicable to every device. For example, the Home button test is not applicable to Surface Pro 4 where there is no Home button. You can specify which tests to run, or you can choose to run all tests. For tests that require external devices (such as testing output to an external display) but you do not have the required external device at the time of the test, you are given the option to skip the test. If a test fails, you are prompted to continue or stop testing at that time.
The Microsoft Surface Diagnostic Toolkit tests verify only the hardware of a Surface device and do not test or resolve issues with the operating system or software.
This tutorial will show you how to download and use the Surface Diagnostic Toolkit on Surface devices running Windows 10 Home, Windows 10 Pro, Windows 10 ARM, or Windows 10 in S mode.
Here's How:
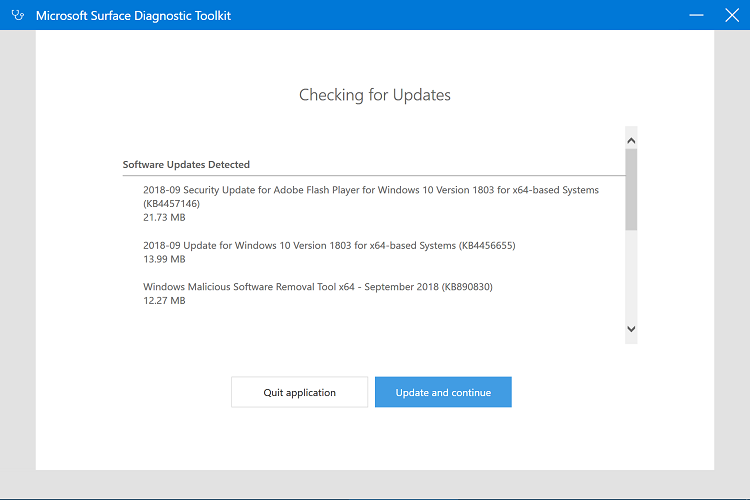
1 If you haven't already, you will need to click/tap on the Download button below to download the Surface Diagnostic Toolkit from Microsoft below.
Surface Pro X (ARM) with Windows 10 Home or Pro
Download
OR
Windows 10 Home or Pro
Download
OR
Windows 10 in S mode
Download
2 Run the SurfaceDiagnosticToolkit_SA.exe file on your Surface device.
3 If prompted by UAC, click/tap on OK.
4 Click/tap on Proceed. (see screenshot below)
5 Do step 6 (Run all tests) or step 7 (Select tests) below for what tests you want to run. (see screenshot below)
A) Click/tap on Select tests. (see screenshot below step 5)
B) Click/tap on tests to check (run) or uncheck (not run) for what you want, click/tap on the Run tests button when ready, and go to step 8 below. (see screenshots below)
ATTACH=CONFIG]76718[/ATTACH]
8 The testing will now begin. (see screenshots below)
Running the Microsoft Surface Diagnostic Toolkit is a hands-on activity. The test sequence includes several tests that require you to perform actions or observe the outcome of the test, and then click the applicable Pass or Fail button. Some tests require connectivity to external devices, like an external display. Other tests use the built in Windows troubleshooters.


9 At the end of testing, a visual report of the test results is displayed and you are given the option to save a log file or copy the results to the clipboard. (see screenshot below)
That's it,
Shawn
Use Microsoft Surface Diagnostic Toolkit in Windows 10
-
New #1
Hi Brink , this Tool appears to no longer be available from the link on the download button , though maybe it has been renamed? are you able to attach it if you have it still?
Download Surface Tools for IT from Official Microsoft Download Center
-
-
New #3
Thanks Brink , I figured the Utility was gone since it wasn't listed , so I didn't dig any deeper at M$, it is a 28mb download now, still small but not able to be emailed to accounts like Hotmail which I think has ( or did?) a 10mb limit.
-
New #4
Thanks Brink , I ran the App , it updated Windows 1st, then does a "Repair" to the Windows Store and Windows itself and then rebooted and started again automatically on reboot.
1st time thru it couldn't find/test the battery, so had me do a "Reset" , which is the PWR Button and Vol-UP for 30 sec minimum , and after I restarted and re-ran the App, all was well.
*** Note to read the screen carefully as it asks you to plug the AC adaptor in and out etc as it goes along.
Also in the Touch Screen - muitl-test , it wants you to place 5 - 8 - 10 etc fingers on the screen not just one.... it should see all 10.
I took screenshots as it went , (Home button , then VOL-Down) they are in the attached zip if you'd like to use them.
KB.
Surface Repair_Screenshots.zip
-
-
New #6

Use Microsoft Surface Diagnostic Toolkit in Windows 10
How to Use Microsoft Surface Diagnostic Toolkit in Windows 10Published by Shawn BrinkCategory: Performance & Maintenance
21 May 2020


 Quote
Quote
Tutorial Categories

Related Discussions
